
How to Make the Best Chicken Wing Recipes Fried at Home
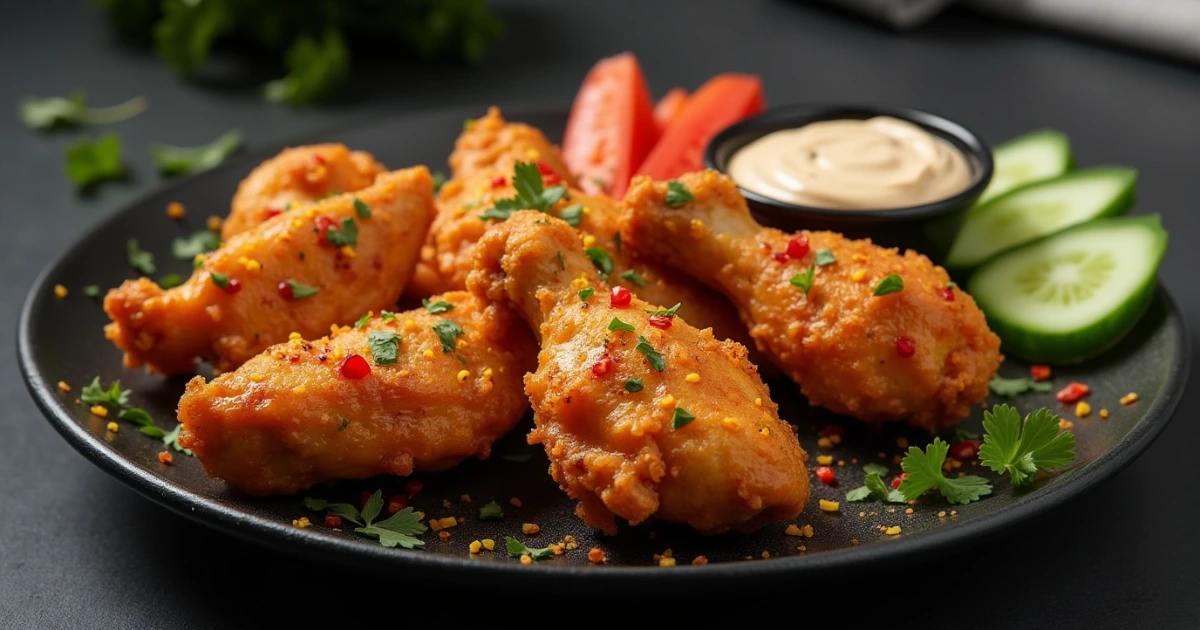
Fried chicken wings are a timeless favorite—crispy on the outside, juicy on the inside, and packed with flavor. Whether you’re making them for a family dinner, game day, or a weekend treat, the right recipe can take your wings to the next level. From classic crispy wings to spicy and savory variations, there are endless ways to enjoy this delicious dish.
In this guide, you’ll learn how to make the best chicken wing recipes fried to perfection. We’ll cover the best ingredients, preparation methods, cooking techniques, and tasty variations to try at home. Get ready to enjoy homemade fried chicken wings that are crunchy, flavorful, and absolutely irresistible!
The Best Ingredients for Fried Chicken Wings
What Type of Chicken Wings to Use (Fresh vs. Frozen)?
Choosing the right chicken wings is the first step to making perfectly fried wings. The two main options are fresh and frozen wings, each with its own advantages and considerations.
Fresh Chicken Wings
Fresh chicken wings are ideal for frying because they:
- Have a better texture, resulting in crispier skin.
- Absorb seasonings and marinades more effectively.
- Require less prep time since they don’t need thawing.
When buying fresh wings, look for plump, moist wings with no discoloration. If possible, choose organic or free-range wings for a more natural taste.
Frozen Chicken Wings
Frozen wings are a great option for convenience, but they require extra preparation:
- They must be fully thawed before frying to prevent uneven cooking and oil splatter.
- Excess moisture from freezing can make it harder to achieve crispy skin.
- They are often pre-brined, which can affect seasoning and salt levels.
To properly thaw frozen wings, place them in the refrigerator overnight or use a cold water bath. Avoid microwaving them, as this can create uneven thawing and affect the texture.
Which One is Better?
For the best fried chicken wings, fresh wings are the preferred choice. However, if you only have frozen wings, make sure to thaw and pat them completely dry before frying to achieve maximum crispiness.
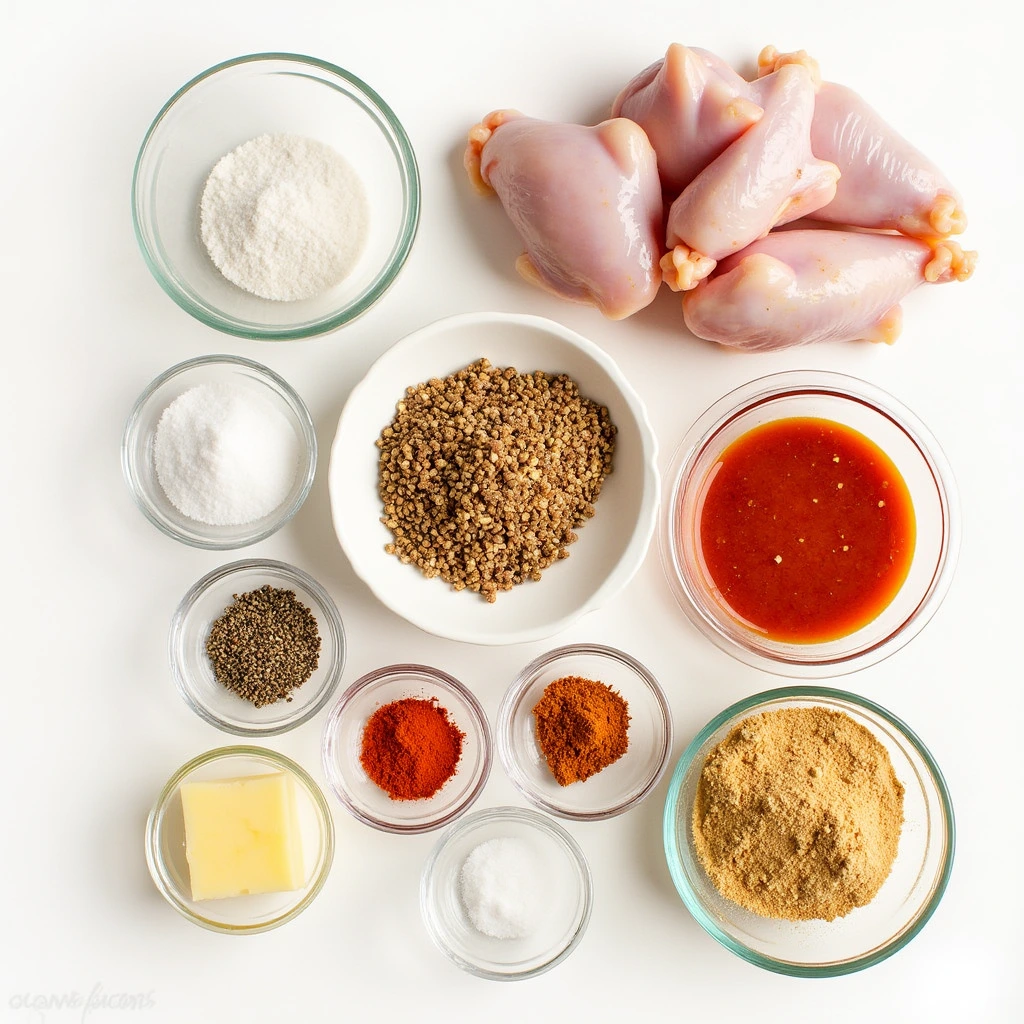
Essential Seasonings for Flavor (Salt, Pepper, Paprika, Garlic Powder, etc.)
The secret to making delicious fried chicken wings lies in the seasoning. The right combination of spices enhances the natural flavor of the chicken while adding depth and balance. Here’s a breakdown of essential seasonings and how they contribute to the perfect wing.
1. Salt: The Flavor Enhancer
Salt is the foundation of any great seasoning blend. It:
- Draws out moisture, helping to create a crispy crust.
- Enhances the natural savory taste of the chicken.
- Balances out the other spices for a well-rounded flavor.
Use kosher or sea salt for even distribution, as finer table salt can sometimes make the seasoning too intense.
2. Black Pepper: A Classic Kick
Black pepper adds a subtle heat and depth of flavor to fried wings. It:
- Provides a mild spiciness without overpowering the other ingredients.
- Works well with both classic and spicy wing recipes.
- Can be used in coarse or fine ground form, depending on preference.
For an extra punch, try white pepper, which has a sharper, slightly earthy taste.
3. Paprika: Mild Sweetness and Color
Paprika not only enhances the flavor of chicken wings but also gives them a beautiful golden-red hue. There are different types of paprika:
- Sweet paprika – Adds mild, earthy sweetness without heat.
- Smoked paprika – Brings a rich, smoky depth that enhances fried wings.
- Hot paprika – Introduces a subtle kick for those who enjoy a little heat.
For a balanced wing seasoning, a mix of sweet and smoked paprika works best.
4. Garlic Powder: Savory Depth
Garlic powder is a must-have in any wing seasoning blend because it:
- Adds a rich umami flavor that complements the chicken.
- Enhances the overall depth of the seasoning mix.
- Distributes evenly, unlike fresh garlic, which can burn during frying.
For extra garlicky goodness, combine garlic powder with a touch of onion powder.
5. Additional Seasonings for Extra Flavor
To take your fried chicken wings to the next level, consider adding:
- Onion Powder: Complements garlic powder and adds a subtle sweetness.
- Cayenne Pepper: Brings heat and works well in spicy variations.
- Dried Oregano or Thyme: Adds a hint of herbal freshness.
- Mustard Powder: Provides a tangy, slightly spicy undertone.
How to Apply Seasonings for Maximum Flavor
- Dry Seasoning: If you prefer a dry rub, coat the wings evenly before frying.
- Marination: Letting the wings sit with seasonings for 30 minutes (or overnight) enhances flavor.
- Layering: Season before and after frying to lock in taste.
By using the right mix of spices, you’ll create fried chicken wings that are flavorful, crispy, and absolutely irresistible!
The Role of Flour, Cornstarch, and Baking Powder in Making Crispy Wings
When it comes to achieving that perfectly crispy, golden crust on fried chicken wings, flour, cornstarch, and baking powder are the secret ingredients. Each of these components plays a crucial role in creating a light, crunchy exterior while keeping the inside juicy and tender. Let’s break down how each ingredient contributes to that crispiness and overall texture.
1. Flour: The Base for Coating
Flour is the primary ingredient for creating the outer coating of fried chicken wings. It:
- Forms the foundation of the crust, helping the seasoning and spices stick to the wings.
- Creates a crispy texture when fried, especially when mixed with the right amount of seasoning.
- Can be all-purpose flour, but some recipes use rice flour or self-rising flour for an even lighter crust.
Tip: To prevent the flour from becoming too heavy or doughy, use just enough to coat the wings evenly without clumping. A light dusting is all you need for that perfect crunch.
2. Cornstarch: The Crispy Crunch
Cornstarch is often added to the flour mixture because it helps to:
- Absorb moisture from the wings and the batter, which leads to an ultra-crispy finish.
- Enhance the texture, giving the wings a crispier exterior while preventing the skin from becoming soggy.
- Create bubbles in the batter, resulting in a light and airy crunch.
Cornstarch is a key ingredient for achieving that signature crispy exterior you see on restaurant-style wings. In fact, some chefs even recommend using only cornstarch for a crispier crust if you’re looking for an extra light and crunchy finish.
3. Baking Powder: The Secret to Lightness
Baking powder is another essential ingredient for creating crispy chicken wings. It works by:
- Introducing air bubbles into the batter, which makes the coating lighter and crispier when fried.
- Increasing the puffiness of the coating without adding any extra flavor or heaviness.
- Ensuring even crispiness across the surface, rather than having a soggy or uneven crust.
Baking powder is often used in combination with cornstarch and flour to give the wings that irresistible crunchy texture without deep frying them for too long.
How to Use These Ingredients Together
For the perfect crispy wings, combine the following ingredients in a simple yet effective ratio:
- 1 cup of all-purpose flour
- 1 tablespoon of cornstarch
- 1/2 teaspoon of baking powder
Mix them together with your seasonings, and coat the wings evenly. The result? An extra-crunchy coating that stays crispy for hours, even after cooling down.
Tip: For an even lighter, crispier result, you can double-coat your wings by dipping them in the flour mixture, then in a beaten egg wash, and back into the flour mixture. This gives them an extra-thick coating that holds up well during frying.
By using flour, cornstarch, and baking powder in the right proportions, you’re setting yourself up for success in the crispy chicken wing department. These ingredients work together to create a perfectly crunchy exterior that complements the tender, juicy meat inside, making your fried chicken wings a guaranteed hit every time.
How to Prepare Chicken Wings for Frying
Step-by-Step Guide on Cleaning and Patting the Wings Dry
Cleaning and drying the chicken wings properly is a crucial step in achieving the perfect fried wing. Proper preparation ensures that the wings cook evenly, the coating sticks better, and you get that crispy, golden exterior everyone loves. Here’s a detailed guide on how to clean and pat your wings dry, step by step.
1. Remove the Tips (Optional)
Chicken wing tips are often discarded for aesthetic reasons and because they don’t contribute much to the overall flavor or texture. You can:
- Use kitchen shears or a sharp knife to cut off the tips of the wings at the joint.
- Save the tips for making homemade stock or broth if you prefer not to waste them.
Removing the tips is optional, but if you’re after uniform-sized wings for even cooking, it’s worth considering.
2. Rinse the Wings (if desired)
Rinsing your wings under cold water can help remove any residual blood, bone fragments, or small feathers.
- Place the wings in a colander or large bowl.
- Run cold water over the wings, gently rubbing them with your hands to clean the surface.
- Inspect the wings carefully to make sure they’re free of any small feathers or debris.
While some people rinse their chicken, others prefer to skip this step for hygiene reasons. Always make sure to wash your hands and any utensils that come into contact with raw chicken to avoid cross-contamination.
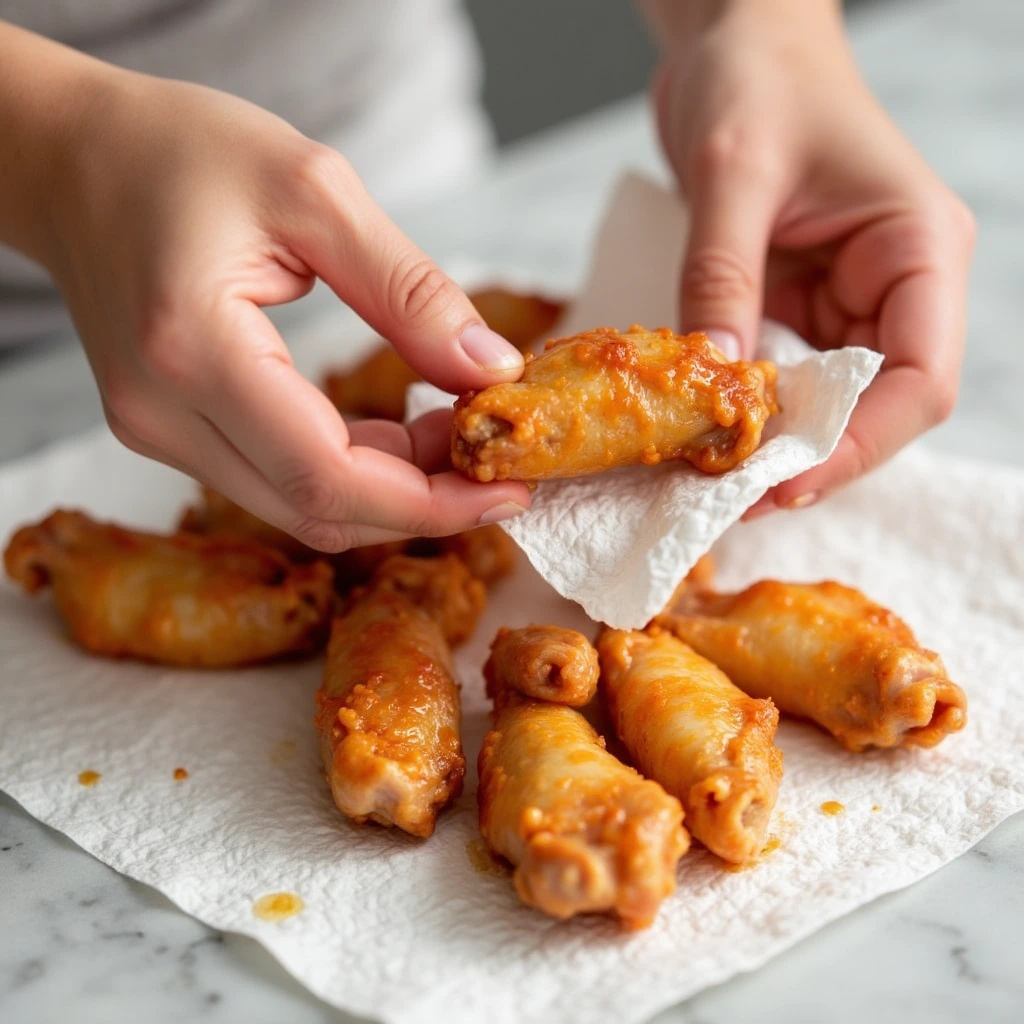
3. Dry the Wings Thoroughly
After cleaning, patting the wings dry is one of the most important steps for achieving crispy fried chicken. Any excess moisture can prevent the coating from sticking and result in soggy wings.
- Place the wings on a clean paper towel or a large, absorbent cloth.
- Use additional paper towels to pat the wings dry on all sides, pressing gently to absorb as much moisture as possible.
- Make sure to dry both sides of the wings and even between the folds of the skin for maximum crispiness.
Tip: For even better results, you can let the wings air dry on a wire rack for 30 minutes to an hour. This allows the surface to dry out even more, which leads to a crispier finish when fried. The skin will tighten up as the moisture evaporates, giving you that desired crispy texture.
4. Season the Wings Immediately After Drying
Once the wings are thoroughly dried, they are ready to be seasoned. Apply your dry rub or seasoning mix right away while the skin is still dry. This allows the seasonings to stick better and penetrate the skin, ensuring more flavor.
Tip: If you’re planning to marinate the wings, make sure they are as dry as possible before applying any marinade. The drier the wings are, the better the marinade will adhere, and the more flavorful the wings will be. However, be careful not to over-marinate, as this can make the wings soggy.
5. Optional: Resting the Wings for Extra Crispy Skin
After patting the wings dry, you can let them rest for another 10 to 15 minutes before frying. This gives the skin more time to tighten, ensuring an even crispier texture once cooked.
Some chefs even recommend placing the wings in the refrigerator, uncovered, for a few hours or overnight. This allows the skin to dry out even more, which can contribute to extra crispiness when frying.
Why Drying is So Important
The key to crispy fried wings lies in removing moisture from the surface of the chicken. When frying, excess moisture will cause the oil temperature to drop, leading to wings that are greasy and soggy. The drying process allows the oil to quickly seal the coating around the wings, resulting in a crispy golden exterior and tender, juicy meat inside.
Tips on Marinating for Extra Flavor
Marinating chicken wings is an excellent way to infuse them with extra flavor and tenderness. A good marinade not only enhances the natural taste of the chicken but also adds depth and complexity to your fried wings. Here’s a comprehensive guide on how to marinate wings for extra flavor and some tips to make the most out of your marinade.
1. Choose the Right Marinade Base
The base of your marinade plays a significant role in both flavor and texture. It usually consists of acidic components that help tenderize the meat and carry flavors deeper into the wings. Common marinade bases include:
- Citrus Juice (Lemon, Lime, Orange): The acidity from citrus helps to break down muscle fibers, making the wings more tender and juicy. It also adds a zesty kick to your wings.
- Vinegar (Apple Cider Vinegar, Balsamic): Vinegar works similarly by tenderizing the meat while imparting a subtle tangy flavor.
- Yogurt or Buttermilk: Both are excellent for creating a tender, juicy texture. The lactic acid helps break down proteins in the chicken, making it more flavorful. They also help the seasoning adhere better to the wings.
- Soy Sauce: Adds a salty, umami flavor and helps to lock in moisture, which makes the wings juicy.
2. Add Aromatics and Flavorings
Once you’ve chosen a marinade base, it’s time to layer in aromatics and flavorings that will give your wings depth and complexity. Common ingredients for marinades include:
- Garlic and Onion: Both of these aromatic ingredients are essential for giving the wings a savory, umami-rich flavor. Fresh minced garlic or garlic powder works great.
- Fresh Herbs (Rosemary, Thyme, Oregano): Fresh herbs can elevate the flavor profile with earthy, aromatic notes. Add them to your marinade to give the wings an herbaceous twist.
- Ginger: Adds a spicy, slightly sweet note that works well with Asian-inspired marinades (think soy sauce or honey).
- Chili Flakes or Hot Sauce: If you like spicy wings, a bit of heat from chili flakes, cayenne pepper, or your favorite hot sauce will infuse the wings with fiery flavor.
3. Sweeteners for Balance
While savory ingredients form the foundation of your marinade, sweeteners balance out the acidity and spice, giving the wings a deliciously complex flavor. Common sweeteners include:
- Honey: Adds a natural sweetness and helps the wings caramelize during frying, contributing to that perfect crispy, golden texture.
- Brown Sugar: Offers a richer, molasses-like sweetness that pairs well with BBQ-style wings.
- Maple Syrup or Agave: Both have a subtle sweetness and work well in marinades for a more refined flavor.
4. Seasonings and Spices
Seasoning the marinade is key to infusing the wings with flavor from the inside out. Common spices and seasonings to consider:
- Salt and Black Pepper: These are the foundational seasonings in any marinade. Salt helps draw moisture into the wings, enhancing their flavor.
- Paprika: Adds a mild smoky or sweet flavor and helps give your wings a deeper color when cooked.
- Cumin, Coriander, and Turmeric: For a more exotic twist, these spices can add warmth and earthiness to your wings.
- Mustard Powder or Dijon Mustard: Adds tang and depth to marinades, and it also helps emulsify the marinade, giving it a thicker texture.
5. Marinate for the Right Amount of Time
The marinating time is crucial for flavor penetration and tenderness. Here’s a general guide:
- Short marination (30 minutes to 2 hours): This is sufficient for flavoring the wings without making them too soggy or changing their texture too much.
- Long marination (4 hours to overnight): For maximum flavor, marinate the wings in the fridge for 4 to 12 hours or even overnight. The longer marinating time allows the seasonings to penetrate deeper into the chicken, making them more flavorful and tender.
Tip: If you marinate for a longer period, be mindful of the acidic ingredients (like lemon juice or vinegar). Over-marinating can result in overly soft or mushy wings.
6. Don’t Overload on the Marinade
While marinating is important, you don’t want the wings to drown in marinade. Too much marinade can make the wings soggy, preventing them from crisping up during frying.
- Use just enough marinade to coat the wings evenly.
- If you’re using a bag to marinate, make sure to squeeze out excess air for an even distribution of flavors.
7. Optional: Marinade and Dry Rub Combo
For even more flavor and texture, you can combine marinating with a dry rub. After marinating, pat the wings dry to remove excess moisture, and then coat them with your favorite dry seasoning mix. The dry rub will stick better, creating an extra layer of flavor and crispiness when fried.
Marinating is one of the easiest ways to take your fried chicken wings to the next level in terms of flavor and tenderness. By choosing the right marinade base, adding aromatics and spices, balancing sweetness and acidity, and marinating for the right amount of time, you’ll create wings that are not only flavorful but also juicy and tender inside with a perfect crispy exterior.
How to Coat the Wings Properly for the Crispiest Texture
Coating chicken wings is a key step in achieving that perfect, crispy texture everyone craves. The right coating technique ensures that the wings crisp up beautifully during frying and develop a golden, crunchy exterior that contrasts perfectly with the juicy meat inside. Here’s how you can properly coat your wings for the crispiest texture.
1. Dry the Wings Thoroughly
Before applying any coating, it’s essential to ensure that the wings are completely dry. Excess moisture on the surface of the chicken will cause the coating to become soggy and prevent it from crisping up properly.
- Pat the wings dry using paper towels, making sure to remove any moisture from both the skin and the folds of the wing.
- For extra crispy results, you can let the wings air-dry on a wire rack in the refrigerator for about 30 minutes to 1 hour. This will help the skin tighten and dry out further.
Why it’s Important: Dry skin allows the coating to adhere better and crisp up when fried.
2. Use a Combination of Dry Ingredients for the Coating
The secret to crispy wings lies in the perfect dry coating mix. While flour is the main component, combining it with other ingredients helps enhance the crunch and flavor. Here’s a basic guide:
- Flour (All-purpose or Rice Flour): All-purpose flour is the go-to choice for most fried wings, creating a solid base. Rice flour, however, is known for giving extra crispiness due to its fine texture.
- Cornstarch: Adding cornstarch to your flour mix makes the coating lighter and crispier. It helps create a thin, crispy crust that doesn’t become heavy or doughy.
- Baking Powder: A key ingredient in many crispy coatings, baking powder helps create bubbles in the batter, resulting in a lighter, crispier texture. It helps the wings achieve that sought-after crunch.
Ratio for the Coating:
- A typical coating might consist of 1 cup of flour, 1/4 cup of cornstarch, and 1 teaspoon of baking powder. You can also add a pinch of salt and pepper for flavor.
3. Season the Coating Mix
The coating isn’t just for texture—it also adds an essential layer of flavor to the wings. Be sure to season the dry mixture well before coating the wings:
- Salt and Pepper: These are the basic seasonings, but they are crucial for enhancing the overall flavor.
- Paprika: Adds a mild smoky flavor and gives the wings a rich color.
- Garlic Powder, Onion Powder, or Onion Salt: These ingredients help give the wings that savory umami taste.
- Cayenne Pepper or Chili Powder: For those who like it spicy, a little heat can balance the richness of the fried wings.
- Herbs: Dried herbs like thyme, oregano, or parsley can also add a unique flavor to the coating.
Tip: Mix the seasonings thoroughly with the flour, cornstarch, and baking powder to ensure an even distribution of flavor.
4. Dredge the Wings in the Coating Mixture
Now that your wings are dry and your coating mixture is ready, it’s time to coat the wings:
- Toss the wings in the dry mixture: You can use a bowl or a resealable plastic bag to coat the wings. Add the wings in small batches and toss them around until they’re fully coated in the dry mixture.
- Shake off the excess: After coating each wing, shake off any excess flour mixture. Too much coating can result in a thick, heavy layer that doesn’t crisp up well.
Tip: You can also use the wet-dry method: dip the wings in a light egg wash (beaten egg with a little water or milk) before tossing them in the dry coating mixture. This extra layer helps the coating stick and creates a thicker, crunchier crust.
5. Double Coat for Extra Crispiness
If you’re looking for an extra layer of crisp, you can double coat the wings. This means that after the initial coat, you dip the wings back in the egg wash (if using) and then coat them a second time in the flour mixture.
- This method is ideal for those who want an ultra-crunchy, thicker crust.
- The double coating method is commonly used for fried chicken recipes, and it works wonders for crispy wings too!
Tip: Let the coated wings sit on a wire rack for about 10-15 minutes before frying. This resting period allows the coating to “set,” which helps it stick better during frying.
6. Fry at the Right Temperature
The temperature of the oil plays a significant role in the crispiness of the coating. Make sure your oil is at the right temperature—350°F to 375°F (175°C to 190°C)—before frying the wings.
- Too hot and the wings will burn on the outside while remaining raw inside.
- Too cold and the wings will become greasy and soggy instead of crispy.
Tip: Use a deep-fry thermometer to monitor the oil temperature throughout the frying process. Frying in small batches helps maintain the oil temperature.
7. Finish with a Light Dusting (Optional)
For an extra crispy and flavorful finish, you can lightly dust the wings with seasoned flour or a dry seasoning mix right after frying. This gives them an additional layer of crunch and flavor without being too heavy.
Coating chicken wings properly is one of the most important steps in achieving that golden, crispy exterior. By drying the wings, using the right combination of dry ingredients like flour, cornstarch, and baking powder, seasoning the coating mix, and double-coating for extra crunch, you’ll ensure your wings are crispy on the outside and juicy on the inside. With these tips, your fried wings will have the perfect texture every time!
The Best Cooking Methods for Fried Chicken Wings
Deep Frying: Ideal Temperature and Oil Choices
Deep frying is one of the most popular methods for making crispy chicken wings, but getting the right temperature and choosing the best oil are key factors in achieving that perfect golden crunch. Let’s break down what you need to know for deep frying chicken wings to perfection.
1. Ideal Temperature for Deep Frying Chicken Wings
The ideal frying temperature for chicken wings is crucial in ensuring they cook evenly and achieve a crispy texture.
- 350°F to 375°F (175°C to 190°C) is the optimal temperature range for frying wings. This range allows the chicken to cook quickly, which results in a crispy crust while keeping the inside tender and juicy.
- If the oil is too hot (above 375°F), the outside of the wings will cook too fast and may burn, while the inside remains raw or undercooked.
- On the other hand, if the oil is too cold (below 350°F), the wings will absorb more oil and become greasy instead of crisping up.
Why it Matters: Maintaining the right oil temperature helps to form a crisp, golden crust while preventing the wings from becoming greasy or soggy.
2. How to Monitor the Oil Temperature
To ensure the oil stays at the correct temperature while frying:
- Use a Deep-Fry Thermometer: This tool is essential for keeping the oil within the target range. It should be placed in the oil while heating it, and you can monitor the temperature throughout the frying process.
- Fry in Batches: Don’t overcrowd the fryer. Adding too many wings at once will lower the oil temperature, leading to less crispy results. Frying in smaller batches allows the oil to stay at the optimal temperature and cook the wings evenly.
- Adjust as Needed: If the oil temperature drops below 350°F while frying, raise the heat slightly to get it back into the optimal range. Conversely, if the oil gets too hot, reduce the heat and give the oil time to cool before continuing.
3. Best Oils for Deep Frying Chicken Wings
Choosing the right oil is important for both the taste and texture of the wings. Here are some of the best options for deep frying:
- Peanut Oil: This is one of the best oils for deep frying because it has a high smoke point (around 450°F or 232°C) and neutral flavor. It’s perfect for frying chicken wings, as it fries evenly and crisps up the coating beautifully.
- Canola Oil: Another great option, canola oil has a slightly lower smoke point (around 400°F or 204°C), but it still works well for deep frying. It has a neutral taste and is affordable, making it a popular choice for home frying.
- Vegetable Oil: Similar to canola oil, vegetable oil has a high smoke point (around 400°F or 204°C) and a neutral flavor. It’s commonly available and suitable for deep frying, providing a crispy texture without adding any strong flavors to the wings.
- Sunflower Oil: This oil also has a high smoke point (around 440°F or 227°C) and a light flavor, making it a good choice for frying wings. It has a mild taste, so it won’t overpower the seasoning of the wings.
- Safflower Oil: Known for its high smoke point (around 450°F or 232°C), safflower oil is another excellent choice for deep frying chicken wings. It also has a neutral taste, making it ideal for preserving the flavors of the wings and seasonings.
Tip: If you want to add a subtle flavor to your wings, you can experiment with oils that have a bit of a natural taste, like avocado oil or coconut oil. Just make sure they have a high enough smoke point for deep frying.
4. Reusing Frying Oil
Deep frying can use a lot of oil, but with the right technique, you can reuse your frying oil a few times before it needs to be replaced. Here are some tips:
- Strain the Oil: After frying, allow the oil to cool and strain it through a fine-mesh sieve or cheesecloth to remove any leftover bits of batter or chicken residue.
- Store Properly: Store the strained oil in an airtight container in a cool, dark place for future use. Depending on the type of oil, it can be reused up to three times for frying.
- Know When to Replace the Oil: If the oil starts to smoke at lower temperatures, has an off smell, or begins to change color significantly, it’s time to replace it.
5. Frying Time and Oil Depth
The depth of the oil and the frying time also play important roles in achieving crispy wings.
- Oil Depth: To properly submerge the wings, the oil should be at least 2 to 3 inches deep in your frying vessel. This ensures even frying and prevents the wings from sticking to the bottom.
- Frying Time: Typically, chicken wings need about 8 to 12 minutes to fry, depending on the size of the wings and the temperature of the oil. Smaller wings will cook faster, while larger wings may take a bit longer.
- Check for Doneness: Use a meat thermometer to check the internal temperature of the wings. The wings should reach 165°F (74°C) to be fully cooked. You can also check for crispiness by lifting the wings out of the oil; if they are golden brown and crispy, they are done.
The key to frying the crispiest, juiciest chicken wings is controlling the oil temperature and choosing the right oil for the job. By maintaining a temperature range of 350°F to 375°F and using high-quality oils like peanut, canola, or vegetable oil, you’ll achieve perfectly crispy wings every time. Remember to fry in batches, monitor the temperature with a thermometer, and store your oil properly for reuse. With these tips, your fried chicken wings will have that ideal crunch that everyone loves!
Pan Frying: How to Get Crispy Wings with Less Oil
Pan frying is a great alternative to deep frying when you want crispy chicken wings without using a large amount of oil. This method can still produce deliciously golden, crunchy wings while keeping the oil usage minimal. Here’s everything you need to know to achieve crispy wings using a pan frying method.
1. Choosing the Right Pan for Pan Frying
The first step to getting crispy wings with minimal oil is choosing the right pan.
- Cast Iron Skillet: A heavy-duty cast iron skillet is the best choice for pan frying. Its excellent heat retention and even distribution of heat help cook the wings thoroughly and evenly, ensuring a crispy exterior.
- Non-stick Skillet: If you don’t have a cast iron skillet, a non-stick skillet is a good option. It requires less oil and reduces the chances of sticking, which makes cleanup easier. However, cast iron is preferred for a crispier texture.
Why it Matters: A heavy skillet, like cast iron, allows the heat to stay consistent throughout the cooking process, which is crucial for getting a golden-brown crust.
2. Preparing the Chicken Wings for Pan Frying
Just like with deep frying, preparation is key to achieving crispy wings when pan frying.
- Pat the Wings Dry: Moisture is the enemy of crispiness. Before pan frying, thoroughly pat the wings dry with paper towels. Any excess moisture on the surface can create steam, preventing the skin from crisping up.
- Use a Light Coating: You don’t need to deep fry the wings to get a crispy crust, but a light coating of flour or cornstarch will help achieve a crispier texture. Simply toss the wings in a small amount of flour, cornstarch, or a mixture of both, and season with your desired spices.
- Seasoning: Before frying, season the wings well with salt, pepper, and any other spices you prefer. Paprika, garlic powder, and cayenne pepper can give your wings a flavorful kick.
Why it Matters: Drying the wings and adding a light coating helps to create a crisp surface. Overcoating them will make the wings heavy, so stick to a light dusting.
3. The Right Amount of Oil
When pan frying, you want to use enough oil to cover the bottom of the pan, but not so much that the wings are submerged as they would be in deep frying.
- Use About 1/4 Cup to 1/2 Cup of Oil: Pour just enough oil to coat the bottom of your pan. You don’t want to drown the wings in oil, but you need enough to ensure that they crisp up as they cook.
- Opt for High Smoke Point Oils: Use oils with a high smoke point for pan frying, such as canola oil, vegetable oil, or sunflower oil. These oils can withstand the high heat required for crisping the wings without breaking down or burning.
Why it Matters: The right amount of oil ensures that the wings get that crispiness on all sides without becoming greasy. A high-smoke-point oil also ensures the oil doesn’t burn at higher temperatures.
4. Cooking at the Right Temperature
Temperature control is key to getting crispy wings when pan frying.
- Preheat the Pan: Before adding the wings, preheat the skillet over medium-high heat for a couple of minutes. This ensures that the oil is hot enough to immediately start crisping the skin.
- Adjust the Heat: Once the wings are in the pan, you may need to adjust the heat to maintain an optimal frying temperature. If the heat is too low, the wings will absorb too much oil and become greasy. If the heat is too high, the skin may burn before the wings cook through.
Why it Matters: Maintaining the right temperature helps to achieve a crispy exterior while cooking the wings all the way through.
5. Cooking the Wings in Batches
To ensure that the wings cook evenly and crisply, avoid overcrowding the pan.
- Cook in Batches: Fry the wings in small batches to ensure that each wing gets enough space to fry properly. Overcrowding the pan lowers the oil temperature and leads to uneven cooking and less crispiness.
- Turn the Wings for Even Cooking: As the wings cook, be sure to flip them occasionally with tongs to ensure all sides are evenly golden brown. Depending on the size of your wings, they should take about 10-12 minutes to cook through, with each side cooking for about 4-6 minutes.
Why it Matters: Cooking wings in smaller batches ensures that they don’t steam and that the oil temperature remains consistent, leading to a crispy, crunchy texture.
6. Post-Frying Tips for Extra Crispiness
Once your wings are cooked, there are a few extra steps you can take to make sure they remain crispy and delicious.
- Drain on Paper Towels: After removing the wings from the skillet, place them on a plate lined with paper towels to absorb any excess oil. This helps to prevent the wings from becoming soggy.
- Rest Before Serving: Let the wings rest for a few minutes to allow the exterior to firm up and stay crispy.
Why it Matters: Allowing the wings to rest gives them time to finish crisping up and ensures that they won’t become greasy from residual oil.
7. Optional: Finishing Touches
For an extra flavor boost, consider tossing the cooked wings in your favorite sauce or glaze once they’re out of the pan. Just be sure to serve the sauce on the side or drizzle it lightly on top—coating the wings too much in sauce will reduce their crispiness.
Pan frying chicken wings is an excellent method for getting crispy results with less oil. By using the right pan, controlling the heat, and ensuring your wings are well-prepared with a light coating and the right amount of oil, you can achieve perfectly crispy chicken wings with a fraction of the oil used in deep frying. Follow these simple tips, and you’ll be enjoying delicious, crispy wings with a fraction of the mess and oil!
Air Frying: A Healthier Alternative for Fried Wings
Air frying has become a popular method for cooking crispy foods, including chicken wings, as it offers a healthier alternative to traditional frying. With an air fryer, you can achieve that same satisfying crispy texture without submerging the wings in oil. Here’s everything you need to know about air frying chicken wings and how to make them deliciously crispy with less fat.
1. How Air Frying Works
Air frying uses hot air circulation to cook food, simulating the effect of deep frying. This method requires little to no oil, allowing you to enjoy crispy wings with significantly less fat. The air fryer works by rapidly circulating hot air around the food, creating a crispy outer layer while locking moisture inside, resulting in juicy wings with a crunchy exterior.
Why it Matters: Unlike traditional deep frying, air frying uses only a small amount of oil—sometimes just a light spray—while still delivering that signature crispiness we all love in fried foods.
2. Preparing Chicken Wings for the Air Fryer
Before placing your chicken wings in the air fryer, it’s important to prepare them properly to achieve the crispiest results.
- Pat Wings Dry: Just as with deep frying or pan frying, moisture is a big factor in the crispiness of the wings. Be sure to pat the wings dry with paper towels to remove any excess moisture from the surface. This will help them crisp up during cooking.
- Coating the Wings: While you don’t need a heavy coating of batter or flour for air frying, a light dusting of flour, cornstarch, or a combination of both can enhance the texture. For best results, toss the wings lightly in a coating of flour or cornstarch along with your seasoning mix.
- Use a Small Amount of Oil: You don’t need to dunk your wings in oil; a light spritz of cooking spray or a small brush of oil will suffice to help the wings achieve that golden-brown, crispy exterior.
Why it Matters: Properly prepping the wings ensures that they cook evenly and become crispy in the air fryer. A light coating of oil and flour or cornstarch ensures the wings won’t dry out and that they achieve a crispy, crunchy finish.
3. The Right Temperature and Cooking Time
One of the most important factors in air frying is getting the temperature and cooking time just right.
- Preheat the Air Fryer: Most air fryers need to be preheated for 3-5 minutes before cooking. Preheating ensures that the wings cook evenly and get that crispy texture.
- Ideal Temperature: Set the air fryer to 375°F (190°C) for a perfectly crispy wing. Cooking at a high temperature will allow the skin to crisp up while keeping the inside tender and juicy.
- Cooking Time: Depending on the size of your wings, air frying typically takes about 20-25 minutes. It’s important to flip or shake the wings halfway through the cooking process to ensure they cook evenly and achieve crispiness on all sides.
Why it Matters: The right temperature and cooking time will ensure your wings are crispy on the outside while staying juicy and tender on the inside. Overcooking can dry out the wings, while undercooking might leave them soggy.
4. How to Ensure Crispy Wings in the Air Fryer
Achieving the perfect crispiness in an air fryer is all about ensuring the wings are cooked evenly and have enough airflow around them.
- Don’t Overcrowd the Basket: One of the most important tips when using an air fryer is not to overcrowd the basket. If the wings are packed too tightly, the hot air cannot circulate properly, and the wings won’t cook evenly. Instead, cook the wings in batches if necessary, leaving enough space between each piece for optimal airflow.
- Shake or Flip the Wings: To ensure all sides of the wings get crispy, shake the basket or flip the wings halfway through cooking. This ensures that both sides are exposed to the circulating hot air.
Why it Matters: Proper airflow is essential in achieving a crispy texture. Overcrowding or neglecting to flip the wings can result in uneven cooking and a soggy texture.
5. How to Add Flavor to Your Air Fried Wings
One of the great advantages of air frying is that it allows you to control the level of flavor without relying on excessive amounts of oil or sauce. Here’s how you can elevate your air-fried wings:
- Season Before Cooking: Season the wings with a dry rub or your favorite spices before placing them in the air fryer. Popular seasonings include garlic powder, onion powder, paprika, and cayenne pepper. This will give the wings a flavor-packed crust.
- Add Sauce After Cooking: If you like saucy wings, toss the wings in your favorite sauce after they’re done cooking. Some popular options include Buffalo sauce, barbecue sauce, or teriyaki sauce. Adding the sauce post-cooking ensures the wings stay crispy.
Why it Matters: Seasoning the wings before air frying helps build a flavorful crust, while adding the sauce afterward keeps the wings crispy and avoids sogginess.
6. The Benefits of Air Fried Wings
The air frying method provides several health benefits over traditional deep frying:
- Less Oil, Fewer Calories: Air frying uses far less oil, which means fewer calories and less fat compared to deep-frying methods. This is a great option for those looking to enjoy the crispy texture of fried wings without the guilt.
- Healthier Alternative: Air-fried wings retain the crispy exterior but with a much lower fat content, making them a healthier choice for anyone looking to cut down on oils and fats.
- Convenience and Speed: Air fryers cook quickly and are incredibly easy to use. There’s no need to worry about monitoring hot oil, making air frying a convenient and safer method for frying wings at home.
Why it Matters: Air frying is an excellent method for people who want to reduce their intake of unhealthy fats but still enjoy crispy, flavorful chicken wings.
Air frying is a game-changer for anyone who loves crispy chicken wings but wants a healthier, less greasy option. With minimal oil, the right seasoning, and proper cooking techniques, air frying can produce wings that are just as crispy and delicious as those deep-fried, without the excess fat. Whether you’re cooking for health-conscious family members or just looking for a quicker, cleaner alternative to traditional frying, air frying is a method worth trying.
Flavorful Fried Chicken Wing Variations to Try

Classic Crispy Wings: Light Seasoning with Maximum Crunch
When it comes to the ultimate fried chicken wings, sometimes simplicity is key. Classic crispy wings are all about achieving the perfect balance between a crunchy, golden exterior and a tender, juicy interior. While there are countless ways to season chicken wings, the “light seasoning” approach allows the natural flavor of the chicken to shine through, while the crispy texture steals the show.
1. The Secret to Maximum Crunch: The Coating
To achieve maximum crunch, the key lies in the coating you use on the wings before frying. Classic crispy wings rely on a simple, yet effective, flour-based coating that helps create a crunchy exterior.
- Flour and Seasoning: The classic coating for crispy wings usually consists of all-purpose flour, which gives the wings that crispy texture. To keep it simple, season the flour with basic spices like salt, pepper, and paprika. These simple seasonings highlight the chicken’s flavor without overpowering it.
- Cornstarch for Extra Crispiness: Adding a small amount of cornstarch to the flour helps create an even crispier texture. Cornstarch absorbs moisture from the chicken, which leads to a beautifully crisp exterior once fried. You only need a couple of tablespoons per cup of flour for the perfect balance.
- Baking Powder (Optional): If you want to elevate your crispy wing game even further, you can add a teaspoon of baking powder to the flour mixture. This helps the coating puff up slightly and adds an extra layer of crunch when fried. However, baking powder is optional and can be skipped if you prefer a lighter, more traditional crunch.
Why it Matters: The flour-based coating combined with a touch of cornstarch or baking powder ensures the wings turn out golden, crispy, and flavorful without the heaviness of a batter.
2. Seasoning the Wings Lightly
One of the defining features of classic crispy wings is the light seasoning that enhances the chicken without overshadowing it. The goal is to keep the seasoning simple yet effective, allowing the crunch and the natural flavors of the chicken to shine.
- Salt and Pepper: Start with the basics: salt and pepper. These two ingredients bring out the chicken’s natural flavor and complement the crispy texture. Be sure to season the wings evenly, ensuring every bite is flavorful.
- Paprika: A pinch of paprika can bring a subtle smokiness and color to the wings without overwhelming the taste. You can also experiment with smoked paprika for a richer flavor.
- Garlic Powder (Optional): If you want a slight savory edge, garlic powder is a great addition. Use it sparingly to avoid it overpowering the wings, but just enough to give a mild aromatic flavor.
Why it Matters: Light seasoning enhances the chicken’s flavor without masking the crispy coating. The balance of salt, pepper, and paprika creates a flavorful, crunchy wing that tastes like a classic favorite.
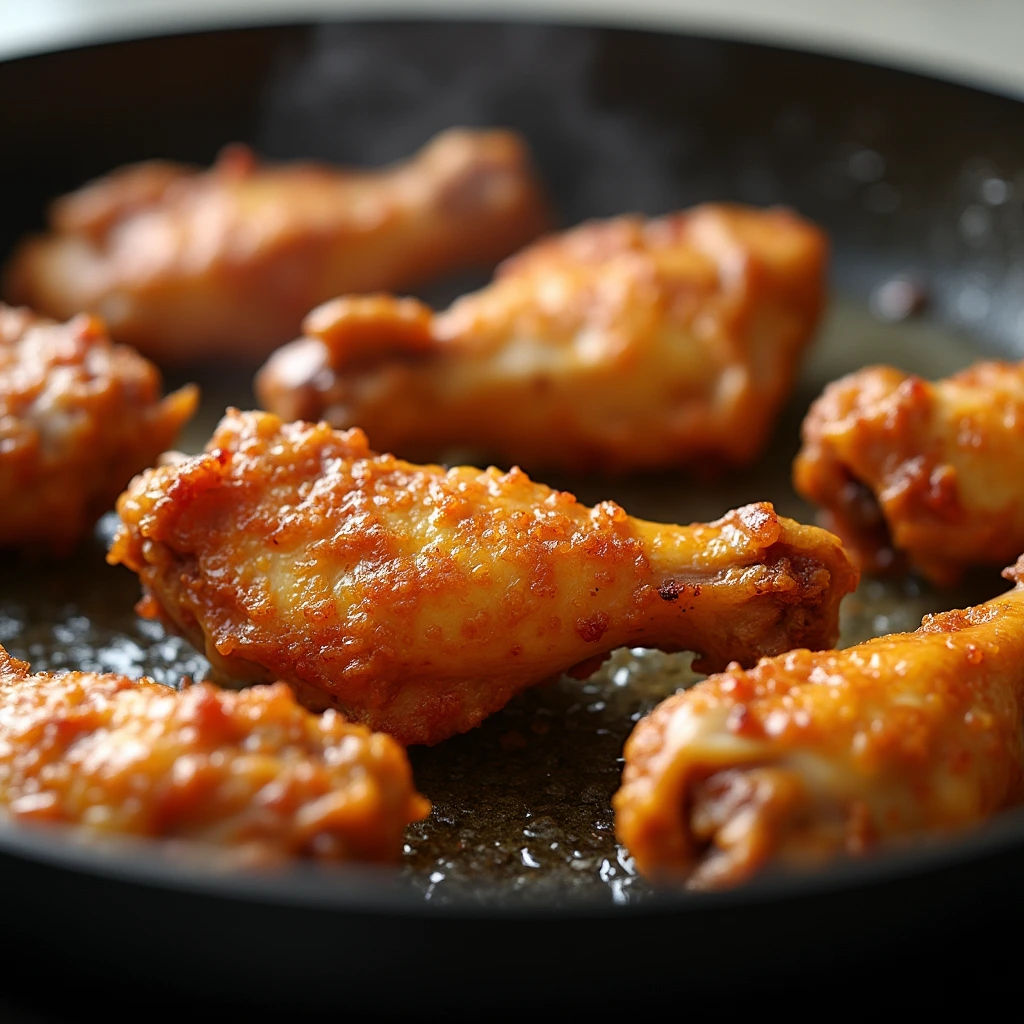
3. The Perfect Frying Technique for Crispiness
Once the wings are coated and lightly seasoned, the next step is frying them to perfection. To get that golden-brown crispy crunch, the frying technique is just as important as the ingredients.
- Hot Oil: Preheat your oil to about 350°F (175°C). A hotter oil temperature ensures that the wings cook quickly, forming a crispy crust on the outside while keeping the inside juicy. If the oil is too cold, the wings will absorb too much oil and become greasy, rather than crispy.
- Avoid Crowding the Pan: When frying, make sure not to overcrowd the pan. If there are too many wings in the oil at once, they will steam rather than fry, which will result in a soggier texture. Fry the wings in small batches to ensure they cook evenly and stay crispy.
- Frying Time: Depending on the size of your wings, fry them for about 8-10 minutes or until they are golden brown and crispy. To check for doneness, the wings should reach an internal temperature of 165°F (74°C). The crispy texture will form when the oil has been hot enough to quickly cook the wings and seal in their moisture.
Why it Matters: Frying at the right temperature and not overcrowding the pan ensures a crisp exterior and a juicy interior, resulting in the ultimate crunchy wings.
4. Draining Excess Oil
After frying your wings to a perfect crisp, it’s important to drain the excess oil to maintain the crunchy texture. Once you remove the wings from the oil, place them on a paper towel-lined plate or wire rack. This step helps to absorb any extra grease, ensuring that the wings stay crispy rather than soggy.
- Wire Rack vs. Paper Towels: For the crispiest results, using a wire rack to drain the wings is ideal. It allows air to circulate around the wings, preventing them from getting soggy. Paper towels are a good alternative but can make the wings soggy if they sit on them for too long.
Why it Matters: Draining excess oil keeps the wings crispy and prevents them from becoming greasy. This step ensures your wings maintain their texture from the moment they leave the fryer until they’re served.
5. Enjoying Classic Crispy Wings
Once your wings are perfectly fried, it’s time to enjoy them! Serve your classic crispy wings as they are, or pair them with dipping sauces for added flavor. Some popular options include Buffalo sauce, ranch dressing, or a tangy blue cheese sauce. However, the light seasoning and crispy texture of the wings are often enough to enjoy them on their own.
Why it Matters: The simple, classic crispy wing is a crowd-pleaser, and serving it with a variety of sauces allows everyone to enjoy their wings just the way they like them.
Classic crispy wings are all about achieving the right balance of flavor and texture. With a light seasoning, the perfect coating, and the right frying technique, you can enjoy wings that are crispy on the outside and juicy on the inside. Whether served plain or with a dipping sauce, these wings offer a timeless, flavorful experience that everyone can enjoy. Keep the seasoning light, focus on getting the perfect crunch, and you’ll have a classic wing recipe that’s sure to satisfy.
Spicy Fried Wings: Adding Heat with Cayenne or Hot Sauce
If you’re a fan of bold, fiery flavors, spicy fried wings are the perfect choice for you. These wings add an exciting twist to the classic crispy recipe by incorporating heat through spices like cayenne pepper or sauces like hot sauce. Whether you like a gentle kick or crave a serious spice, there are plenty of ways to turn up the heat on your fried chicken wings. Here’s how to master the art of making spicy fried wings that bring both crunch and heat.
1. The Power of Cayenne Pepper for Heat
Cayenne pepper is a popular spice when it comes to adding heat to fried wings. It has a scorching heat that is distinct but not overwhelmingly intense, making it a perfect choice for those who enjoy a spicy kick without compromising the overall flavor of the wing.
- How Much Cayenne to Use: The amount of cayenne pepper to use depends on your preferred spice level. For a moderate heat, start with 1/4 to 1/2 teaspoon per batch of wings. If you’re a fan of extra spice, you can gradually increase the amount, but always taste as you go.
- Balancing the Heat: To avoid overwhelming the wings with spice, balance the cayenne pepper with other seasonings. Paprika can complement the heat by adding a smoky flavor, while garlic powder and onion powder bring depth to the overall seasoning mix. A touch of brown sugar can also help balance the heat with a slight sweetness, creating a more complex flavor profile.
- Mixing with Flour: To ensure the heat is evenly distributed, mix cayenne pepper directly into the flour coating before dredging the wings. This ensures that every bite has a consistent level of heat. You can also add a little cayenne to the marinade or rub the wings directly for an extra fiery boost.
Why it Matters: Cayenne pepper adds an immediate, sharp heat to the wings that works beautifully with the crispy coating. It also brings a subtle depth of flavor that enhances the wings without overwhelming the natural taste of the chicken.
2. Hot Sauce for Bold Flavor
If you love the tangy, vinegary kick of hot sauce, then incorporating it into your spicy fried wings is a game-changer. Hot sauce can be added in various stages of the cooking process, from marinating the wings to tossing them after frying for an added burst of flavor.
- Marinating with Hot Sauce: To infuse your wings with a deep, bold heat, marinate them in hot sauce for at least 30 minutes to an hour. The sauce will penetrate the meat, adding flavor and heat from the inside out. For a simple hot sauce marinade, mix hot sauce, a bit of garlic powder, and a squeeze of lemon juice. This combination will create a flavorful base for your spicy fried wings.
- Battering with Hot Sauce: Some recipes call for adding hot sauce directly to the batter or coating. When you coat your wings with a mixture of flour and hot sauce, you achieve an even layer of flavor and spice. The sauce, when mixed with the flour, will help create a spiced crispy crust that holds up well during frying.
- Tossing After Frying: After frying, toss the wings in a hot sauce glaze for a fresh, zesty flavor. This method allows you to control how much heat you want. For example, you can create a mild coating with a buffalo-style sauce or go for a stronger blend using Habanero or Sriracha. Adding a butter or honey to the sauce can help mellow out the heat and add richness or sweetness, respectively, creating a balanced flavor profile.
Why it Matters: Using hot sauce introduces a zesty, tangy flavor alongside the heat, making it a favorite choice for those who crave both spice and flavor. Tossing wings in hot sauce after frying creates a crispy, flavorful exterior with the perfect amount of heat.
3. Combining Cayenne and Hot Sauce for Extra Heat
For those who are true spice enthusiasts, combining cayenne pepper and hot sauce can elevate the heat level of your fried wings to a whole new level. The cayenne provides a consistent, all-around heat, while the hot sauce adds a tangy kick that gives the wings a dynamic, layered flavor.
- Layering Heat: To combine both cayenne and hot sauce effectively, you can start by seasoning the wings with cayenne before frying and then toss the wings in a hot sauce mixture after cooking. This double-layer approach ensures your wings are spicy inside and out.
- Creating Your Own Hot Sauce Glaze: If you prefer a more customized experience, you can make your own glaze by mixing hot sauce with cayenne pepper, butter, and a splash of vinegar. The butter will tone down the sharpness of the heat, and the vinegar will add that signature tanginess that works so well with fried chicken.
Why it Matters: Combining cayenne and hot sauce gives your wings both depth and complexity in heat, delivering an unforgettable spicy experience with every bite.
4. Serving Suggestions for Spicy Fried Wings
While spicy fried wings are perfect on their own, they also pair wonderfully with certain sides or dips to balance the heat.
- Cooling Dips: A side of ranch dressing or blue cheese dip can provide a cool contrast to the heat of the wings. These creamy dips help tone down the spiciness while complementing the flavor of the wings.
- Refreshing Sides: Consider serving your spicy fried wings with celery sticks or cucumber slices to add a refreshing, crunchy contrast. The coolness of the vegetables helps neutralize the heat and makes for a perfect pairing.
- Serving with Rice: Spicy fried wings also pair well with a side of steamed rice or a light salad, providing a neutral base to balance the fiery flavors.
Why it Matters: Serving spicy fried wings with cooling sides or dips offers a refreshing contrast to the heat, making the meal more enjoyable and satisfying.
Spicy fried wings are a flavorful way to turn up the heat on your chicken wing recipes. Whether you use cayenne pepper for a sharp heat or hot sauce for a tangy, vinegary kick, these wings are sure to please those who crave bold flavors. By layering spices and sauces, and pairing the wings with cooling dips and sides, you can achieve the perfect balance of crispiness and heat that will satisfy all your spicy cravings. So go ahead, spice things up in the kitchen and enjoy these crispy, fiery treats!
Garlic and Herb Wings: A Savory and Fragrant Option
If you’re looking for a more savory and aromatic alternative to the traditional fried wing options, garlic and herb wings are the perfect choice. These wings offer a delightful blend of earthy garlic and fresh herbs, creating a flavor profile that is both fragrant and satisfying. Unlike the heat-driven spicy wings, garlic and herb wings are all about rich, comforting flavors that will appeal to those who enjoy savory tastes.
1. Why Garlic and Herb Wings Work
Garlic and herbs are a classic combination that enhances the natural taste of the chicken without overpowering it. The garlic brings a deep, robust flavor, while the herbs add layers of freshness, fragrance, and a touch of earthiness. This combination creates a wing that’s both flavorful and versatile, perfect for anyone looking for something different from the typical spicy or sweet options.
- Garlic’s Richness: Garlic is known for its ability to infuse dishes with a complex depth of flavor. When paired with fried chicken wings, it not only adds a savory richness but also provides an aromatic fragrance that enhances the overall experience.
- Herbaceous Freshness: Herbs like rosemary, thyme, parsley, and oregano add a bright and fresh contrast to the deep, savory flavor of the garlic. This makes garlic and herb wings a well-balanced option that’s savory without being too heavy.
2. Key Ingredients for Garlic and Herb Wings
To make your garlic and herb wings truly stand out, you’ll need to incorporate high-quality ingredients that provide maximum flavor. The essential ingredients include:
- Fresh Garlic: Using fresh garlic gives your wings a vibrant flavor, compared to using powdered garlic. Finely chopped or minced garlic creates a strong aromatic base for the sauce and enhances the savory flavor.
- Fresh or Dried Herbs: Fresh herbs such as rosemary or thyme bring a fragrant and herbal touch to your wings. Alternatively, dried herbs can be used for a more concentrated flavor. Combining a few different herbs creates a balanced, aromatic seasoning mix that perfectly complements the garlic.
- Olive Oil or Butter: A generous drizzle of olive oil or melted butter helps to bring all the flavors together and creates a smooth coating for the wings. Olive oil offers a rich, fruity taste, while butter provides a rich, creamy texture that pairs beautifully with the savory garlic and herbs.
- Lemon Zest or Juice: To add a bit of brightness and cut through the richness of the garlic and butter, lemon zest or a squeeze of fresh lemon juice is a great addition. It enhances the freshness of the herbs and helps elevate the overall flavor.
3. Preparing the Garlic and Herb Coating
The key to perfect garlic and herb wings is in how you prepare the garlic and herb coating. A simple, flavorful marinade or coating mix can be created with just a few ingredients:
- Making the Marinade: Start by combining olive oil or melted butter with minced garlic, lemon juice, and your choice of herbs. To make the mixture extra aromatic, add a pinch of salt and freshly ground black pepper. Let the wings marinate in this mixture for at least 30 minutes to ensure the flavors infuse into the meat.
- Coating After Frying: Alternatively, you can fry the wings first and then toss them in the garlic and herb mixture for a more intense burst of flavor. In this case, mix the garlic and herbs with melted butter or olive oil and pour it over the fried wings, tossing them until they are fully coated.
4. Cooking Tips for Garlic and Herb Wings
To make sure your garlic and herb wings come out with the perfect balance of flavors and texture, there are a few important steps to follow during the cooking process:
- Frying the Wings: Start by frying the wings as you would normally, ensuring they are crispy on the outside and tender on the inside. Be careful not to overcook them, as this can lead to dry wings that won’t hold the marinade as well.
- Tossing with the Garlic and Herb Mix: After frying, toss the wings in the garlic and herb mixture while they’re still hot. This helps the wings absorb the flavors of the garlic and herbs, creating a perfectly flavored exterior while keeping the interior juicy.
- Caramelization: When frying, garlic has the potential to burn quickly, so be sure to keep an eye on the temperature and avoid direct contact with high heat for long periods. For this reason, many opt to fry the wings first and then toss them in the garlic and herb mix to avoid burning the garlic.
5. Customizing Your Garlic and Herb Wings
One of the best things about garlic and herb wings is how versatile the flavor profile can be. If you want to tailor the recipe to your personal preferences, there are many ways to customize it:
- Adding Spice: If you like a bit of heat, add a pinch of crushed red pepper flakes to the garlic and herb mixture. This will provide a mild spice that balances out the richness of the garlic and butter.
- Sweet Touch: For a unique twist, try adding a little bit of honey or brown sugar to the marinade. This will give your garlic and herb wings a touch of sweetness that pairs beautifully with the savory flavors.
- Cheese: Adding grated Parmesan cheese or crumbled feta can elevate the flavor, giving your wings an extra burst of richness that complements the garlic and herbs.
6. Serving Garlic and Herb Wings
Garlic and herb wings are perfect for a variety of occasions, from casual weeknight dinners to elegant parties. Here are some ideas for serving these wings:
- Serve with Fresh Veggies: Pair your wings with carrot sticks, celery, or cucumber slices for a refreshing crunch that contrasts with the rich, savory flavor of the wings.
- Dips: While garlic and herb wings are flavorful on their own, serving them with a garlic aioli or ranch dressing can add an extra layer of richness and creaminess.
- On the Side: Garlic and herb wings are also great when served alongside a light salad or roasted potatoes to round out the meal.
Garlic and herb wings are a wonderfully savory, aromatic option for those who want to take a break from the spicier or sweeter wing varieties. The combination of garlic, fresh herbs, and olive oil or butter creates a flavor profile that is rich, comforting, and fragrant. Whether you prefer them fried or baked, tossing the wings in a flavorful garlic and herb coating will leave your taste buds craving more. With endless possibilities for customization, garlic and herb wings are sure to become a staple in your wing recipe repertoire.
Tips for Serving and Storing Fried Chicken Wings
Best Side Dishes to Serve with Fried Wings (Fries, Coleslaw, and More)
When it comes to fried chicken wings, the right side dish can elevate the meal and create a satisfying, well-rounded dining experience. Fried wings are crispy, savory, and often bold in flavor, so it’s important to balance their richness with side dishes that offer contrast in texture and taste. Whether you want something crunchy, creamy, or refreshing, there are plenty of options that pair perfectly with these delicious wings. Here are some of the best side dishes to serve with fried wings:
1. Classic French Fries: A Crispy, Golden Favorite
French fries are a timeless classic and a perfect companion to fried chicken wings. Their crispy texture and golden color complement the crispy exterior of the wings, and their mild flavor allows the wings to take center stage. You can serve them as traditional skin-on fries, curly fries, or shoestring fries—all of which bring their own unique twist to the dish.
- Why it works: The saltiness and crispy texture of fries add a satisfying contrast to the tender, juicy interior of the fried wings. The fries’ neutral flavor also balances the stronger, more intense seasonings on the wings.
- Customization: You can elevate your fries by seasoning them with garlic powder, paprika, or parmesan cheese for added flavor. Pair with a dipping sauce such as ketchup, mayo, or sriracha aioli for a bit of extra indulgence.
2. Creamy Coleslaw: A Refreshing and Crunchy Contrast
Coleslaw is a refreshing and crunchy side that balances the richness of fried wings. The cool and creamy nature of coleslaw provides a nice contrast to the hot and crispy wings, while the crunch from the cabbage or other vegetables adds texture and a satisfying bite.
- Why it works: The tangy and creamy dressing in coleslaw helps cut through the richness of the fried wings, while the crispiness of the cabbage offers a different texture, making it a great textural and flavor contrast.
- Customization: You can adjust the flavor of coleslaw to suit your taste. For a spicy twist, add some finely chopped jalapeños or a bit of sriracha to the dressing. For a sweet and tangy version, use a mixture of apple cider vinegar and honey for the dressing.
3. Crispy Onion Rings: Extra Crunch and Flavor
Onion rings are another crispy and savory side dish that pairs wonderfully with fried wings. The breaded and fried exterior of onion rings gives an added layer of crunch and flavor, while the sweetness of the onion inside balances the savory elements of the wings.
- Why it works: Like fries, onion rings have a crispy texture that mirrors the crunchiness of the fried wings, while their natural sweetness offers a nice contrast to the spicy or savory flavors in the wings.
- Customization: You can make your onion rings more flavorful by using beer batter or buttermilk for the breading. You can also serve them with a spicy ranch or barbecue sauce to enhance the flavor profile.
4. Cornbread: A Soft and Slightly Sweet Side
Cornbread adds a slightly sweet, moist, and crumbly texture that complements the crispy, savory nature of fried wings. The sweetness of cornbread balances out the saltiness of the wings, creating a delightful contrast.
- Why it works: The slightly sweet flavor of cornbread pairs beautifully with the savory flavors of fried chicken wings, and its soft, fluffy texture is a great contrast to the crunchiness of the wings. Plus, it’s a comforting side dish that brings a touch of warmth to the meal.
- Customization: You can make your cornbread more flavorful by adding ingredients like cheddar cheese, jalapeños, or scallions to the batter. For a savory twist, you could try cornbread muffins with a hint of garlic or bacon bits.
5. Pickles: A Tangy and Refreshing Option
If you’re looking for something light and tangy to balance the richness of fried wings, pickles are an excellent choice. Their vinegary tang provides a refreshing contrast to the greasiness of fried food, while their crunchy texture pairs perfectly with the wings.
- Why it works: The sharpness of the pickles cuts through the fatty richness of the wings and refreshes your palate, making each bite feel lighter and more balanced.
- Customization: You can serve classic dill pickles or try bread-and-butter pickles for a sweet and tangy twist. If you’re feeling adventurous, make your own spicy pickles or add pickled jalapeños for an added kick.
6. Macaroni and Cheese: A Comforting, Cheesy Side
Macaroni and cheese is another comfort food that pairs beautifully with fried chicken wings. The creamy and cheesy sauce provides a rich, indulgent counterpoint to the crispy, savory wings.
- Why it works: The richness of macaroni and cheese creates a satisfying balance with the crispiness of the wings. Its creamy texture complements the crunchy exterior of the wings and provides a warm, comforting bite.
- Customization: Add crumbled bacon, scallions, or extra cheese to your macaroni and cheese for added flavor. You can even make it spicy by stirring in some hot sauce or jalapeños.
7. Roasted Vegetables: A Healthy, Flavorful Option
For a lighter, healthier side dish, try roasted vegetables. Vegetables like carrots, zucchini, sweet potatoes, and brussels sprouts are tossed in olive oil and roasted to perfection, offering a great balance of flavor, texture, and nutrition.
- Why it works: The natural sweetness of roasted vegetables balances the savory, spicy flavors of the wings, and their soft and caramelized texture provides a great contrast to the crunchy wings.
- Customization: You can experiment with different seasonings like garlic powder, herbs, or a sprinkle of parmesan cheese to enhance the flavor of the roasted vegetables.
8. Fresh Salad: A Light, Crisp Choice
A fresh salad made with greens, tomatoes, cucumbers, and other fresh vegetables is an excellent choice to balance the richness of fried wings. The crispness of the salad ingredients refreshes the palate and provides a light, healthy contrast to the heaviness of the wings.
- Why it works: The freshness of the salad helps lighten up the meal, while the tangy dressing (such as vinaigrette) adds a nice contrast to the fried wings.
- Customization: You can add avocado, nuts, or cheese to your salad for extra texture and flavor. A creamy ranch or blue cheese dressing can also complement the wings nicely.
When serving fried wings, the right side dish can truly elevate the meal, balancing out the richness, crunchiness, and savory flavors of the wings. Whether you opt for classic sides like fries and coleslaw, or something more adventurous like garlic bread or roasted vegetables, each side dish provides a unique contrast that complements the fried wings perfectly. Mix and match these sides to create a deliciously satisfying meal that everyone will love!
How to Keep Wings Crispy for Longer
Nothing beats the irresistible crunch of freshly fried chicken wings, but maintaining that crispy texture over time can be tricky. Whether you’re preparing wings for a party, serving a big family meal, or making them ahead of time, keeping them crispy for as long as possible is essential to ensuring they’re enjoyable. There are a few simple but effective methods to prevent your wings from becoming soggy and ensure they remain crispy and delicious. Let’s explore how to keep those wings crispy for longer.
1. Drain Excess Oil Properly
One of the main reasons wings lose their crispy texture is because they’re sitting in excess oil after frying. To maintain their crispiness, it’s important to drain the wings properly after they come out of the oil.
- How to do it: Once the wings are done frying, place them on a cooling rack instead of a paper towel-lined plate. The cooling rack allows air to circulate around the wings, helping to prevent any trapped moisture that could soften the coating.
- Why it works: The air circulation helps keep the wings crispy by allowing excess oil to drain off. The paper towels, on the other hand, can trap moisture against the surface of the wings, leading to a soggy coating.
2. Use a Low Heat Oven to Keep Wings Warm
If you’re preparing wings in advance or need to keep them warm while serving a large group, using an oven at a low temperature can help preserve their crispiness.
- How to do it: Preheat your oven to 200°F (93°C), and place the wings on a cooling rack over a baking sheet. This setup allows the hot air in the oven to circulate around the wings, keeping them crispy without overcooking them.
- Why it works: Keeping the wings at a low temperature in the oven helps prevent moisture from settling on the skin, which keeps the coating crispy. The cooling rack also ensures that the wings don’t sit in their own juices, which can cause them to become soggy.
3. Avoid Storing in Airtight Containers Immediately
Storing crispy wings in an airtight container too soon can trap steam, which will make the wings lose their crispiness. If you need to store leftovers, it’s important to give the wings some time to cool before storing them properly.
- How to do it: Allow the wings to cool down for about 5 to 10 minutes after frying or baking, and then place them in a loose container or wrap them in foil. This allows moisture to escape, keeping the wings crispy.
- Why it works: When you store wings in an airtight container while they’re still warm, moisture from the wings can build up and soften the crispy coating. By giving them a little time to cool, you reduce the chance of this happening.
4. Reheat in an Oven or Air Fryer
If your wings have cooled and you need to reheat them, avoid using the microwave, which will steam the wings and make them soggy. Instead, use an oven or air fryer to bring back the crispiness.
- How to do it: Preheat your oven to 375°F (190°C) or your air fryer to 350°F (175°C). Spread the wings in a single layer on a baking sheet or air fryer basket, and heat for about 5 to 10 minutes until crispy.
- Why it works: The dry heat from the oven or air fryer crisps up the outer layer of the wings, while the inside stays tender and juicy. The oven and air fryer both circulate air around the wings, preventing moisture from softening the coating.
5. Consider Double Frying for Extra Crunch
For extra crispy wings, consider the technique of double frying. This method gives the wings an extra layer of crunch that helps them stay crispy for longer.
- How to do it: First, fry the wings at a lower temperature (300°F/150°C) for about 5-7 minutes to cook the chicken through. Then, let the wings rest for a few minutes, and fry them again at a higher temperature (375°F/190°C) for about 2-4 minutes until the outer layer is golden brown and crispy.
- Why it works: The first fry cooks the chicken through, while the second fry crisps up the outer layer. This creates a crispy exterior that holds up better over time, even if the wings sit for a while before serving.
6. Coat the Wings with a Crisping Mixture
To ensure your wings have the best chance of staying crispy, you can coat them with a mixture of flour, cornstarch, or even baking powder before frying.
- How to do it: Mix flour with cornstarch (about 2:1 ratio), and then add a little baking powder to the mix. Coat the wings in this dry mixture before frying.
- Why it works: The cornstarch and baking powder help create a light, crispy crust on the wings, and the flour helps lock in moisture while ensuring the coating stays crunchy even after frying.
7. Serve Immediately or Keep in a Warming Tray
If you’re serving a crowd or want to ensure that your wings are as crispy as possible when guests arrive, consider using a warming tray. These devices use low heat to keep food warm without causing it to lose its texture.
- How to do it: Place the wings in a warming tray set to a low temperature, or keep them on the cooling rack in the oven as mentioned earlier.
- Why it works: A warming tray will keep the wings at a perfect temperature without making them soggy, ensuring they stay crispy and fresh for longer.
Keeping your fried wings crispy for longer doesn’t have to be a challenge if you follow a few simple techniques. From draining excess oil properly to reheating with the right equipment, there are plenty of ways to keep that crispy crunch intact, whether you’re preparing wings in advance or just want to make sure they stay crispy during a party. By taking extra steps like double frying, using a cooling rack, and avoiding airtight containers, your wings will stay as crispy as the first bite until the last!
The Best Way to Store and Reheat Leftovers
Storing and reheating leftover fried chicken wings can be a tricky task, as the crispy texture that you love can quickly turn soggy if not done correctly. However, with a few key tips and the right techniques, you can keep those leftovers tasting just as good as when they were first made. Here’s how to store and reheat your wings to ensure they stay flavorful and crispy.
1. Let Wings Cool Before Storing
One of the most important steps in storing fried wings is to let them cool down properly before putting them away. If you store hot wings in a sealed container immediately, the trapped steam can soften the crispy skin, resulting in soggy wings.
- How to do it: After frying your wings, allow them to cool for about 10-15 minutes on a cooling rack. This helps any excess oil to drain off and prevents moisture from accumulating.
- Why it works: Allowing the wings to cool ensures that they don’t continue to cook in their own heat, and it prevents condensation from forming in the container, which can make the wings soggy.
2. Store Wings in an Airtight Container (But Not Too Soon)
Once your wings have cooled, it’s time to store them. The key is to find the right balance between sealing them tightly to preserve freshness and avoiding trapping moisture that can ruin their texture.
- How to do it: Place the wings in an airtight container or resealable plastic bag. If using a plastic bag, try to squeeze out as much air as possible before sealing. Alternatively, you can place the wings on a cooling rack in the refrigerator to allow air circulation.
- Why it works: The airtight container helps lock in flavor and keeps out other odors from the fridge. However, don’t store them while they’re still hot to prevent condensation, which leads to a loss of crispiness.
3. Use Parchment Paper for Extra Protection
For an added layer of protection to maintain your wings’ crispiness, consider using parchment paper between layers of wings if you plan to store them in a container or bag. This allows air to flow between the layers and prevents them from sticking to each other.
- How to do it: Place a sheet of parchment paper at the bottom of the storage container, then layer the wings on top. Add another sheet of parchment paper and layer more wings if necessary. Seal the container tightly.
- Why it works: Parchment paper prevents the wings from touching each other and absorbing moisture, which helps maintain their crispy texture.
4. Refrigeration: Best for Short-Term Storage
Fried wings are best stored in the refrigerator if you plan to eat them within a few days. They’ll stay fresh for up to 3-4 days when stored properly.
- How to do it: Place the wings in an airtight container or plastic bag, and store them in the refrigerator for no more than 3-4 days. Always make sure that the wings have cooled down before storing them.
- Why it works: The refrigerator slows down bacterial growth, preserving the wings for a short period without compromising flavor or safety.
5. Freezing: Best for Long-Term Storage
If you don’t plan to eat the wings within a few days, freezing them is the best option. Freezing prevents the wings from spoiling and allows you to enjoy them at a later time.
- How to do it: To freeze fried wings, place them in a single layer on a baking sheet and freeze for about 2-3 hours until solid. Once they’re frozen, transfer them to a resealable plastic bag or airtight container. Make sure to remove as much air as possible to prevent freezer burn.
- Why it works: Freezing the wings first on a baking sheet ensures that they don’t stick together, making it easy to grab just as many wings as you need. The airtight bag or container prevents freezer burn and keeps the wings fresh for up to 3 months.
6. Reheating: The Key to Restoring Crispiness
The best way to reheat your leftover fried chicken wings is by using methods that allow the wings to get crispy again, rather than just warming them up. Microwaving is not ideal because it tends to make the coating soggy. Instead, opt for oven, air fryer, or stovetop reheating methods.
- How to do it (Oven): Preheat your oven to 375°F (190°C). Place the wings on a cooling rack set over a baking sheet, and bake for about 10-12 minutes, or until the wings are hot and crispy. The cooling rack helps air circulate around the wings, ensuring they stay crispy.
- How to do it (Air Fryer): Preheat your air fryer to 350°F (175°C). Place the wings in a single layer in the basket, and heat for about 5-7 minutes until crispy. The air fryer is great for reheating because it mimics the effect of frying, making the wings crispy on the outside while keeping the inside juicy.
- How to do it (Stovetop): Heat a small amount of oil in a skillet over medium heat. Add the wings and fry for about 3-4 minutes per side until the exterior is crispy and golden brown.
- Why it works: All these methods use dry heat to help restore the crispy texture. The oven and air fryer both circulate hot air, while the stovetop method uses direct heat to crisp up the wings again.
7. Avoid Using the Microwave
While it might be tempting to just pop your leftover wings in the microwave, this method will almost certainly make them soggy, as the microwave steams the coating rather than crisping it. If you must use the microwave for convenience, it’s best to only reheat the wings for a few seconds and then finish them off in a pan or air fryer for a crispier result.
- Why it works: The microwave uses moisture to reheat food, which can soften the crispy coating. It’s much better to use the oven or air fryer, which apply dry heat, to retain the crispy texture.
Storing and reheating fried wings doesn’t have to result in soggy disappointment. By following these simple steps—cooling them down properly, using the right storage containers, and reheating them in a way that restores their crispiness—you can enjoy your leftover wings just as much as when they were freshly made. Whether you choose the oven, air fryer, or stovetop, there’s a perfect method for bringing back that crispy crunch!
Conclusion: Chicken Wing Recipes Fried
Fried chicken wings are a timeless favorite, offering a crispy, flavorful experience that can be customized to suit any taste. Whether you prefer classic, spicy, or garlic-infused flavors, the beauty of fried wings lies in their versatility and the endless possibilities for seasoning and preparation. With the right techniques for choosing your wings, seasoning, coating, and frying methods, you can create the crispiest, most delicious wings right at home.
From understanding the importance of using fresh or frozen wings to mastering different frying methods like deep frying, pan frying, and air frying, this guide has provided you with the essentials for making mouthwatering fried chicken wings. By following the simple tips on storing and reheating your leftovers, you can ensure that your wings stay just as crispy and flavorful the next day.
Whether it’s for a party, a casual dinner, or a late-night snack, fried chicken wings are always a crowd-pleaser. So, get creative with your seasonings, perfect your frying technique, and enjoy the crispy, juicy goodness of homemade fried chicken wings every time!