
The Best Baked Turkey Wings Recipe: Crispy, Juicy, and Flavorful
Baked turkey wings are a delicious and easy meal that delivers crispy, juicy, and flavorful results without the need for frying. Whether you’re looking for a comforting dinner, a simple meal prep option, or a tasty alternative to chicken wings, this recipe is perfect for any occasion.
By baking the turkey wings in the oven, you get tender meat with golden, crispy skin while using minimal ingredients. With the right seasonings and baking technique, you can achieve incredible flavor without much effort. Plus, baking is a healthier option that doesn’t sacrifice taste.
In this guide, you’ll learn how to make the best baked turkey wings step by step, along with expert tips for achieving perfect crispiness. Let’s get started!
Why You’ll Love This Baked Turkey Wings Recipe

Easy to Prepare with Simple Pantry Ingredients
One of the best things about baked turkey wings is how easy they are to prepare. You don’t need any fancy ingredients or complicated cooking techniques—just a handful of everyday pantry staples that you likely already have at home. This makes it a budget-friendly, no-fuss meal that’s perfect for busy weeknights or casual family dinners.
The preparation process is simple: start by patting the turkey wings dry to ensure crispy skin, then coat them with a mix of olive oil and seasonings. Common pantry staples like garlic powder, onion powder, paprika, salt, and black pepper add bold, savory flavors without requiring a trip to the store. You can also customize the seasonings to your preference by adding ingredients like cayenne pepper for heat or dried herbs for extra depth.
Since turkey wings are naturally flavorful, they don’t need much to taste amazing. A quick seasoning, a bit of oil to help with crispiness, and proper baking techniques are all you need to achieve golden, juicy perfection. This simple approach makes baked turkey wings a go-to dish when you want something delicious with minimal effort.
Healthier Than Deep-Fried Wings but Still Flavorful
Baked turkey wings offer the perfect balance between crispy texture and rich flavor without the excess oil and calories of deep frying. While deep-fried wings can be delicious, they often absorb a significant amount of oil, leading to higher fat content. By baking the wings in the oven, you can achieve perfectly crispy skin and juicy meat without the need for excessive frying oils.
Why Baking is a Healthier Option
- Less Oil, Fewer Calories – Instead of submerging the wings in oil, baking requires only a light coating of olive oil, reducing overall fat content while still promoting crispiness.
- Lower in Saturated Fats – Deep-fried foods contain higher levels of unhealthy fats, which can contribute to health issues. Baking helps keep the dish lighter and heart-healthier.
- Retains More Nutrients – Cooking turkey wings in the oven at the right temperature ensures that the natural proteins, vitamins, and minerals remain intact, making it a more nutritious choice.
How to Keep Baked Turkey Wings Flavorful
Despite being a healthier option, baked turkey wings are anything but bland. Here’s how to maximize their flavor:
- Season Generously – Using a blend of garlic powder, onion powder, paprika, salt, and black pepper ensures bold, well-balanced flavors.
- Use a Wire Rack for Crispiness – Elevating the wings on a wire rack allows heat to circulate evenly, creating a crisp exterior similar to fried wings.
- Slow Roasting for Tenderness – Baking at a moderate temperature ensures the meat stays juicy while the skin becomes golden and crispy.
- Optional Butter Glaze – A light brush of butter before the final minutes of baking adds richness without making the wings greasy.
By choosing to bake instead of fry, you can enjoy a healthier version of turkey wings without sacrificing the crispy, savory flavors that make them so satisfying!
Perfect for Family Meals or Meal Prep
Baked turkey wings are an excellent choice for family meals and meal prep because they are easy to make, budget-friendly, and packed with flavor. Whether you’re cooking a hearty dinner for loved ones or planning meals for the week, this recipe provides a delicious and versatile option that satisfies everyone at the table.
Great for Family Dinners
Turkey wings are naturally rich, juicy, and satisfying, making them a fantastic centerpiece for a comforting meal. Here’s why they’re a great family-friendly dish:
- Feeds a Crowd – Turkey wings are larger than chicken wings, making them a more filling and substantial option. A few wings can easily satisfy a hungry family.
- Customizable Flavor – You can adjust the seasonings to match your family’s taste preferences. Add extra garlic and herbs for a classic taste or a pinch of cayenne for those who love heat.
- Pairs Well with Many Sides – Serve these wings with comforting side dishes like mashed potatoes, roasted vegetables, collard greens, or cornbread for a complete meal.
Ideal for Meal Prep
If you love having ready-to-eat meals during the week, baked turkey wings are a fantastic option for meal prepping. They store well and can be easily reheated while maintaining their delicious flavor and texture.
- Make Ahead for the Week – Bake a batch of turkey wings at the start of the week and store them in the refrigerator for quick, protein-packed meals.
- Easy to Reheat – Warm them up in the oven at 350°F (175°C) for 10-15 minutes to keep them crispy, or use an air fryer for an even quicker option.
- Versatile for Different Meals – Use leftover turkey wings in various dishes, such as turkey salads, wraps, grain bowls, or served over rice with a savory sauce.
With minimal effort, you can enjoy flavorful, home-cooked meals throughout the week while keeping dinner time stress-free. Whether you’re preparing a meal for the whole family or planning ahead for busy days, baked turkey wings are a tasty and practical choice!
Ingredients You’ll Need for Baked Turkey Wings

Turkey Wings – Fresh or Frozen (Thawed)
When preparing baked turkey wings, one of the first decisions you’ll need to make is whether to use fresh or frozen wings. Both options can yield delicious results, but there are a few key differences to consider when selecting and handling them.
Fresh Turkey Wings
Fresh turkey wings are ready to season and cook immediately, making them a convenient option if you’re looking to save time. Here’s why fresh wings might be the right choice:
- No Need for Thawing – You can season and bake them right away.
- Slightly More Tender – Fresh wings often retain more natural moisture, which can result in juicier meat.
- Easier to Work With – Since they aren’t frozen, you don’t have to worry about excess liquid or long defrosting times.
If using fresh turkey wings, be sure to check the packaging date and select wings that are plump, moist, and free of discoloration for the best quality.
Frozen Turkey Wings (Thawed Before Cooking)
Frozen turkey wings are a great alternative if fresh wings aren’t available or if you want to stock up and store them for later use. Here’s why frozen wings might work best for you:
- Longer Shelf Life – Frozen turkey wings can be stored for months without spoiling, making them great for meal planning.
- Often More Budget-Friendly – Buying frozen can sometimes be more affordable, especially when purchasing in bulk.
- Equally Delicious When Properly Thawed – With the right thawing method, frozen wings can be just as juicy and flavorful as fresh ones.
How to Properly Thaw Frozen Turkey Wings
For safe and even cooking, always thaw frozen turkey wings before baking. Here are the best methods:
- Refrigerator Method (Recommended) – Place frozen wings in the refrigerator 24 hours before cooking. This ensures a slow, even thaw, preserving texture and flavor.
- Cold Water Method (Faster Option) – Submerge the wings in cold water, changing the water every 30 minutes. This usually takes 2 to 3 hours depending on the size of the wings.
- Avoid Room Temperature Thawing – Letting wings sit out at room temperature can lead to bacterial growth, so it’s best to thaw them safely.
Fresh vs. Frozen: Which is Better?
Both fresh and frozen turkey wings can result in a delicious meal, so the choice depends on convenience and availability. If you want quick preparation, fresh wings are ideal. If you prefer to plan ahead and have turkey wings on hand, frozen wings are a great option—just remember to thaw them properly before baking for the best results.
Olive Oil – Helps Crisp Up the Skin
Olive oil plays a key role in achieving the perfect crispy, golden-brown skin when baking turkey wings. While turkey wings naturally contain some fat, adding a light coating of olive oil helps enhance texture, lock in moisture, and ensure that the seasonings stick evenly to the meat.
Why Olive Oil is Essential for Crispy Turkey Wings
- Encourages Browning and Crispiness
- When turkey wings are baked, olive oil helps render the fat under the skin, allowing it to crisp up beautifully.
- It promotes the Maillard reaction, a natural browning process that gives the skin a rich, golden color and a slightly crunchy texture.
- Prevents Dryness
- Baking can sometimes cause lean meats like turkey to dry out, but a thin layer of olive oil helps retain moisture, ensuring juicy and flavorful meat inside.
- Enhances Seasoning Adhesion
- Without oil, seasonings can fall off or cook unevenly. Olive oil acts as a binding agent, helping spices like paprika, garlic powder, and black pepper adhere to the skin for even flavor distribution.
How to Use Olive Oil for the Best Results
- Use Just Enough – A little goes a long way! Lightly brush or rub about 1-2 tablespoons of olive oil over the wings to avoid excess greasiness.
- Apply Before Seasoning – Coat the wings with oil first, then add seasonings to ensure the best flavor coverage.
- Combine with Butter for Extra Richness – If you want a deeper, richer taste, mix olive oil with melted butter for a combination of crispiness and extra flavor.
Alternative Oils for Crispiness
If you don’t have olive oil on hand, you can substitute it with:
- Avocado Oil – Has a high smoke point and a mild flavor, making it great for baking at high temperatures.
- Vegetable or Canola Oil – Neutral-tasting and effective for crisping up the skin.
- Ghee (Clarified Butter) – Adds a rich, buttery flavor while still promoting crispiness.
Using olive oil is a simple but effective way to get crispy, flavorful baked turkey wings without deep frying. It ensures the skin turns golden and delicious while keeping the meat juicy and tender inside!
Seasonings – Garlic Powder, Onion Powder, Paprika, Salt, and Black Pepper
Seasonings play a crucial role in enhancing the flavor of baked turkey wings, turning them into a mouthwatering dish with bold, savory, and slightly smoky notes. The combination of garlic powder, onion powder, paprika, salt, and black pepper creates a well-balanced and flavorful coating that perfectly complements the natural taste of turkey.
Breakdown of Each Seasoning and Its Role
- Garlic Powder – Rich, Savory Depth
- Garlic powder brings a bold and slightly sweet flavor that enhances the natural savoriness of turkey wings.
- Unlike fresh garlic, garlic powder distributes evenly across the meat, ensuring every bite is well-seasoned without burning during baking.
- Onion Powder – Mild Sweetness and Umami
- Onion powder provides a mild, slightly sweet umami boost that complements the garlic.
- It helps round out the overall seasoning blend, making the turkey wings more aromatic and flavorful.
- Paprika – Smoky or Sweet Flavor & Vibrant Color
- Paprika adds a mild smokiness or sweetness, depending on the variety used.
- It also gives the wings a beautiful reddish-golden hue when baked, making them visually appealing.
- Smoked paprika is a great option for a deeper, more complex flavor, while sweet paprika offers a milder taste.
- Salt – Enhances Natural Juiciness
- Salt is essential for bringing out the turkey’s natural flavors and ensuring the meat is well-seasoned.
- It also helps the wings retain moisture, preventing them from drying out during baking.
- Use kosher salt or sea salt for better control and even seasoning.
- Black Pepper – Gentle Heat and Earthy Spice
- Black pepper adds a subtle heat and earthy depth that balances the other seasonings.
- Freshly ground black pepper is recommended for maximum flavor and a slight kick of spice.
Tips for Seasoning Baked Turkey Wings
- Mix Well for Even Coverage – Combine all seasonings in a small bowl before sprinkling them onto the wings to ensure balanced flavor distribution.
- Massage into the Meat – Rubbing the seasoning blend into the turkey wings helps infuse the flavors deeply.
- Let It Marinate – For even better flavor, allow the wings to sit for 30 minutes to an hour after seasoning.
- Customize to Your Taste – Add a pinch of cayenne pepper for extra heat or a dash of Italian seasoning for herbal notes.
This simple but effective seasoning blend creates perfectly seasoned baked turkey wings with a crispy, flavorful crust and juicy, tender meat inside!
Optional Additions – Fresh Herbs, Lemon Juice, or Butter for Extra Flavor
While the basic seasoning of garlic powder, onion powder, paprika, salt, and black pepper provides a delicious foundation for baked turkey wings, adding extra layers of flavor with optional ingredients like fresh herbs, lemon juice, or butter can take your dish to the next level. These additions offer a unique twist, enhancing both the aroma and taste of your wings.
Fresh Herbs – Bright and Aromatic
Fresh herbs such as rosemary, thyme, or parsley can provide a burst of natural freshness and complexity to the dish. Here’s how they contribute:
- Rosemary – This herb has a woodsy, pine-like aroma that complements the richness of turkey, adding an earthy depth to the flavor profile. Toss some whole sprigs onto the wings while baking, or chop them finely and mix them with your seasoning blend.
- Thyme – With a subtle lemony and minty taste, thyme pairs wonderfully with turkey. It helps bring out the savory notes in the meat. Add a few sprigs of fresh thyme to the baking tray or rub chopped leaves directly onto the wings.
- Parsley – This herb adds a bright, fresh finish when sprinkled on the wings just before serving. Parsley helps balance out the richness of the turkey wings, making each bite feel light and refreshing.
Lemon Juice – Zesty and Refreshing
Lemon juice provides a zesty, tangy element that contrasts beautifully with the richness of the turkey wings. Here’s why it works so well:
- Balances Richness – The acidity from lemon juice cuts through the greasiness of the turkey skin, helping to balance the flavors and make the wings feel lighter.
- Enhances Seasonings – Lemon’s tang complements the savory seasonings, brightening up the overall flavor without overpowering it.
- How to Use – Squeeze fresh lemon juice over the wings before or after baking. For an extra citrusy punch, you can also place lemon slices on the baking tray as the wings cook, allowing them to release their juice into the wings.
Butter – Rich and Savory
Butter is a fantastic addition to elevate the flavor of baked turkey wings, adding richness and moisture. Here’s how to incorporate butter for the best results:
- Extra Richness – Melting butter over the wings creates a deliciously rich glaze, which helps crisp the skin and imparts a slightly nutty, savory flavor.
- Flavor Infusion – For a more aromatic touch, you can infuse the butter with garlic, herbs, or lemon zest before drizzling it over the wings. This infuses the butter with additional flavors, which are then absorbed by the turkey.
- How to Use – Melt 2-3 tablespoons of butter and brush it over the turkey wings during the last 10 minutes of baking for a golden, flavorful finish. Alternatively, you can add butter to the wings before baking for extra moisture.
How to Mix and Match
The beauty of these optional additions is that you can mix and match to suit your flavor preferences:
- Combine rosemary and lemon juice for a herbaceous, citrusy flavor.
- Pair thyme and butter for a rich, savory depth.
- Use parsley and lemon juice for a refreshing, light touch just before serving.
By incorporating these optional additions, your baked turkey wings will take on new dimensions of flavor, creating a more complex and satisfying eating experience. These tweaks allow you to customize the wings to your taste, whether you want them herb-forward, zesty, or rich and buttery!
How to Make the Best Baked Turkey Wings
Step 1: Preheat the Oven
Preheating the oven is an essential first step in baking turkey wings, as it ensures that the wings cook evenly and at the right temperature from the moment they enter the oven. By setting the correct baking temperature and allowing your oven to fully heat up before cooking, you create the perfect environment for the crispy, juicy texture that you’re aiming for.
Why Preheating is Important
- Even Cooking – Starting with a preheated oven ensures that your turkey wings will cook evenly from all sides. If you place the wings in a cold oven, they will cook unevenly, potentially resulting in overcooked edges while the center remains undercooked.
- Helps Achieve Crispiness – A preheated oven helps the skin of the wings crisp up right away. If the oven is not hot enough, the wings may cook too slowly, and the skin will not crisp as it should, leaving you with soggy wings rather than a beautifully golden, crispy exterior.
- Speeds Up Cooking Time – When your oven is preheated, the wings begin cooking immediately, reducing the overall cooking time and ensuring they are ready as quickly as possible.
How to Preheat Your Oven
- Set the Temperature – Most baked turkey wing recipes call for an oven temperature between 375°F and 425°F (190°C to 220°C). This range allows the wings to cook through while also achieving that desirable crispiness on the outside. If you’re going for extra-crispy wings, opt for the higher end of the range.
- Give It Time – Preheating your oven typically takes about 10-15 minutes, depending on your oven model. It’s essential to allow it to reach the set temperature before placing the wings inside, as an oven that’s not fully heated will not deliver consistent results.
- Use an Oven Thermometer – While most ovens have a built-in temperature gauge, they may not always be accurate. If you find that your oven’s temperature readings are inconsistent, using an oven thermometer can help ensure that your oven is at the correct temperature for baking.
Tips for Preheating
- Do Not Skip This Step – Preheating may seem like an easy step to overlook, but it’s crucial to getting those crispy, juicy wings you crave.
- Prepare the Wings While the Oven Heats – Use the time the oven is preheating to prepare your wings, season them, and arrange them on the baking sheet so that they are ready to go as soon as the oven reaches the desired temperature.
- Avoid Overcrowding the Baking Sheet – While the oven is heating, prepare the baking tray or sheet. Arrange your wings in a single layer without overcrowding them, as this allows for proper air circulation around the meat, helping the wings cook evenly and crisp up.
What Happens if You Don’t Preheat?
If you place turkey wings in an oven that hasn’t fully preheated:
- Uneven Cooking – Some parts of the wings may cook faster than others, leading to overcooked or undercooked sections.
- Soggy Skin – The skin may not become crisp because the cooking process starts slowly, which means the fat has more time to render out before it has the opportunity to crisp up.
By preheating the oven, you ensure that the turkey wings are cooked to perfection with a crispy exterior and moist, tender interior. It’s a simple yet important step in the cooking process that sets the stage for a delicious result.
Step 2: Season the Turkey Wings
Seasoning the turkey wings is one of the most critical steps in the cooking process, as it sets the foundation for the flavor. Proper seasoning enhances the natural taste of the turkey while giving the wings a savory, aromatic profile that complements the crispy skin and juicy meat. The seasoning blend you choose will play a significant role in determining how your wings taste, so it’s important to use the right balance of herbs, spices, and salt to maximize flavor.
Why Properly Seasoning Is Essential
- Enhances Flavor – Turkey wings, like most meats, have a relatively neutral flavor on their own. The seasoning you apply helps to elevate and enhance that natural taste. It’s what turns simple turkey wings into a deliciously savory meal with layers of flavor.
- Creates a Flavorful Crust – When you season the wings before baking, the spices and herbs create a crispy, flavorful crust as the skin bakes in the oven. This crust adds texture and a burst of flavor with every bite.
- Helps to Tenderize – Certain seasonings, especially those that contain salt, can help to draw out moisture from the meat, which in turn helps to tenderize the turkey wings, making them juicier and more succulent.
How to Season the Turkey Wings
- Start with a Base Seasoning Blend – For a basic and balanced flavor, use a combination of garlic powder, onion powder, paprika, salt, and black pepper. These ingredients are versatile and readily available, providing a savory, smoky, and mildly spicy flavor that works well with turkey.
- Coat the Wings Evenly – Before applying your seasoning, it’s important to pat the turkey wings dry with a paper towel. Moisture on the surface of the wings can prevent the seasoning from sticking evenly. Once they’re dry, rub the seasoning mixture onto the wings, making sure to coat all sides. A generous amount of seasoning is key to achieving great flavor throughout the meat.
- Massage the Seasonings Into the Meat – Don’t just sprinkle the seasonings on top; take a few extra moments to massage the seasoning mix into the turkey wings. This allows the flavors to be absorbed into the skin and meat, ensuring that every bite is well-seasoned.
- Let the Wings Rest – If you have the time, allow the wings to rest for 30 minutes to an hour after seasoning. This resting period gives the spices a chance to penetrate the meat and helps to enhance the overall flavor. If you’re in a rush, you can bake them right away, but the longer they sit, the better the flavors meld.
Optional Flavor Enhancements
While the base seasoning blend is essential, you can add optional ingredients for extra flavor complexity:
- Fresh Herbs – Add fresh rosemary, thyme, or parsley for an aromatic lift. Chop them finely and mix them into the seasoning blend, or scatter whole sprigs on the wings before baking.
- Citrus Zest – A little lemon or orange zest can give your wings a refreshing citrus note, balancing the richness of the turkey. Zest the citrus directly onto the wings after seasoning.
- Spicy Kick – If you prefer a spicier flavor, consider adding a pinch of cayenne pepper or a dash of hot sauce to the seasoning mix. This will add a nice kick without overpowering the overall flavor.
- Sweetness – A small amount of brown sugar or honey can be mixed into the seasoning blend to create a subtle sweet and savory contrast, especially when paired with smoked paprika or other spices.
Common Seasoning Mistakes to Avoid
- Over-salting – While salt is important for flavor, too much can make the wings too salty. It’s better to start with a light hand and adjust as needed.
- Not Using Enough Seasoning – Turkey wings have a lot of surface area, so make sure you use enough seasoning to fully coat them. If you only season the top, you’ll miss out on the full flavor impact.
- Skipping the Massage – Simply sprinkling the seasoning onto the wings doesn’t guarantee that the flavors will be absorbed. Always massage the spices into the meat for an even distribution.
How Seasoning Affects the Cooking Process
Properly seasoned turkey wings help to create a flavorful outer layer that crisps up beautifully while maintaining a tender and juicy interior. The seasoning also acts as a protective barrier, preventing the wings from drying out during baking. The flavors deepen as the wings cook, resulting in a deliciously satisfying final dish that’s bursting with flavor from the first bite to the last.
By taking the time to season the turkey wings properly, you’re setting the stage for a dish that’s not only crispy on the outside but succulent and flavorful on the inside as well!
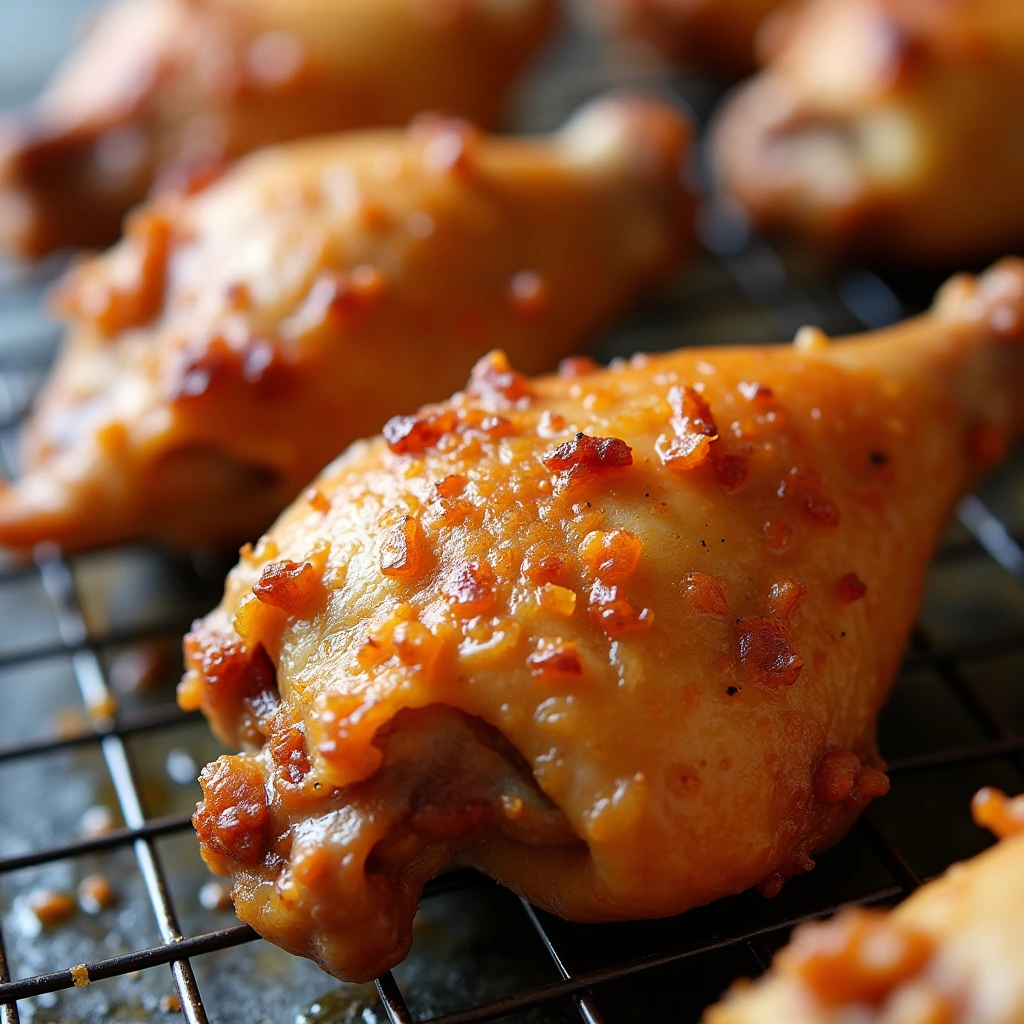
Step 3: Bake to Perfection
Baking your turkey wings is the final and most crucial step to achieving a crispy, golden skin and a tender, juicy interior. The oven’s heat transforms your seasoned turkey wings into a flavorful meal, and how you bake them makes all the difference. Getting the right balance of temperature, time, and technique ensures that your turkey wings come out perfectly every time.
Why Baking Time and Temperature Matter
- Crispy Skin – The right oven temperature is key to getting that delicious, crispy skin that everyone loves. Too low of a temperature, and the skin will be soft and rubbery; too high, and the wings may burn before the meat cooks through. A balanced temperature, typically around 400°F (200°C), allows the wings to crisp up perfectly while giving the meat enough time to cook through without drying out.
- Tender, Juicy Meat – The meat on the turkey wings must cook long enough to become tender and fully cooked, but not so long that it dries out. The right temperature and time allow the collagen in the wings to break down, keeping the meat moist and juicy.
- Even Cooking – A consistent oven temperature ensures that all parts of the wings cook evenly. Uneven heat or fluctuating temperatures could result in overcooked edges and an undercooked center.
How to Bake Turkey Wings to Perfection
- Arrange the Wings Properly – Once seasoned, arrange the turkey wings on a baking sheet in a single layer, ensuring there’s space between each wing. This promotes even airflow around the wings, allowing them to cook evenly and achieve that coveted crispy skin. If the wings are crowded on the sheet, they may steam rather than bake, leading to less crispy skin.
- Use a Rack for Crispiness – To elevate the wings and allow the heat to circulate around them, place a wire rack on the baking sheet before adding the wings. This helps the fat drain off, resulting in even crispier wings. The fat will drip away, leaving the skin crispy and light instead of greasy.
- Flip Halfway Through – For the best results, bake the turkey wings for about 35-45 minutes, flipping them halfway through the cooking time. This ensures that both sides of the wings get the chance to crisp up evenly. If you prefer extra crispiness, you can bake them a bit longer, but be careful not to dry them out.
Baking Times for Different Sizes of Turkey Wings
The baking time for turkey wings can vary depending on the size of the wings and the oven temperature. Here’s a general guideline to help you get the timing right:
- Small to Medium Wings (around 8–10 oz each) – Bake for about 35–40 minutes at 400°F (200°C).
- Large Wings (over 10 oz each) – Bake for about 45–50 minutes at 400°F (200°C).
- Frozen Wings – If you’re using frozen turkey wings, increase the baking time to 50–60 minutes. It’s also essential to thaw them completely before seasoning and baking for the best results.
Checking for Doneness
To ensure the turkey wings are fully cooked, use a meat thermometer to check the internal temperature. The wings should reach an internal temperature of 165°F (74°C) at the thickest part of the meat. If the temperature is too low, continue baking the wings and check every 5-10 minutes.
Tips for Perfectly Baked Turkey Wings
- Monitor the Skin – Keep an eye on the wings as they bake. Once the skin is golden and crispy, and the internal temperature has reached 165°F (74°C), they’re ready to come out of the oven.
- Rest Before Serving – Once your turkey wings are done baking, let them rest for 5-10 minutes before serving. This allows the juices to redistribute within the meat, ensuring that each bite is juicy and flavorful.
- Use the Broil Setting for Extra Crispiness – If the wings aren’t as crispy as you’d like by the end of the baking time, switch your oven to the broil setting for the last 2-3 minutes. Broiling will give the wings an extra crispy finish without overcooking the meat. Just be sure to keep a close watch to avoid burning them.
What Can Go Wrong When Baking Turkey Wings?
- Overbaking – If you bake the turkey wings for too long, they may dry out and lose their juicy tenderness. To prevent this, always check the internal temperature with a thermometer to ensure the wings don’t overcook.
- Undercooking – If the wings aren’t in the oven long enough, they may still be undercooked in the center. Be sure to follow the recommended baking time and use a thermometer to ensure the wings reach the proper internal temperature.
- Not Preheating the Oven – Baking turkey wings in an oven that isn’t fully preheated can result in uneven cooking. Always preheat your oven before placing the wings inside for the best results.
Why Baking is the Best Method for Turkey Wings
Baking turkey wings is the best method to achieve that crispiness without the added grease from frying. It’s a healthier way to cook, as the fat drains off the wings while they cook, leaving them with a crisp texture and rich flavor. Baking also allows the meat to retain its moisture, ensuring each bite is tender and flavorful.
By following the correct baking time, temperature, and tips, you’ll have perfectly baked turkey wings that are crispy on the outside, juicy on the inside, and full of flavor!
Tips for the Crispiest and Juiciest Turkey Wings
Use a Wire Rack – Helps Air Circulate for Crispy Skin
When it comes to achieving perfectly crispy turkey wings, one of the simplest yet most effective tricks is using a wire rack during the baking process. It may seem like a small detail, but placing your turkey wings on a wire rack while they bake can make a huge difference in the final texture and quality of the skin.
How a Wire Rack Works
A wire rack allows air to circulate all around the turkey wings while they bake. When you place the wings directly on a baking sheet, the bottom of the wings can become soggy or greasy because the fat rendered during cooking doesn’t have anywhere to go. The fat stays trapped beneath the wings, preventing the skin from crisping up properly.
By raising the wings on a wire rack, the fat drips away from the wings as they cook, leaving the skin crispier and less greasy. The constant airflow helps the skin dry out evenly, making it crunchy and golden brown on all sides.
Why Air Circulation Matters for Crispiness
Crispiness comes from the evaporation of moisture, and even air circulation is crucial for achieving this effect. Without proper airflow, the moisture trapped in the skin will prevent it from getting crispy. A wire rack elevates the wings, ensuring hot air circulates freely around them, which aids in the even evaporation of moisture. The result is a uniform, crisp texture across the entire surface of the wings.
Additionally, the high heat of the oven works with the wire rack to quickly dry out the skin, causing the collagen and fat beneath the skin to render properly. As a result, the skin crisps up without burning or becoming overcooked.
How to Use a Wire Rack for Baked Turkey Wings
- Position the Rack Correctly – Start by placing a baking sheet on your oven rack, and then set a wire rack on top of it. This setup allows the fat to drip off the wings while they cook, preventing it from pooling at the bottom of the pan. Ensure that the rack is centered on the baking sheet to allow even heat distribution.
- Place the Wings Evenly – Lay your seasoned turkey wings in a single layer on the wire rack. Make sure there’s some space between each wing to allow air to circulate freely. Crowding the wings can reduce the effectiveness of the rack and result in less crispiness.
- Monitor the Cooking Process – Once the wings are on the rack, you can bake them as usual. Since the heat circulates evenly, you may notice the skin crisping up faster than if the wings were resting on a flat baking sheet. Check for golden, crispy skin, and flip the wings halfway through cooking if you want them extra crispy.
Additional Tips for Maximum Crispiness
- Use Parchment Paper – If you’re concerned about any drips or grease splattering in your oven, you can line the baking sheet with parchment paper. It will catch the drips, but it won’t interfere with the airflow around the wings.
- Preheat the Rack – For extra crispiness, try preheating your wire rack in the oven for about 5–10 minutes before placing the wings on it. This gives the wings a head start in crisping up as soon as they hit the hot surface.
- Choose the Right Rack – Ensure that the wire rack you use has small enough holes to support the turkey wings. This prevents any smaller bits or crumbs from falling through, which could make a mess or result in uneven cooking.
Why You Should Use a Wire Rack Every Time
Using a wire rack is a technique that brings your baked turkey wings to the next level. It’s a simple method that requires minimal effort but yields maximum results. If you want perfectly crispy skin every time, this is an essential step. It helps you get that restaurant-quality crispiness without the need for deep-frying, making it a healthier, easier way to prepare your turkey wings while still delivering great flavor and texture.
By incorporating a wire rack into your turkey wing recipe, you’ll be amazed at how much crispier the skin becomes, while the meat inside remains moist and tender. This step is crucial for achieving wings that are not just tasty, but perfectly golden and crisp on every bite!
Don’t Overcrowd the Pan – Space Out Wings for Even Baking
One of the most common mistakes when baking turkey wings (or any type of poultry) is overcrowding the pan. While it may seem like you can pile a large quantity of wings into the baking sheet and call it a day, spacing out the wings on the pan is crucial for ensuring even cooking and achieving that perfect, crispy skin.
Why Spacing Matters for Even Cooking
When you overcrowd the pan, you’re essentially trapping the heat and moisture around the wings, causing them to steam rather than bake. As the wings cook, moisture from the meat and skin gets released into the air and the baking sheet. If there is not enough space for this moisture to escape, it ends up staying in contact with the wings. This prevents the skin from becoming crispy and results in a soggy texture.
Additionally, when wings are packed too closely together, the heat doesn’t circulate properly around each piece, leading to uneven cooking. Some wings may cook faster than others, while others may remain undercooked or not reach the desired crispiness. Proper spacing ensures uniform heat distribution so every wing cooks evenly and reaches its full potential in terms of both flavor and texture.
The Importance of Airflow in Baking
For the crispiest skin and tender meat, it’s essential to allow air to circulate freely around each turkey wing. This is where proper spacing really comes into play. When there’s enough room between each wing, hot air can flow around them evenly, promoting crispy skin all over the wings. The air helps dry out the skin quickly, so it crisps up and doesn’t get soggy.
Without sufficient airflow, the moisture that naturally escapes from the wings during baking will just accumulate around them, making the skin soft and rubbery. This also causes the skin to shrink, affecting the overall texture and appearance of the wings.
How to Avoid Overcrowding the Pan
- Use a Larger Baking Sheet – The first step to preventing overcrowding is choosing the right size baking sheet. Make sure the sheet is large enough to comfortably fit all of your turkey wings while leaving a little bit of space between them. A 12×18-inch baking sheet or larger is typically ideal for a batch of wings.
- Use Multiple Baking Sheets if Needed – If you’re making a larger batch of wings, don’t hesitate to use two or more baking sheets. This ensures that each wing has enough space to cook properly. You can rotate the sheets halfway through baking if your oven doesn’t cook evenly, but the key is ensuring even spacing for each batch.
- Arrange Wings in a Single Layer – Arrange your turkey wings in a single layer without overlapping. Placing them on their sides can help you maximize space without overcrowding. You want to avoid stacking or crowding wings on top of each other, as this will result in uneven cooking and a less crispy finish.
- Use a Wire Rack to Elevate the Wings – As mentioned earlier, using a wire rack helps with the even distribution of heat around each wing. When wings are placed on a rack, they are lifted off the baking sheet, which further enhances air circulation. This method is especially useful when your pan is a bit small, as it ensures the fat drains away from the wings, leaving them crispy and less greasy.
The Benefits of Properly Spaced Wings
- Crispier Skin – Spacing out the wings allows for more even cooking and crispier skin. As each wing receives adequate airflow, the skin can crisp up to perfection without becoming soggy.
- Tender, Juicy Meat – When wings are spaced out, they also cook more evenly inside. The meat can cook through at a consistent rate, ensuring it stays moist and juicy while the skin becomes crispy.
- Faster Cooking Time – When the wings are spaced out and cooking evenly, they cook faster, as each piece has the optimal amount of exposure to the heat. Overcrowded wings can take longer to cook, as the heat has to work harder to reach each wing.
What Happens When You Overcrowd the Pan?
- Soggy Skin – When wings are crowded together, the moisture released from the skin and meat has nowhere to escape. This trapped moisture keeps the skin soft instead of allowing it to crisp up properly.
- Uneven Cooking – If the wings are packed too closely together, the heat will be unevenly distributed, leading to overcooked or undercooked wings. Some wings may burn, while others are underdone or soggy.
- Longer Cooking Time – Overcrowded pans will slow down the cooking process because heat is less able to circulate properly. This may cause your turkey wings to take longer than necessary to cook, potentially leading to dry or overcooked meat.
Tips for Spacing Wings for the Best Results
- Leave a Small Gap Between Each Wing – Aim for about 1 to 2 inches of space between each wing. This allows enough airflow to reach the skin and ensures even cooking.
- Don’t Be Afraid to Rotate the Sheets – If you’re using multiple baking sheets, be sure to rotate them halfway through cooking. This helps ensure that all wings are exposed to the same amount of heat and cook evenly.
- Consider the Size of Your Wings – Larger wings need more space than smaller ones. If you’re working with extra-large turkey wings, consider using a larger rack or a bigger baking sheet to allow ample space between the wings.
Spacing out the turkey wings on the baking sheet may seem like a small detail, but it plays a critical role in achieving the perfect baked wings. By allowing enough room for air to circulate around each piece, you’re ensuring that the skin crisps up beautifully, the meat stays juicy, and the wings cook evenly. So, avoid overcrowding, and give your turkey wings the space they need to bake to crispy, golden perfection.
Let Them Rest Before Serving – Keeps Them Juicy and Flavorful
One of the simplest yet most effective techniques for ensuring your baked turkey wings are moist, tender, and flavorful is allowing them to rest after baking. This step is often overlooked, but it plays a critical role in enhancing the texture and flavor of your wings. By letting the wings rest, you give the juices time to redistribute throughout the meat, resulting in wings that are juicier and more flavorful.
Why Resting is Essential for Juicy Turkey Wings
When you cook turkey wings (or any meat), the heat causes the juices inside the meat to move towards the surface. If you cut into the wings immediately after they come out of the oven, all of those delicious juices will spill out, leaving the meat dry and lacking in flavor. Allowing the wings to rest gives those juices the time they need to reabsorb into the meat, ensuring that every bite is as moist and flavorful as possible.
Resting also helps to keep the texture of the wings tender. The muscle fibers in the meat contract when exposed to heat, and letting the wings rest for a few minutes helps them relax, resulting in more tender, bite-sized pieces. Without resting, the wings can become tougher and drier, especially if they’re cut or served too quickly.
How Long Should You Let Turkey Wings Rest?
While the optimal resting time can vary depending on the size of the wings and your cooking method, a general rule of thumb is to allow your turkey wings to rest for 5 to 10 minutes after they come out of the oven. This short period is usually enough for the juices to redistribute throughout the meat without allowing the wings to cool down too much.
For best results, don’t cover the wings too tightly during resting, as this could cause them to steam and lose some of their crispy texture. Instead, loosely cover them with foil or let them rest uncovered on a cutting board. The goal is to allow the wings to retain their crispiness while giving the meat a chance to become juicy and tender.
What Happens During the Resting Period?
- Juices Redistribute – As the turkey wings rest, the juices inside the meat have time to redistribute throughout the flesh, resulting in a more even texture and more flavor in every bite.
- Moisture Is Locked In – The resting period ensures that the moisture that was forced to the surface during baking has time to be absorbed back into the meat, so it stays moist and tender.
- Prevents Dryness – Cutting into the wings too soon releases the juices, leaving the meat dry and tough. Allowing them to rest helps seal in the moisture so you can enjoy perfectly juicy, flavorful wings.
The Benefits of Letting Turkey Wings Rest
- Juicier Meat – As the juices redistribute, the meat becomes more moist and tender, ensuring a succulent eating experience.
- Better Flavor – When the juices stay inside the wings, they carry more of the seasonings, fats, and flavors, making every bite richer and more satisfying.
- Improved Texture – Resting helps the meat fibers relax, leading to a more tender texture that is easier to bite into and enjoy.
When Resting is Especially Important for Baked Turkey Wings
- Larger Cuts – For larger wings or when baking a whole turkey wing, resting is even more important. The thicker the meat, the more time it needs to retain moisture.
- High Heat Cooking – If you bake your wings at a high temperature for a crispy finish, letting them rest allows the meat to remain tender even though it was exposed to intense heat.
- Longer Cooking Times – Wings that cook for a longer time may have more chance of releasing moisture during baking. Resting them ensures that the moisture isn’t lost and stays locked into the meat.
How to Rest Turkey Wings Properly
- Place Wings on a Cutting Board or Plate – Once the wings are done baking, transfer them to a cutting board or large plate. Don’t cover them tightly with foil—just lightly cover them if you prefer to keep them warm.
- Let Them Rest for 5-10 Minutes – Allow the wings to rest for about 5 to 10 minutes before serving. During this time, the juices will redistribute, and the wings will be ready for the best possible flavor and texture.
- Don’t Rush to Serve – Resist the urge to cut or serve the wings immediately. While they’re resting, the meat will absorb more flavor and retain its moisture.
Resting Tips for Maximum Flavor
- Resting and Crispy Skin – If you’re concerned about your crispy skin losing texture during the resting process, try resting the wings uncovered or loosely covered with foil. This will prevent the skin from steaming while still allowing the meat to rest properly.
- Keep Warm – If you need to keep your turkey wings warm while they rest, place them in a slightly warm oven (around 200°F/93°C) or cover them loosely with foil. However, avoid covering them tightly, as this can make the skin soggy.
- Serve with Accompaniments – While the wings are resting, it’s a great time to prepare any sides or dips you’ll be serving alongside. This way, everything can come together at once!
Resting your baked turkey wings is one of the simplest, most effective ways to ensure they are juicy, tender, and flavorful. By allowing the wings to rest for just a few minutes after baking, you’re giving the meat the time it needs to redistribute its juices, resulting in wings that are more satisfying and delicious. So, whether you’re preparing a family meal or a special dish for guests, don’t skip this important step—it’s the key to perfectly cooked turkey wings every time!
What to Serve with Baked Turkey Wings

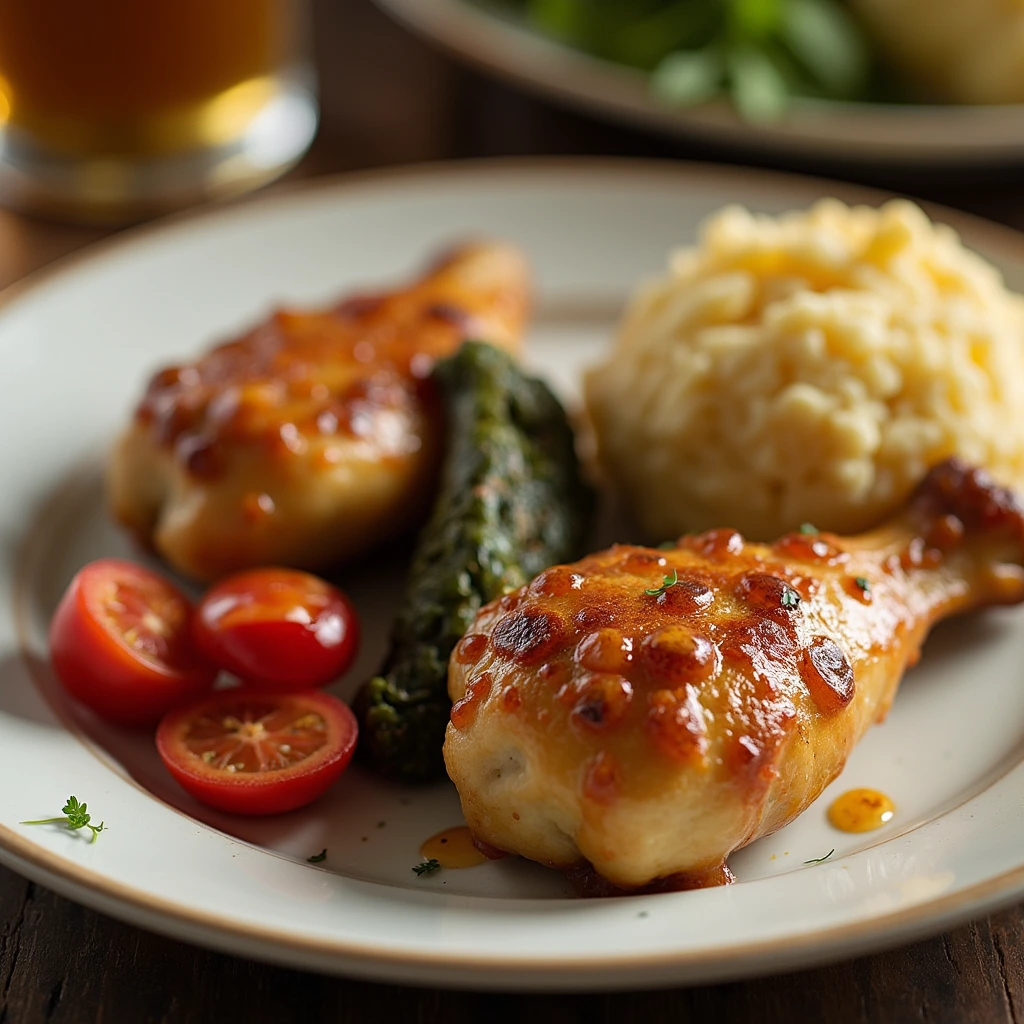
Side Dishes – Mashed Potatoes, Roasted Vegetables, Collard Greens
When it comes to baked turkey wings, the right side dishes can take your meal to the next level. The rich flavors of the turkey wings, with their crispy skin and juicy meat, pair beautifully with a variety of comforting, flavorful sides. Whether you’re preparing a weeknight dinner or a special family gathering, these side dish options are sure to complement the turkey wings perfectly.
Mashed Potatoes – Creamy, Buttery, and Comforting
Mashed potatoes are a classic side dish that pairs well with virtually any roasted or baked meat, and turkey wings are no exception. The creamy texture of mashed potatoes contrasts wonderfully with the crispy skin of the wings, creating a satisfying balance of flavors and textures.
- Why It Works: Mashed potatoes have a soft, buttery consistency that complements the juiciness of the turkey wings. They also act as a natural vessel for soaking up any delicious turkey drippings, enhancing their flavor. The richness of the potatoes works in harmony with the savory seasoning of the turkey wings.
- Tips for Perfect Mashed Potatoes:
- Use starchy potatoes like Russet or Yukon Gold for smooth, creamy mashed potatoes.
- For extra flavor, add garlic or cheese into the mashed potatoes. Cream cheese or butter can also make them more luxurious.
- Don’t forget to season well with salt, pepper, and even a touch of nutmeg or fresh herbs to enhance the flavor.
Roasted Vegetables – A Colorful and Nutritious Addition
Roasted vegetables are another excellent side that adds color, texture, and nutritional balance to your turkey wing meal. Vegetables like carrots, brussels sprouts, sweet potatoes, and parsnips roast beautifully, bringing out their natural sweetness and earthiness.
- Why It Works: Roasted vegetables provide a delicious contrast to the richness of turkey wings. The caramelized edges and tender centers of roasted vegetables are satisfying yet light enough not to overshadow the main dish. Additionally, roasting vegetables with simple herbs and spices brings out their natural sweetness, making them the perfect complement to savory turkey wings.
- Tips for Perfect Roasted Vegetables:
- Cut vegetables into uniform pieces so they cook evenly.
- Toss vegetables in olive oil, garlic, and your favorite spices, such as thyme, rosemary, or paprika, to enhance their flavor.
- Roast at 400°F (200°C) for 25-35 minutes, flipping halfway through to ensure even browning.
Collard Greens – A Southern Classic with a Bold Flavor
For a more traditional southern touch, collard greens are a fantastic side dish to serve alongside baked turkey wings. The slightly bitter, earthy flavor of collard greens is an excellent foil to the rich, savory flavor of turkey wings.
- Why It Works: The deep, savory flavor of collard greens, often cooked with ham hocks or smoked turkey, balances out the richness of the turkey wings. The slight bitterness of the greens contrasts nicely with the sweetness of roasted vegetables or mashed potatoes, creating a well-rounded plate. Additionally, collard greens are full of nutrients like vitamins A and K, making them a healthy complement to the meal.
- Tips for Perfect Collard Greens:
- Wash thoroughly to remove any grit or dirt before cooking.
- Slow-cook collard greens for several hours in a flavorful broth with onions, garlic, and smoked meats (like ham hocks or turkey necks) for depth of flavor.
- Season well with salt, vinegar, and a pinch of sugar to balance the bitterness and add complexity.
Additional Side Dish Suggestions
- Cornbread – For a warm, comforting addition, try making cornbread. The slight sweetness and crumbly texture pair well with the savory turkey wings.
- Mac and Cheese – The creamy, cheesy goodness of mac and cheese is another indulgent choice that complements the turkey wings beautifully.
- Rice Pilaf – A light, fragrant rice pilaf with vegetables and herbs can provide a simple, yet flavorful side to the turkey wings, soaking up any extra turkey juices.
- Green Beans Almondine – For a lighter, slightly nutty side, sautéed green beans with almonds and a squeeze of lemon juice can be a refreshing option that pairs well with the turkey wings.
Serving Tips for a Complete Meal
- Balance Flavors: Aim for a mix of sides that provide a balance of textures and flavors—creamy, crispy, and tender options work well together. For example, pair the creamy mashed potatoes with crispy roasted vegetables and a hearty portion of collard greens for a full and satisfying meal.
- Portion Sizes: Be mindful of the portion sizes when serving your sides to ensure you’re not overwhelming your guests with too much food. A small helping of each side dish is often enough to create a fulfilling meal without overshadowing the turkey wings.
- Garnish for Visual Appeal: Don’t forget to garnish your dishes for visual appeal. Fresh herbs, like parsley or thyme, sprinkled on the mashed potatoes or collard greens can elevate the presentation, making the meal feel even more special.
The side dishes you choose to serve with your baked turkey wings can elevate the entire meal, adding both variety and depth to the plate. Mashed potatoes, roasted vegetables, and collard greens are tried-and-true options that perfectly complement the richness of the turkey wings. With a little attention to detail in seasoning and cooking, these side dishes will not only complete the meal but also offer a variety of textures and flavors that enhance the turkey wings’ deliciousness. Whether you’re enjoying a casual family dinner or preparing a special occasion meal, these sides are sure to delight and satisfy.
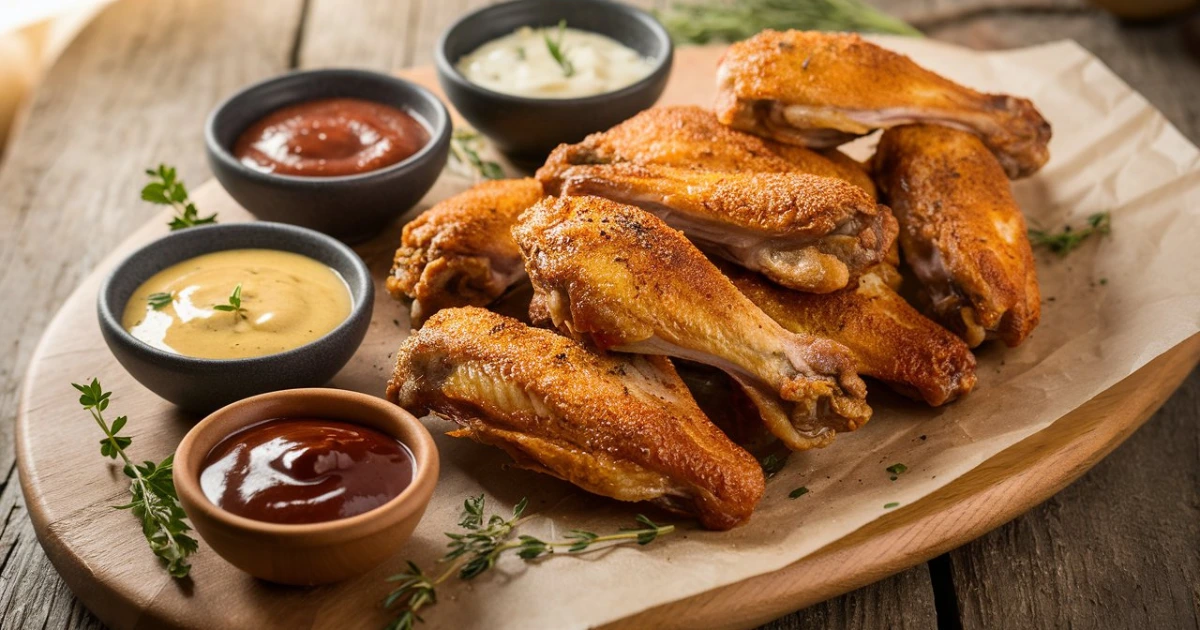
Dipping Sauces – Honey Mustard, Garlic Butter, Homemade Barbecue Sauce
No meal of baked turkey wings is complete without the perfect dipping sauce to enhance their flavor. Dipping sauces add an extra layer of taste and allow you to customize each bite. Whether you prefer something tangy, rich, or sweet, the right dipping sauce can elevate the experience of eating turkey wings and offer a variety of flavors that complement the crispiness and juiciness of the baked wings.
Honey Mustard – Sweet and Tangy Balance
Honey mustard is a classic dipping sauce that brings together the best of both worlds—sweetness and tanginess. The honey adds a natural sweetness that balances the acidity of the mustard, creating a sauce that’s both creamy and slightly sharp. It’s a simple sauce that works beautifully with the savory flavors of turkey wings.
- Why It Works: The sweet and tangy flavor profile of honey mustard enhances the crispy exterior of the turkey wings, while the creaminess of the sauce complements the juicy meat inside. It’s a versatile sauce that goes well with a variety of proteins, but it’s especially delightful with baked turkey wings.
- How to Make It:
- Combine mustard (yellow or Dijon), honey, a dash of vinegar or lemon juice, and a touch of garlic powder to taste. You can adjust the balance of sweet and tangy to your liking by adding more honey or mustard.
- For a thicker consistency, incorporate mayonnaise or Greek yogurt to create a creamy base.
Garlic Butter – Rich and Savory
Garlic butter is a rich, savory dipping sauce that adds a decadent touch to your baked turkey wings. It’s simple to make and packs a lot of flavor, thanks to the garlic and butter. The butter creates a silky, smooth texture, while the garlic provides a savory depth that pairs wonderfully with the turkey wings’ crispy skin.
- Why It Works: The rich, savory flavor of garlic butter complements the crispy, juicy turkey wings, providing a luscious dipping experience. The butter also helps to moisten the turkey wings if you prefer them with extra moisture, while the garlic infuses a bold, aromatic flavor.
- How to Make It:
- Melt butter in a saucepan and stir in freshly minced garlic. Cook for a couple of minutes until the garlic becomes fragrant. You can also add herbs such as parsley or thyme for an extra layer of flavor.
- To balance out the richness, add a small splash of lemon juice or hot sauce to give the sauce a bit of acidity and brightness.
Homemade Barbecue Sauce – Sweet, Smoky, and Tangy
Homemade barbecue sauce offers the perfect balance of sweet, smoky, and tangy flavors, making it a great dipping sauce for baked turkey wings. Unlike store-bought versions, homemade barbecue sauce allows you to adjust the flavor to your preference, whether you want it spicy, sweet, or tangy. It’s also a fantastic way to add smoky depth to the turkey wings without needing a smoker.
- Why It Works: The sweet and smoky notes in barbecue sauce pair perfectly with the savory turkey wings. The tanginess adds a bit of bite, while the smoky undertones bring a depth of flavor that complements the crispy skin of the turkey. The sticky texture of the barbecue sauce also helps it adhere to the wings, making each bite even more delicious.
- How to Make It:
- Start with ketchup as your base, and then add brown sugar, apple cider vinegar, molasses, and worcestershire sauce to create the foundation of the sauce.
- Add smoked paprika, onion powder, garlic powder, and a pinch of cayenne pepper for heat and smokiness. Adjust the sweetness with more sugar or the acidity with extra vinegar. If you prefer a spicier kick, add a few drops of hot sauce.
- Simmer the sauce for 20-30 minutes to allow the flavors to meld together and thicken to your desired consistency.
Other Delicious Dipping Sauce Options
While honey mustard, garlic butter, and homemade barbecue sauce are fantastic choices, there are plenty of other creative dipping sauces you can try to accompany your baked turkey wings.
- Ranch Dressing – For a cool, creamy contrast to the crispy turkey wings, ranch dressing is a popular choice. It’s especially great for those who love a mild flavor with a creamy texture.
- Blue Cheese Dressing – If you enjoy a more robust, tangy sauce, blue cheese dressing provides a rich, creamy option with a distinct flavor. It pairs perfectly with turkey wings, especially if you want a flavor profile reminiscent of classic buffalo wings.
- Spicy Sriracha Mayo – For those who love heat, a mixture of mayonnaise and sriracha sauce creates a creamy, spicy dipping sauce that adds a kick to the turkey wings.
- Lemon Dill Sauce – For a refreshing, herbaceous dip, try a lemony dill sauce made with Greek yogurt, fresh dill, lemon juice, and a bit of garlic.
Dipping sauces are a fun and flavorful way to elevate your baked turkey wings. Whether you opt for a sweet and tangy honey mustard, a rich and savory garlic butter, or a smoky homemade barbecue sauce, these dips will complement the crispy, juicy turkey wings and take your meal to new heights. Feel free to experiment with other sauces like ranch or blue cheese to create a variety of dipping options for your guests. With the right dipping sauces, your baked turkey wings will become an unforgettable meal, bursting with flavor in every bite.
Storage & Reheating Tips – Store in an Airtight Container; Reheat in the Oven for Crispiness
To keep your baked turkey wings tasting fresh and delicious, proper storage and reheating are essential. If you’ve made extra or simply have leftovers, it’s important to store them correctly so they maintain their flavor and texture. Reheating the wings properly will ensure they retain their crispy skin and juicy meat. Here are some storage and reheating tips to help you enjoy your baked turkey wings at their best, even after they’ve been sitting for a while.
Storage – Keep Them Fresh and Juicy
After enjoying your freshly baked turkey wings, you might have some leftovers that you want to keep for later. To ensure they stay fresh and flavorful, follow these storage tips:
- Let the Wings Cool First: Before storing your turkey wings, allow them to cool to room temperature. Storing them while they’re still hot can create condensation inside the container, leading to sogginess. This is especially important if you’re storing them with their skin intact, as you want to preserve their crispy texture as much as possible.
- Use an Airtight Container: To keep your wings fresh, place them in an airtight container. This will help lock in moisture while preventing the wings from absorbing any odors from the fridge. If you don’t have a container large enough to hold the wings without stacking them, you can also wrap them tightly in plastic wrap or aluminum foil before placing them in the container. Be sure to press out as much air as possible to minimize exposure to moisture, which can cause them to lose their texture.
- Store in the Refrigerator: Store the wings in the fridge if you plan to eat them within a few days. Turkey wings will stay fresh in the fridge for about 3 to 4 days. If you need to store them for longer, freezing is a good option.
- Freezing for Longer Storage: If you won’t be eating the leftovers within a few days, freezing is your best bet. To freeze your baked turkey wings, wrap them tightly in plastic wrap or freezer paper before placing them in a freezer bag or an airtight container. For best results, consume frozen wings within 3 months. When you’re ready to eat them, you can reheat them directly from frozen, but be sure to follow proper reheating steps to retain their texture.
Reheating – Crisp Them Up Again
The key to reheating your baked turkey wings is to preserve their crispy skin and juicy interior. While there are several ways to reheat turkey wings, the oven is the best option for maintaining their crispy texture. Here’s how to do it:
- Preheat the Oven: Preheat your oven to 350°F (175°C). This is the ideal temperature for reheating baked turkey wings, as it’s hot enough to crisp them up without drying them out.
- Arrange the Wings on a Baking Sheet: Lay your turkey wings out on a baking sheet lined with parchment paper or a silicone baking mat. If you have a wire rack, use it to elevate the wings, as it allows for better air circulation, resulting in crispier skin.
- Cover with Foil (Optional): If you’re concerned about drying out the wings, you can loosely cover them with aluminum foil for the first 10-15 minutes of reheating. This will help trap moisture and prevent the wings from getting too dry. After that, remove the foil for the final few minutes to allow the skin to crisp up.
- Reheat for 15-20 Minutes: Place the wings in the preheated oven and reheat them for about 15-20 minutes. Check them periodically to ensure they don’t dry out. If you’re reheating frozen wings, you may need to extend the reheating time by an additional 10-15 minutes. Make sure the wings reach an internal temperature of at least 165°F (74°C) before serving.
- Alternative – Use the Air Fryer: If you have an air fryer, this is another great option for reheating your baked turkey wings. Set the air fryer to 350°F (175°C) and cook the wings for about 5-7 minutes, checking them halfway through. The air fryer’s hot circulating air will help crisp up the skin and heat the meat thoroughly.
- Microwave (Less Recommended): While it’s tempting to use the microwave for quick reheating, this method can cause the wings to lose their crispiness, as microwaves tend to steam the wings rather than re-crisp them. However, if you’re in a hurry, you can use the microwave for 30-60 seconds to warm them up, then transfer them to the oven or air fryer for a few minutes to restore the crispiness.
Pro Tip – Don’t Overheat
One of the most important things to keep in mind when reheating baked turkey wings is not to overheat them. Overheating can cause the meat to dry out, making it tough and less enjoyable. Stick to moderate reheating times and temperatures to ensure the wings remain tender and juicy.
Serving After Reheating
Once your turkey wings are properly reheated and crispy, they’re ready to be enjoyed again! You can serve them with your favorite dipping sauces, or pair them with fresh sides like roasted vegetables, mashed potatoes, or a simple salad. The key is to savor the crispy texture and juicy interior, making it hard to believe these wings were ever leftovers.
Proper storage and reheating techniques are crucial for preserving the flavor and texture of your baked turkey wings. By following these tips—storing them in an airtight container, reheating them in the oven or air fryer, and avoiding overheating—you can enjoy perfectly crisp, juicy turkey wings every time, even if they’re leftover from a previous meal.
Conclusion: Why Baked Turkey Wings Are a Must-Try
Baked turkey wings are a simple yet delicious way to enjoy tender, flavorful, and crispy wings without the hassle of frying. Whether you’re cooking them for a family meal, meal prep, or a special occasion, these wings offer a healthier alternative to their deep-fried counterparts while still delivering on taste and texture. With minimal ingredients and easy preparation, you can create a dish that is both satisfying and versatile.
By following the right tips for seasoning, baking, and reheating, you can ensure your turkey wings stay juicy and crispy every time. Plus, with endless options for sides and sauces, baked turkey wings can be paired with just about anything to complete a delicious meal.
From the first bite to the last, baked turkey wings are a sure way to impress your family and guests with their flavor and ease. Whether fresh or leftover, they’re guaranteed to be a hit in any kitchen. Try them today and discover why baked turkey wings are the perfect meal choice!
Are you ready to try this recipe?
There are no reviews yet. Be the first one to write one.