
Salmon Sushi Bake: A Quick and Easy Weeknight Dinner Recipe
If you love sushi but don’t want to spend time rolling it, Salmon Sushi Bake is the perfect solution. This easy and flavorful dish takes all the best parts of sushi—tender salmon, creamy mayo, and perfectly seasoned rice—and transforms them into a warm, comforting casserole. It’s a simple, oven-baked meal that’s great for busy weeknights, family dinners, or even meal prep.
Unlike traditional sushi, this baked version requires no special skills—just layer the ingredients in a dish, bake until golden and bubbly, and serve with crispy nori sheets for a delicious bite. Whether you’re new to making sushi at home or looking for a quick and satisfying dinner, this Salmon Sushi Bake is sure to become a favorite. Let’s dive into how to make this irresistible dish step by step!
What is Salmon Sushi Bake?
What is a Sushi Bake and How Does It Differ from Traditional Sushi?
Sushi Bake is a layered, oven-baked dish that takes inspiration from traditional sushi flavors but is served in a casserole-style format rather than rolled into individual pieces. It is a modern twist on sushi, combining savory salmon, seasoned rice, creamy toppings, and crispy nori sheets for wrapping.
Unlike traditional sushi, which requires precise rolling techniques using a bamboo mat, a sushi bake is effortless to assemble. The ingredients are layered in a baking dish, baked until warm and slightly crispy on top, and then scooped onto nori sheets for serving. This makes it an excellent beginner-friendly option for those who love sushi but want a simpler, no-fuss method to enjoy it at home.
Key Differences Between Sushi Bake and Traditional Sushi
- Preparation Method:
- Traditional sushi is made by rolling ingredients in seaweed with rice and slicing it into bite-sized pieces.
- Sushi bake is assembled in layers, baked in an oven, and then served in a deconstructed way.
- Texture and Temperature:
- Classic sushi is served cold or at room temperature.
- Sushi bake is warm and creamy with a slightly crisp top, thanks to the baking process.
- Serving Style:
- Traditional sushi is eaten as hand rolls, nigiri, or maki rolls.
- Sushi bake is scooped onto nori sheets and eaten like a mini taco or bite-sized wrap.
- Ease of Making:
- Sushi requires rolling skills, precise ingredient placement, and cutting techniques.
- Sushi bake is beginner-friendly—simply mix, layer, bake, and serve.
- Customization:
- While sushi rolls follow a more traditional approach with specific fillings, sushi bake allows for creative variations, including different proteins like crab, shrimp, or tofu, and unique toppings such as cheese or spicy sauces.
Why People Love Sushi Bake
Sushi bake has become a popular home-cooked dish because it’s easy, customizable, and perfect for sharing. It’s an excellent choice for potlucks, family meals, or when you crave sushi without the extra effort. Whether you’re new to sushi-making or looking for a quick and satisfying alternative, Salmon Sushi Bake offers all the delicious flavors of sushi with a simpler and cozier twist!
The Fusion of Japanese and Western Flavors in Sushi Bake
One of the most exciting aspects of Sushi Bake is its ability to combine traditional Japanese ingredients with Western culinary techniques and flavors. This fusion results in a dish that feels both comforting and exotic, making it a crowd-pleasing meal for sushi lovers and newcomers alike. Let’s break down the Japanese and Western elements that come together in a perfect balance.
Japanese Flavors in Sushi Bake
At the heart of any sushi bake is the Japanese influence, which draws from traditional sushi components:
- Sushi Rice:
The base of any sushi dish, including sushi bake, is sushi rice, seasoned with a mix of rice vinegar, sugar, and salt to create a delicate balance of tangy and sweet flavors. This rice provides the perfect, sticky texture to hold the dish together, mimicking the foundation of sushi rolls. - Salmon:
Salmon is one of the most popular fish used in sushi, and in sushi bake, it retains that rich, buttery texture and flavor that pairs wonderfully with the creamy, warm components of the casserole. While traditional sushi often features raw salmon, sushi bake typically uses cooked or broiled salmon, bringing out its natural umami while ensuring a more comforting, baked texture. - Nori Sheets:
Nori (dried seaweed) is another essential component of sushi, often used as the wrapper for rolls. In a sushi bake, nori sheets serve as a crisp, savory accompaniment to the baked dish, allowing you to scoop the warm, layered casserole onto the nori and create a flavorful bite. It also adds a layer of umami and texture to balance out the creaminess of the bake. - Mayo and Sriracha:
The Japanese flavor profile often includes mayonnaise, specifically the creamy, tangy Kewpie mayo commonly found in Japanese cuisine. This mayo is often paired with sriracha, creating a spicy, sweet sauce that complements the rich flavors of the salmon and rice, taking it beyond traditional sushi into the realm of comfort food.
Western Flavors in Sushi Bake
While sushi bake stays rooted in its Japanese origins, it also incorporates several Western culinary influences that make it feel more familiar and approachable to a wider audience:
- Baked Casserole Style:
One of the key distinctions of sushi bake is its baked, casserole-style preparation, which is a Western cooking technique. Instead of delicate rolls that require careful assembly, sushi bake is a more casual, homey dish, layered in a baking dish and heated in the oven, creating a crispy top with a soft, creamy interior. This cooking method brings a comfort food vibe that’s easy to prepare and perfect for gatherings. - Cheese:
While cheese isn’t traditionally part of sushi, many sushi bake recipes feature a layer of cream cheese mixed with the salmon or used as a topping. This ingredient is a hallmark of Western comfort foods, adding richness and creaminess to the bake. The mild, tangy flavor of cream cheese blends beautifully with the spicy mayo and sushi rice, making the dish feel indulgent and satisfying. - Toppings and Variations:
Sushi bake allows for Western-inspired variations that include toppings like avocado, scallions, and even panko breadcrumbs for added crunch. These ingredients reflect a more modern, fusion approach, as people enjoy experimenting with flavors and textures. The creamy avocado adds a buttery finish, while panko breadcrumbs offer a crispy contrast to the soft, baked filling. - Spicy and Sweet Sauces:
Western sauces, such as teriyaki sauce or honey, are often drizzled over the top or mixed into the sushi bake to create a sweet and savory contrast. These sauces add an extra layer of flavor that’s less common in traditional sushi but resonates with Western palates.
Why the Fusion Works So Well
This marriage of Japanese and Western flavors creates a unique dish that appeals to both traditional sushi enthusiasts and those who enjoy the richness of Western comfort foods. The creamy textures, savory flavors, and spicy kick come together harmoniously in a way that feels both familiar and exciting. Whether you’re familiar with sushi or just discovering it, Sushi Bake offers the best of both worlds in every bite—combining the delicate, umami-rich notes of Japanese cuisine with the comforting, creamy indulgence of Western dishes.
This fusion creates a sushi experience that’s not only delicious and fun to make, but also perfect for sharing with friends and family who may not be as adventurous with traditional sushi but still love flavor-packed meals.
How It’s Baked in Layers and Served with Nori Sheets
One of the standout features of Sushi Bake is its unique layered baking method, which sets it apart from traditional sushi. Instead of individually rolling ingredients, the sushi bake brings everything together in a casserole-style dish, making it easier to prepare and serve. Let’s dive deeper into how this layered approach works and why nori sheets play such an important role in the final presentation.
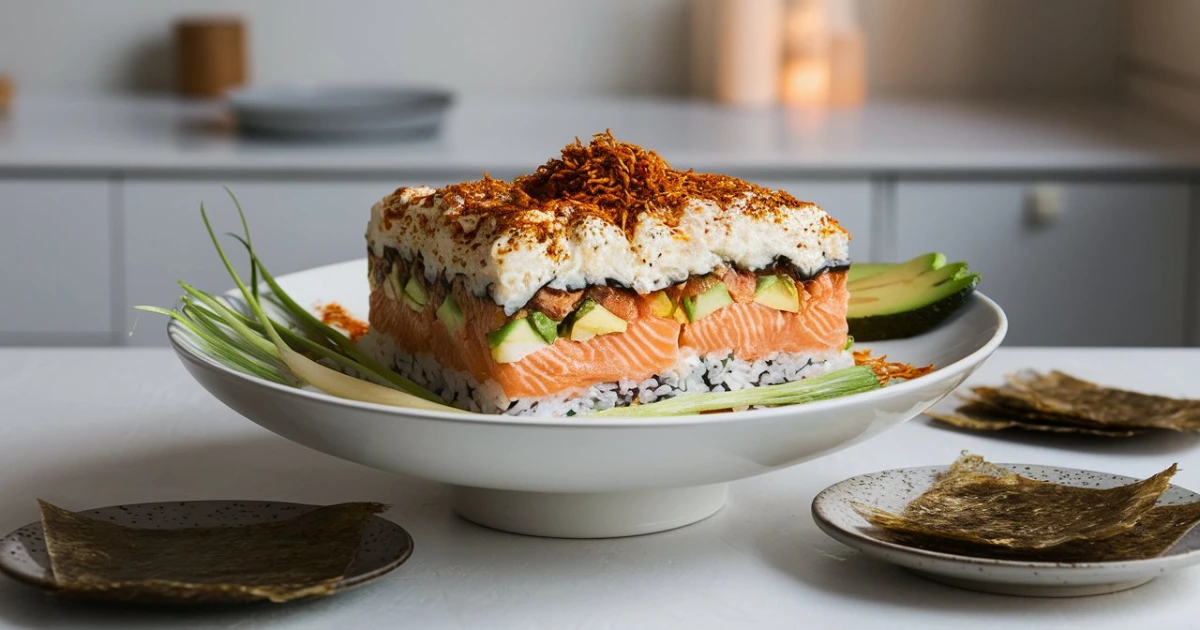
Layering the Ingredients in a Baking Dish
Sushi bake is made by layering the ingredients in a baking dish to create a beautifully cohesive and flavorful casserole. Each layer serves a purpose, contributing to the overall texture and flavor of the dish. Here’s how the layering process typically works:
- Base Layer – Sushi Rice:
The first layer consists of cooked sushi rice that’s seasoned with a mixture of rice vinegar, sugar, and salt. This layer is spread evenly across the bottom of the baking dish and provides a sticky, flavorful foundation. The seasoned rice adds a light tanginess that complements the richness of the salmon and other ingredients. The sticky texture of sushi rice helps everything stay together as it bakes. - Salmon and Sauce Layer:
On top of the rice, you add a flaked salmon layer. The salmon is typically cooked or broiled before being shredded into smaller pieces. It’s then mixed with a creamy sauce made from mayonnaise (often Kewpie mayo), sriracha, and sometimes cream cheese. The salmon mixture is spread over the rice, creating a rich, creamy layer that brings the dish together. The sauce adds a spicy and tangy flavor to the salmon, which contrasts perfectly with the mild sushi rice. - Topping Layer:
The top layer often includes additional sauces like teriyaki or eel sauce to enhance the flavor and give the dish a glossy finish. Some variations also include panko breadcrumbs for a crunchy texture or cheese for added creaminess and flavor. This layer is baked in the oven until it becomes golden and bubbly, forming a slightly crispy top. The result is a crispy outer layer with a creamy, tender interior. - Final Layer – Garnishes:
After baking, you can finish the sushi bake with a variety of garnishes such as scallions, sesame seeds, or extra sriracha for a spicy kick. These toppings not only add color and texture but also bring out the umami flavors in the dish. Fresh avocado slices or Tobiko (fish roe) can also be added for a smooth, rich taste and an extra pop of flavor.
Baking the Dish
Once all the ingredients are layered in the baking dish, the sushi bake is placed in the oven to cook. The baking process usually takes 15 to 20 minutes, allowing the flavors to meld together and creating that beautiful golden top. The heat from the oven helps to melt the cream cheese and thicken the mayo sauce, while also allowing the panko breadcrumbs or cheese to crisp up. The dish is fully cooked when the top is slightly browned and bubbling, and the ingredients have all come together into a creamy, satisfying casserole.
Serving with Nori Sheets
Once the sushi bake is out of the oven, it’s time to serve! Unlike traditional sushi, where you eat individual rolls, sushi bake is served with nori sheets on the side. Nori is the dried seaweed used in sushi, and it serves as the perfect wrapper for the warm, baked mixture.
- How to Serve:
To eat the sushi bake, simply scoop a portion of the baked layers onto a sheet of nori. The nori sheets add a delightful crunch and umami flavor that contrasts beautifully with the warm, creamy casserole. It’s like making your own sushi rolls, but with a more casual and fun approach. You can also fold the nori around the mixture like a mini taco for a bite-sized treat. - Why Nori Sheets?
The nori provides a savory, crispy element that balances the richness of the creamy sushi bake. It also acts as the perfect way to hold the mixture together while adding that signature seaweed flavor that’s a key part of sushi. Plus, nori is low in calories and adds an extra boost of nutrients, including vitamins and minerals like iodine, fiber, and antioxidants.
Why the Layering and Nori Sheets Work So Well Together
This layered baking method and the use of nori sheets make the sushi bake an exciting and interactive meal. The baked layers provide a fusion of textures—creamy, crunchy, and savory—while the nori offers the authentic sushi experience in a fun and easy-to-eat way. The crispy nori contrasts beautifully with the soft and rich layers, making each bite a delicious combination of flavors and textures.
It’s a deconstructed sushi experience, where you can enjoy the classic components of sushi in a new and approachable way. The layered structure ensures that every bite is filled with balanced flavors, and the nori sheets allow you to enjoy the dish in the most flavorful and fun manner!
Ingredients You Need for Salmon Sushi Bake
Main Ingredients: Salmon, Sushi Rice, Kewpie Mayo, Cream Cheese, Sriracha, Soy Sauce, and Furikake
The beauty of Sushi Bake lies not only in its unique layering technique but also in the careful selection of main ingredients. Each ingredient brings its own distinct flavor and texture, creating a dish that’s both comforting and indulgent, with just the right amount of umami. Let’s take a closer look at the core ingredients that make this dish a fusion of Japanese and Western flavors.
1. Salmon – The Star of the Dish
Salmon is the star ingredient in sushi bake. Known for its rich, buttery texture and mild, slightly sweet flavor, salmon holds the dish together and adds a deliciously tender component that pairs beautifully with the other creamy elements.
- Why Salmon?
Salmon is often favored in sushi for its high omega-3 content and mild, fatty texture. In sushi bake, the salmon is usually cooked or broiled, which brings out its natural richness while maintaining a soft texture that melts in your mouth. Whether you’re using fresh salmon fillets or canned salmon, it’s essential to flake the fish into small pieces so it can be evenly distributed throughout the bake. The salmon’s umami-rich flavor is a perfect match for the creamy, tangy toppings, and it adds a wonderful balance to the dish.
2. Sushi Rice – The Foundation of Sushi Bake
Sushi rice is essential for creating the sticky, slightly tangy base of the sushi bake. Sushi rice is a short-grain variety that’s particularly well-suited for holding together in rolls, making it ideal for layering in the bake.
- Preparing Sushi Rice:
Sushi rice is typically cooked, then seasoned with a mixture of rice vinegar, sugar, and salt. This combination creates a slightly sweet, tangy flavor that balances the savory flavors of the salmon and sauces. It’s important to let the rice cool slightly before using it in the bake, as this ensures it stays sticky enough to hold everything together without becoming too mushy.
3. Kewpie Mayo – A Creamy and Tangy Japanese Twist
One of the key ingredients that sets sushi bake apart from other casseroles is the use of Kewpie mayo. This Japanese mayonnaise is known for its creamy, slightly tangy flavor, which makes it a standout addition to many Japanese dishes, especially sushi.
- Why Kewpie Mayo?
Unlike traditional Western mayonnaise, Kewpie mayo is made with egg yolks, which gives it a richer, smoother texture. It also contains rice vinegar, which contributes to its mildly sweet and tangy flavor. In sushi bake, Kewpie mayo serves as the perfect binding agent that holds the salmon and rice together while creating a creamy texture that enhances the overall richness of the dish. It’s also typically mixed with other ingredients, such as sriracha, to create a flavorful sauce that’s both spicy and creamy.
4. Cream Cheese – Rich and Velvety
Cream cheese is a common addition in sushi bake and adds a velvety, smooth texture that complements the salmon and rice. Its mild, slightly tangy taste balances the rich, fatty elements of the dish, providing a creamy base that ties all the flavors together.
- Why Cream Cheese?
Cream cheese contributes to the overall creaminess of the bake while providing a slightly tangy undertone that contrasts nicely with the umami of the salmon. It also melts beautifully when baked, helping to create a smooth, cohesive texture throughout the casserole. Many people enjoy the richness that cream cheese brings to the dish, making it feel more indulgent and satisfying.
5. Sriracha – Adding Heat and Spice
Sriracha is a popular spicy condiment used in many fusion dishes, and it’s an essential component in the sushi bake sauce. This chili garlic sauce is known for its spicy heat combined with sweet undertones, making it the perfect counterpart to the creamy elements of the bake.
- Why Sriracha?
The spicy kick from sriracha provides an excellent contrast to the rich creaminess of the mayo and cream cheese. It also adds depth of flavor, balancing out the richness and giving the dish an extra layer of complexity. Sriracha can be mixed directly into the cream cheese and mayo or drizzled on top as a finishing touch, depending on how much heat you prefer.
6. Soy Sauce – A Key Umami Element
Soy sauce is another important ingredient that adds a deep umami flavor to the sushi bake. It’s commonly used in Japanese cuisine to enhance savory dishes, and it plays a crucial role in balancing the other ingredients.
- Why Soy Sauce?
Soy sauce brings a salty, savory note that helps deepen the flavors of the salmon, rice, and creamy elements. It also adds an extra layer of complexity, helping to unify the ingredients. Soy sauce is often used sparingly, just a splash or two, to avoid overpowering the other flavors while ensuring the dish retains its authentic sushi flavor. Some recipes also use low-sodium soy sauce for a lighter option without sacrificing flavor.
7. Furikake – The Japanese Seasoning Blend
Finally, furikake is a popular Japanese seasoning blend that’s often sprinkled on top of sushi bake for extra flavor and crunch. Furikake typically includes a mixture of sesame seeds, dried seaweed (nori), and sometimes fish flakes or bonito flakes, giving it a salty, umami-rich taste.
- Why Furikake?
Furikake serves as the finishing touch to the sushi bake. The crunchy sesame seeds and toasty seaweed provide a contrast to the soft, creamy casserole. Furikake also enhances the umami flavors of the salmon and rice, giving the dish an authentic Japanese flair. It’s the perfect sprinkle of flavor to elevate the overall experience and add a touch of savory complexity.
How These Ingredients Come Together
When combined, these main ingredients create a well-balanced, flavorful dish that is both creamy and savory. The richness of the salmon, the tanginess of the Kewpie mayo and cream cheese, the spice from sriracha, and the umami from soy sauce and furikake all meld beautifully together in the bake. The result is a comforting and indulgent casserole that’s bursting with flavor in every bite.
Each ingredient plays a key role in building the layered complexity of the sushi bake, creating a dish that combines the best of both traditional sushi flavors and Western comfort food. The result is a dish that’s both crowd-pleasing and satisfying, perfect for weeknight dinners or special occasions.
Optional Toppings: Tobiko, Scallions, Avocado for Extra Flavor
While Salmon Sushi Bake is delicious on its own, there’s always room for enhancement with additional toppings. These optional ingredients can elevate the dish, adding more texture, color, and flavor that take your sushi bake from great to extraordinary. Here’s a closer look at a few popular toppings you can add for extra flair.
1. Tobiko – A Burst of Color and Crunch
Tobiko is the bright orange fish roe often used as a garnish in sushi rolls, and it’s an excellent addition to your sushi bake for an extra pop of color and flavor.
- What is Tobiko?
Tobiko is the roe of the fish species, usually flying fish, and is known for its crunchy texture and slightly salty, briny flavor. It’s typically seasoned with ingredients like wasabi or teriyaki sauce, giving it a unique umami richness that pairs beautifully with the creamy base of the sushi bake. - Why Add Tobiko?
Adding tobiko to your sushi bake creates a delightful crunchy contrast to the soft, tender salmon and creamy rice. The tiny eggs pop in your mouth, giving you a satisfying texture while enhancing the overall seafood experience of the dish. It also adds a touch of elegance, making your dish look more like a restaurant-quality sushi creation. Whether sprinkled on top or mixed into the layers, tobiko is a delicious and visually appealing choice.
2. Scallions – Fresh and Savory Touch
Scallions, also known as green onions, are a popular topping for sushi bake because they provide a fresh, zesty bite that balances the richness of the dish.
- What Are Scallions?
Scallions are a type of onion with mild, slightly pungent flavor, and they’re often used in Asian cuisine to add brightness to savory dishes. The green stalks of the scallion bring an herbaceous flavor, while the white bulb offers a bit more of an onion-like sharpness. When sliced thinly and sprinkled over the top of a salmon sushi bake, they add a burst of color and freshness. - Why Add Scallions?
The crisp, slightly peppery flavor of scallions contrasts beautifully with the creamy, savory elements of the sushi bake. Their freshness also cuts through the richness of the salmon and mayo, providing a bright, savory contrast that’s necessary to keep the dish from feeling too heavy. Whether finely chopped or used as long, decorative sprigs, scallions add an extra layer of flavor without overwhelming the dish.
3. Avocado – Creamy and Mild for Extra Richness
For those who love the creamy richness of avocado, adding this ingredient as a topping can bring a whole new dimension to your sushi bake. Avocado provides a mild, buttery texture that blends perfectly with the other creamy elements like cream cheese and mayo.
- Why Avocado?
Avocado has a naturally mild, creamy flavor that works well in contrast to the spiciness of the sriracha or the savory depth of the soy sauce. Adding slices of ripe avocado to the top of your bake or even integrating them into the layers gives the dish a smooth, velvety texture. The richness of avocado enhances the overall creaminess of the dish without making it overly heavy, making it a favorite topping for sushi bakes. Additionally, avocados are packed with heart-healthy fats and nutrients, making them a great addition to the dish from both a flavor and nutritional standpoint. - How to Use Avocado?
Sliced or diced avocado can be placed directly on top of the baked dish before serving, creating a visually appealing garnish. For a more integrated approach, mash the avocado and spread it over the top or into the layers of the sushi bake for a more uniform texture. If you prefer a bit of extra flavor, you can drizzle a bit of lime juice or chili flakes on the avocado before serving to add a zesty kick.
4. Other Optional Toppings for Customization
Beyond tobiko, scallions, and avocado, there are numerous other toppings you can add to your sushi bake to personalize it to your taste:
- Pickled Ginger: Add a bit of sweetness and acidity with pickled ginger on the side or as a topping.
- Sesame Seeds: A sprinkle of toasted sesame seeds adds a nutty flavor and a bit of crunch to complement the creaminess of the bake.
- Nori Sheets: For an extra layer of seaweed flavor, top your sushi bake with shredded nori or serve it with whole sheets to wrap up portions.
- Cilantro or Parsley: Fresh herbs like cilantro can brighten the dish with a bit of herbal freshness that balances the richness.
- Lime Wedges: Add a bit of tangy acidity to cut through the rich flavors of the dish by squeezing fresh lime on top.
Why Optional Toppings Matter
The beauty of sushi bake is its customizability—the toppings you choose can elevate the dish to new heights and offer a variety of flavors and textures that suit different tastes. Whether you prefer the crunch of tobiko, the freshness of avocado, or the sharpness of scallions, these toppings are the perfect way to enhance your Sushi Bake experience.
By experimenting with different combinations, you can create a dish that suits your personal flavor preferences, while still maintaining the comforting and indulgent qualities of a fusion sushi bake. The added toppings make it possible to enjoy a truly unique sushi experience at home, bringing the best of both Japanese and Western influences to your plate.
Dietary Modifications: Gluten-Free and Dairy-Free Alternatives
When preparing Salmon Sushi Bake, it’s easy to customize the recipe to suit specific dietary needs, including gluten-free and dairy-free options. Whether you’re cooking for yourself or accommodating guests with dietary restrictions, you can still enjoy a delicious, satisfying sushi bake without compromising on flavor or texture. Here’s a breakdown of how to modify your ingredients for these dietary preferences.
1. Gluten-Free Modifications
Traditional sushi bakes often include ingredients like soy sauce or certain types of mayo, which can sometimes contain gluten. However, there are plenty of gluten-free alternatives available to ensure that your sushi bake is suitable for those with gluten sensitivities or celiac disease.
- Gluten-Free Soy Sauce: Regular soy sauce contains wheat, but gluten-free soy sauce or tamari is a great substitute. Both have a similar rich, savory flavor, but they are wheat-free. Tamari, in particular, is often gluten-free by nature, making it a great option for anyone avoiding gluten.
- Kewpie Mayo (Gluten-Free Version): Kewpie mayo, a staple in many sushi bake recipes, can sometimes contain modified food starch, which may be derived from wheat. Look for a gluten-free Kewpie mayo or use mayo alternatives that are labeled gluten-free, such as Hellmann’s or Best Foods. Just ensure that it doesn’t contain any gluten-based thickeners or additives.
- Gluten-Free Furikake: Furikake, a popular topping for sushi bake, sometimes contains gluten in its seasoning mix. Opt for a gluten-free furikake or make your own by combining toasted sesame seeds, seaweed, and salt.
- Rice Substitutes: If you’re looking for a lower-carb option, cauliflower rice can work as a great substitute for sushi rice. Cauliflower rice is gluten-free and provides a light, low-calorie base for your bake.
2. Dairy-Free Modifications
Many of the key ingredients in a traditional sushi bake contain dairy—such as cream cheese or certain mayonnaise varieties. However, you can easily replace these with dairy-free alternatives without sacrificing the creamy texture and savory flavor.
- Dairy-Free Cream Cheese: To keep the dish dairy-free, replace the cream cheese with a dairy-free cream cheese option. Look for products made from cashews, almonds, or coconut milk, which offer a creamy texture and mild flavor that mimics traditional cream cheese. Popular dairy-free cream cheese brands include Daiya or Tofutti.
- Dairy-Free Mayonnaise: Traditional mayonnaise often contains eggs and dairy, but there are plenty of dairy-free mayo options available. Many grocery stores carry vegan mayo brands such as Vegenaise, Hellmann’s Vegan Mayo, or Follow Your Heart, all of which are free from dairy and still provide the rich, creamy base needed for your sushi bake.
- Vegan Butter: If your recipe calls for a butter addition (such as for spreading on the nori), consider using a dairy-free butter substitute like Earth Balance or another vegan butter. These options work well for baking and have a similar texture and flavor to regular butter.
- Cheese Alternatives: If you’re using cheese or cheese-like ingredients in your sushi bake (like melted cheese as a topping), you can replace it with dairy-free cheese. Nutritional yeast can also be sprinkled on top as a cheesy-tasting, dairy-free alternative to add a nutty flavor.
3. Other Considerations for a Dairy-Free and Gluten-Free Sushi Bake
In addition to the major ingredient swaps, consider the following adjustments to fully accommodate a gluten-free and dairy-free sushi bake:
- Check Your Seaweed: Most types of seaweed, including nori, are naturally gluten-free and dairy-free. However, ensure that your nori doesn’t have any added flavoring or ingredients that contain gluten or dairy. Pure nori sheets are the best choice for a safe, allergy-friendly option.
- Vegetable Substitutes: You can add additional vegetables to your sushi bake for extra flavor and texture without affecting the dietary modifications. Consider incorporating cucumbers, avocados, carrots, or peppers into your layers, as these are naturally both gluten-free and dairy-free.
- Seasoning Adjustments: Double-check the sauces and seasonings you’re using in your sushi bake. Certain teriyaki sauces or prepared spice blends may contain gluten or dairy. Opt for low-sodium tamari, coconut aminos, or gluten-free teriyaki sauce to ensure you’re staying within your dietary needs.
4. How to Make Sure Your Sushi Bake Is Fully Safe for Gluten-Free and Dairy-Free Diets
When preparing a gluten-free or dairy-free sushi bake, read all ingredient labels carefully, especially for pre-made products like mayo, soy sauce, or cream cheese substitutes. If you’re cooking for someone with serious food allergies, it’s also important to be mindful of cross-contamination. Always check for any potential cross-contact with gluten or dairy in your kitchen and consider using separate utensils, cutting boards, and cookware for allergy-friendly meals.
Why These Modifications Matter
For individuals with gluten sensitivities or lactose intolerance, it’s essential to make sure that recipes are properly modified to suit their dietary needs. Offering gluten-free and dairy-free options for your Salmon Sushi Bake not only makes the dish more inclusive but also ensures that those with dietary restrictions can enjoy the same great flavors and textures as everyone else.
By making these simple swaps in your recipe, you can create a delicious, allergy-friendly version of this fusion sushi bake, allowing all guests to enjoy a meal that is as satisfying and flavorful as the original.
Step-by-Step Instructions for Making Salmon Sushi Bake

Step 1: Prepare the Sushi Rice with Seasoning
The foundation of any great Salmon Sushi Bake begins with the sushi rice, which provides a perfectly balanced texture and flavor that complements the rich salmon and creamy toppings. Sushi rice is slightly sticky, making it ideal for holding together in layers and absorbing the seasonings that will infuse the dish with flavor. Here’s a step-by-step guide on how to prepare the sushi rice and season it to perfection.
1. Selecting the Right Rice
To achieve the best sushi rice, start by choosing short-grain or medium-grain rice. This type of rice is essential because it has a higher starch content, which gives it the sticky texture needed for sushi bakes. Unlike regular long-grain rice, short-grain rice will clump together and hold its shape, which is perfect for baking.
- Note: Avoid using jasmine or basmati rice, as these varieties are too dry and won’t give you the ideal texture for your sushi bake.
2. Rinsing the Rice
Rinsing the rice before cooking is a crucial step in achieving the right texture. Sushi rice releases excess starch during cooking, which can make the rice overly sticky or clumpy if not rinsed properly.
- How to rinse: Place the rice in a fine mesh strainer or bowl and rinse it under cold water until the water runs clear. Gently stir the rice with your hand to remove the excess starch, then drain it thoroughly. This step will help ensure that the rice is tender and not overly sticky.
3. Cooking the Rice
Once your rice is rinsed, it’s time to cook it. You can either cook your rice in a rice cooker for convenience or on the stove using a pot. The rice cooker is the most foolproof method, as it ensures consistent temperature and moisture, while stovetop cooking requires more attention to detail.
- Rice Cooker Method: After rinsing and draining the rice, place it in the rice cooker with the appropriate amount of water (usually a 1:1 ratio of rice to water, depending on your rice cooker model). Follow the rice cooker’s instructions for cooking sushi rice.
- Stovetop Method: Add the rinsed rice to a pot and combine it with water (use about 1.25 cups of water for every cup of rice). Bring the mixture to a boil, then reduce the heat to low, cover the pot, and simmer for about 18-20 minutes. Once the water is absorbed and the rice is tender, remove it from heat and let it sit for 10 minutes with the lid on. This helps the rice to finish steaming and ensures a perfect texture.
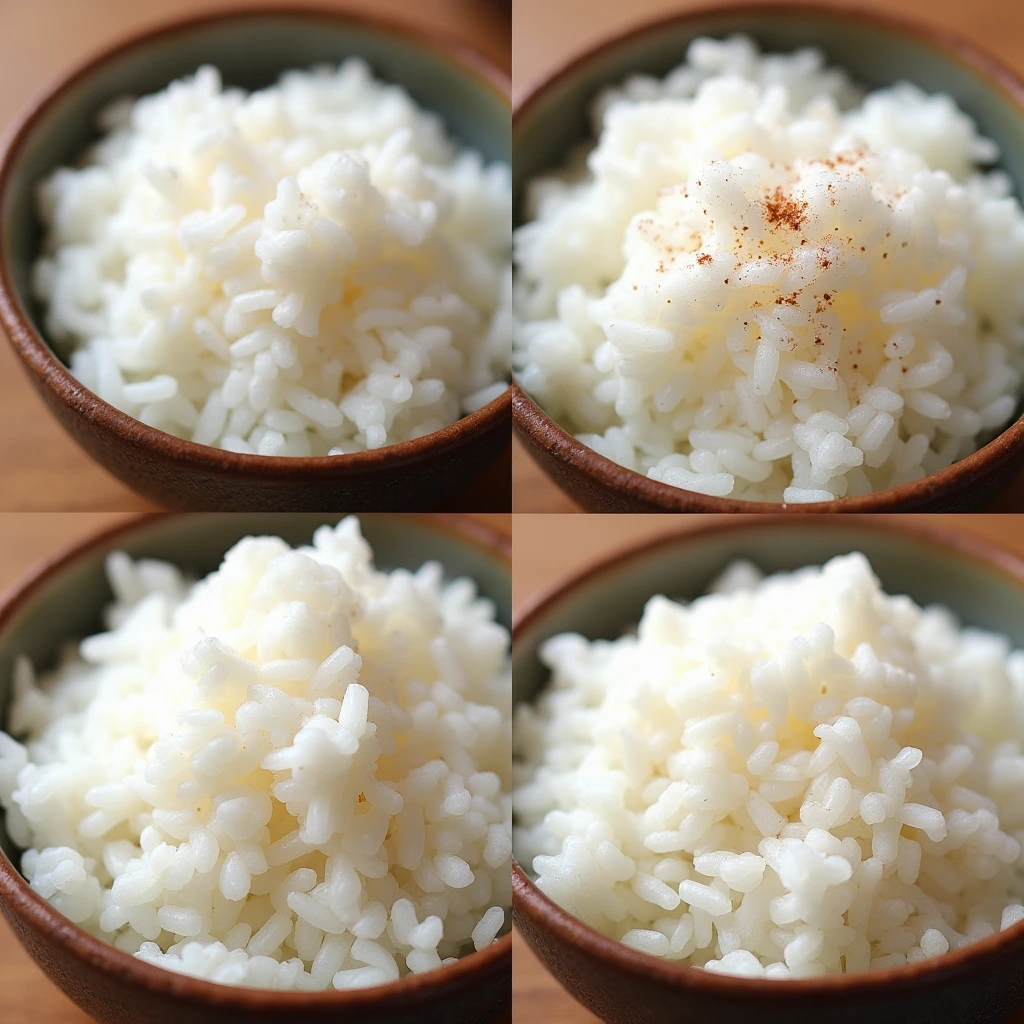
4. Seasoning the Rice
Seasoning the rice is what transforms plain rice into the flavorful, slightly tangy rice that’s characteristic of sushi dishes. The seasoning mixture for sushi rice typically consists of rice vinegar, sugar, and salt. This combination creates a harmonious balance of flavors that will complement the richness of the salmon and other ingredients in your sushi bake.
- Ingredients for seasoning:
- Rice vinegar: This gives the rice a subtle tanginess and helps balance the richness of the fish.
- Sugar: The sugar adds a slight sweetness that contrasts with the vinegar, bringing harmony to the flavor profile.
- Salt: A pinch of salt enhances the overall flavor of the rice and helps balance the sweetness and acidity of the vinegar.
- How to season:
In a small saucepan, combine about 1/4 cup of rice vinegar, 2 tablespoons of sugar, and 1 teaspoon of salt. Heat the mixture over medium heat until the sugar and salt dissolve completely, but avoid bringing it to a boil. Once dissolved, remove the mixture from heat and allow it to cool to room temperature. - After the rice is cooked, transfer it to a large bowl or a Hangiri (a traditional wooden sushi rice container) if you have one. Gently fold the seasoning mixture into the hot rice using a shamoji (a flat wooden paddle or spatula), being careful not to smash the rice. Mix until the rice is evenly coated with the seasoning, then spread the rice out to allow it to cool slightly.
5. Let the Rice Cool
Once the rice is seasoned, it’s important to let it cool slightly before using it in your sushi bake. The cooling process allows the rice to firm up a bit, making it easier to layer and bake without becoming too mushy. Avoid letting it cool completely, as slightly warm rice adheres better to other layers in your dish.
6. Optional Additions to Sushi Rice
While the classic seasoning of rice vinegar, sugar, and salt is traditional, you can experiment with additional flavors depending on your taste preferences or the theme of your sushi bake. Some people like to add a splash of mirin (sweet rice wine) for a bit more sweetness or even a dash of soy sauce to enhance the savory notes.
- For a richer flavor: You can also incorporate a little bit of sesame oil or toasted sesame seeds into the rice for a deeper umami flavor that pairs beautifully with the salmon and other toppings.
7. Final Touch: Mixing the Rice for Sushi Bake
Once your sushi rice is seasoned and cooled slightly, it’s ready to be layered in your sushi bake. This flavor-packed rice will serve as the base layer for your Salmon Sushi Bake, providing a stable foundation to support the salmon, creamy ingredients, and other toppings. The seasoned rice will help tie together all the other flavors, ensuring each bite is a perfect combination of savory, tangy, and slightly sweet.
By following these steps, you’ll have the perfect sushi rice to start your sushi bake. This delicious, sticky, and seasoned rice will provide a wonderful base that complements the rich salmon and other fusion ingredients of the dish.
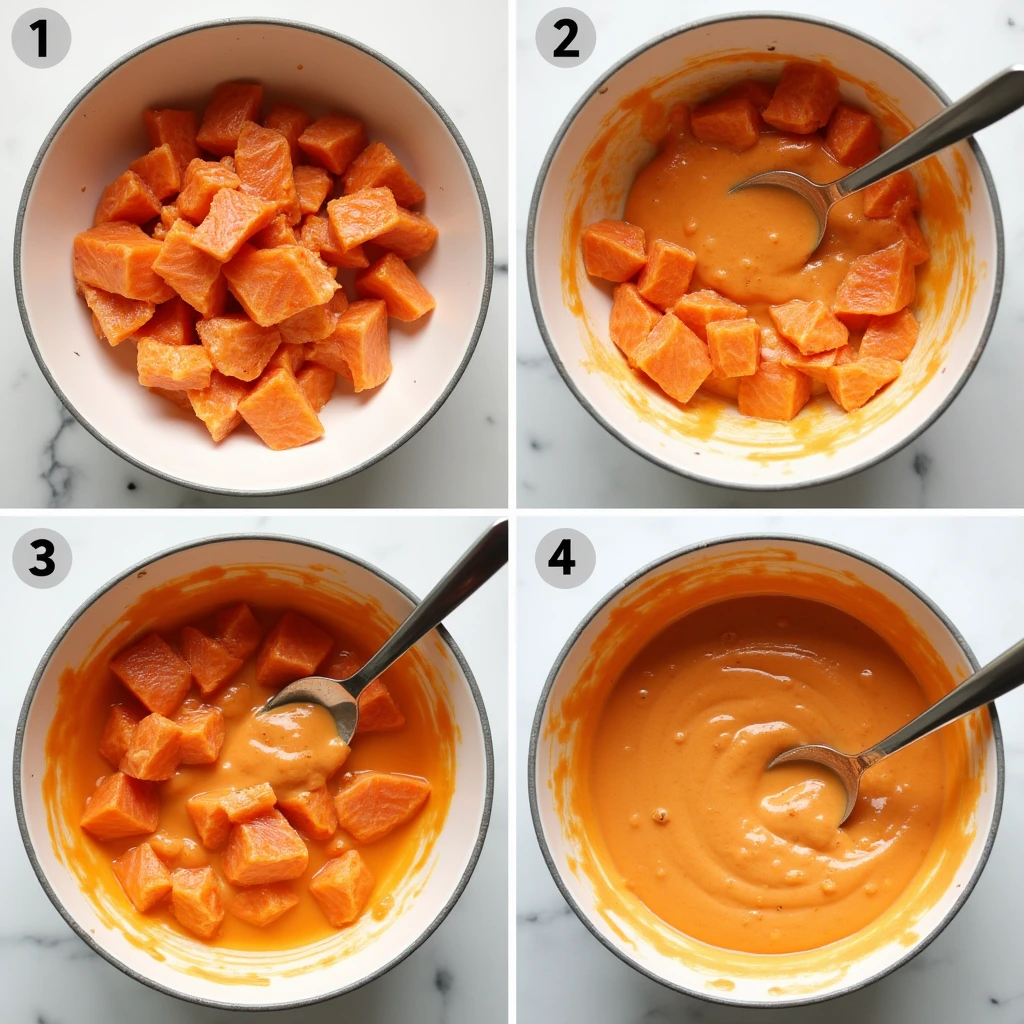
Step 2: Cook and Flake the Salmon, Then Mix with Mayo and Sriracha
After preparing your sushi rice, the next essential step in creating your Salmon Sushi Bake is cooking the salmon and preparing it for the flavorful topping that will take this dish to the next level. Flaked salmon, combined with creamy mayo and spicy sriracha, forms the luscious, creamy layer that contrasts perfectly with the seasoned rice. Here’s a more detailed look at how to cook and flake the salmon and prepare it for mixing.
1. Selecting and Preparing the Salmon
Start by choosing fresh salmon fillets that are skinless and boneless. You can use fresh or thawed frozen salmon, but be sure to choose high-quality fish, preferably wild-caught or sustainably farmed, for the best flavor and texture.
- Tip: Salmon fillets should be firm and have a vibrant pink or orange color. Avoid any fillets with discoloration or a fishy odor, as this could indicate the fish is not as fresh.
2. Cooking the Salmon
There are several methods for cooking the salmon, each yielding a slightly different texture, but the key is to cook it gently so that it flakes easily without drying out.
Pan-Seared Salmon (Recommended)
Pan-searing is one of the best methods for cooking salmon for a sushi bake because it allows you to control the level of doneness and helps the salmon retain its moistness.
- How to pan-sear:
Heat a little oil (vegetable oil or olive oil) in a non-stick skillet over medium heat. Place the salmon fillets into the pan, skin-side down if they still have skin, and cook for about 4-5 minutes on each side, depending on the thickness of the fillets. The salmon should be just cooked through but still tender and moist in the center. You want the salmon to be slightly underdone, as it will finish cooking in the oven.
Baked Salmon (Alternative Method)
If you prefer a more hands-off approach, you can bake the salmon. This method is especially useful if you’re preparing a large batch of salmon for the bake.
- How to bake:
Preheat your oven to 375°F (190°C). Place the salmon fillets on a baking sheet lined with parchment paper or foil, and lightly season them with salt, pepper, and a drizzle of olive oil. Bake for about 12-15 minutes, or until the salmon flakes easily with a fork. Be careful not to overcook the fish, as it can become dry and lose its delicate texture.
3. Flaking the Salmon
Once the salmon is cooked, let it rest for a few minutes to cool slightly and firm up. This will make it easier to flake the salmon without it falling apart into tiny, uneven pieces.
- How to flake:
Use a fork to gently break the salmon into bite-sized flakes. You can flake the salmon directly in the pan or on a cutting board, depending on how you prefer to handle the fish. Aim for small to medium flakes to ensure an even distribution when mixed with the mayo and sriracha later. - Tip: Make sure there are no bones left in the salmon. While fillets are generally boneless, it’s always a good idea to double-check to ensure no bones remain.
4. Mixing the Salmon with Mayo and Sriracha
Now that you have perfectly cooked and flaked salmon, it’s time to mix it with the key ingredients that will give your Salmon Sushi Bake its creamy, spicy kick: mayo and sriracha.
Mayonnaise (Kewpie Mayo for Authentic Flavor)
The mayo you choose will contribute to the overall richness and creaminess of the dish. For an authentic taste, Kewpie mayo is often used in sushi bakes. It’s a Japanese-style mayonnaise made with rice vinegar and egg yolks, which gives it a smoother, richer taste than traditional Western mayo.
- How to mix:
In a mixing bowl, add about 1/2 cup of mayo for every two fillets of salmon (this can be adjusted based on your personal preference for creaminess). Gently fold the mayo into the flaked salmon until it’s evenly coated. The mayo not only enhances the flavor but also helps bind the salmon together, making it easier to layer and bake.
Sriracha for Heat
Sriracha is the perfect ingredient for adding a touch of spice to your salmon mixture. Its heat is well-balanced with the richness of the mayo, creating a smooth, flavorful topping.
- How to mix:
Add about 1 to 2 tablespoons of sriracha (or more, depending on your spice tolerance) to the mayo and salmon mixture. Stir until the ingredients are well combined, creating a creamy, spicy blend that will melt beautifully over the sushi rice when baked. - Tip: If you prefer a milder version, you can adjust the amount of sriracha to your taste. Alternatively, you can substitute sriracha with a milder hot sauce or omit it for a non-spicy version.
5. Optional Add-ins
If you want to elevate the flavor of your Salmon Sushi Bake, you can add extra ingredients to the salmon mixture. Some common additions include:
- Cream cheese: Adding cream cheese to the salmon mixture will create a super creamy texture and add richness.
- Sesame oil: A few drops of sesame oil can lend a subtle, nutty flavor that pairs perfectly with the salmon and other ingredients.
- Lemon juice: A squeeze of fresh lemon juice adds brightness and helps balance the richness of the mayo and cream cheese.
Mix these optional ingredients into the salmon mixture, and you’ll have a richer, more complex flavor profile that adds even more depth to the Salmon Sushi Bake.
6. Ready for the Bake
Once the salmon is flaked, mixed with mayo and sriracha, and seasoned to perfection, it’s ready to be spread over your prepared sushi rice in the next step of creating your Salmon Sushi Bake. The creamy salmon layer will bake beautifully, creating a decadent topping that melts together with the rice, providing a satisfying contrast to the crispy edges of the nori sheets.
This step is crucial in ensuring that your Salmon Sushi Bake achieves the perfect balance of textures and flavors—from the tender flaked salmon to the creamy, spicy mayo blend.
Step 3: Layer the Rice, Salmon Mixture, and Toppings in a Baking Dish
Once you’ve prepared the sushi rice and the salmon mixture, it’s time to assemble your Salmon Sushi Bake in a baking dish. Layering is the key to creating that perfect combination of flavors and textures that make this dish a crowd-pleaser. Here’s a detailed breakdown of how to layer the rice, salmon mixture, and optional toppings for a truly delicious and visually appealing sushi bake.
1. Preparing the Baking Dish
Before starting the layering process, choose the right baking dish. A 9×9-inch square dish or a 9×13-inch rectangular dish works well, depending on how many servings you need. You want a dish that’s deep enough to hold multiple layers while allowing the ingredients to cook evenly.
- Tip: Lightly grease the baking dish with non-stick spray or a small amount of oil to prevent the rice and salmon from sticking to the bottom. Alternatively, you can line the dish with parchment paper for easy cleanup.
2. First Layer: Spread the Seasoned Sushi Rice
Start with an even base layer of the seasoned sushi rice. Sushi rice is sticky and will help bind the layers together. After preparing the rice with vinegar, sugar, and salt, carefully spread it evenly across the bottom of your baking dish.
- How to layer:
Use a spatula or the back of a spoon to gently press the rice into the dish, ensuring that it’s spread out evenly. Try to keep the rice layer about 1 inch thick. Pressing it down lightly will help the rice maintain its shape as it bakes, but avoid packing it too tightly, as you want to preserve its tender texture. - Tip: If you want an extra touch of flavor, you can sprinkle a little furikake seasoning over the rice. This Japanese seasoning adds a burst of umami and will complement the overall flavor profile of the dish.
3. Second Layer: Spread the Creamy Salmon Mixture
Next, take the salmon mixture that you prepared in Step 2, which is a creamy blend of flaked salmon, mayo, sriracha, and other seasonings, and spread it evenly over the rice layer.
- How to layer:
Using a spoon or spatula, carefully spoon the salmon mixture onto the rice. Spread it out to cover the entire surface of the rice, ensuring that every part of the rice is covered with a generous amount of the creamy salmon topping. The salmon mixture should form a smooth, even layer, almost like a creamy topping. - Tip: Make sure to cover the rice completely to prevent it from drying out during baking. If you want the salmon layer to be a bit more golden and crispy, you can slightly press it down to compact the mixture and help it brown.
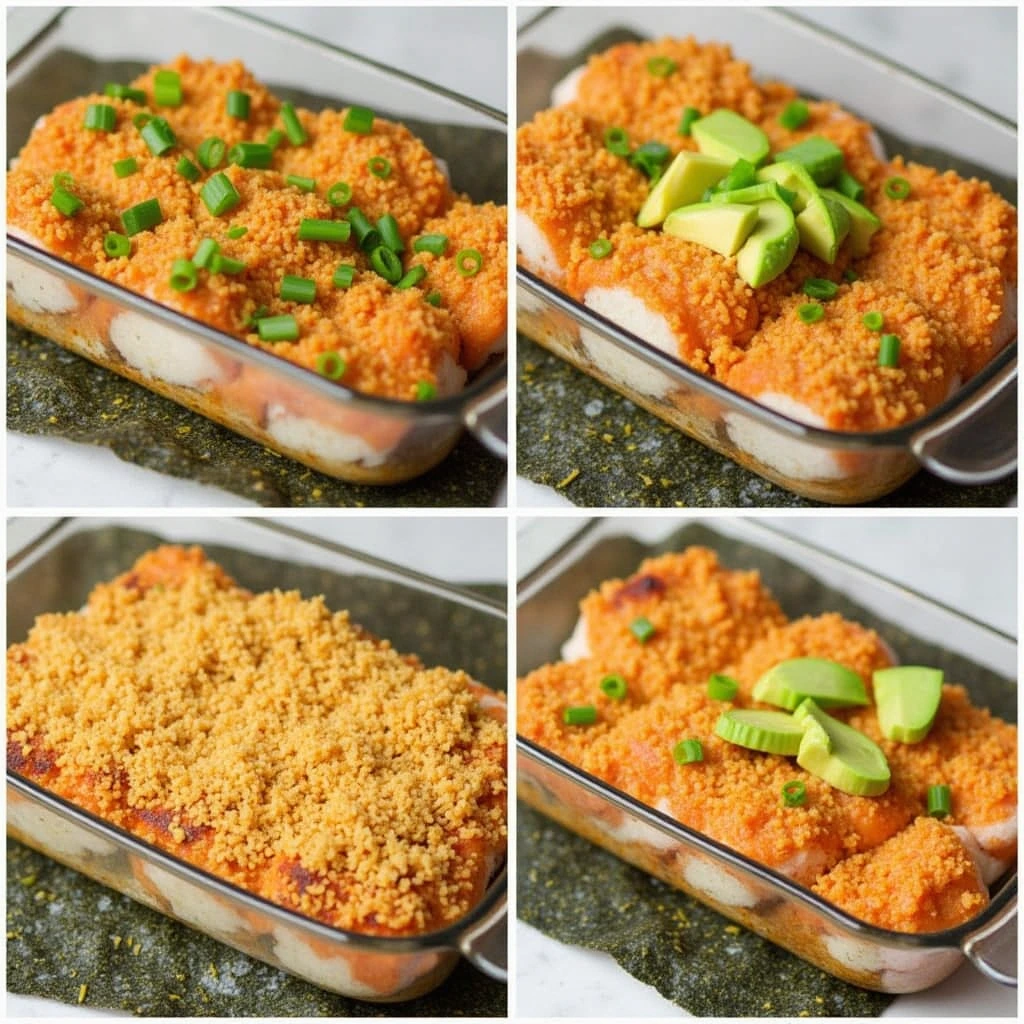
4. Optional Layer: Add Extra Toppings for Flavor
After the salmon mixture, you can add additional toppings for extra flavor, texture, and visual appeal. While some toppings are optional, they can enhance the overall taste and appearance of your Salmon Sushi Bake.
Toppings to Consider:
- Tobiko (Fish Roe): A popular sushi topping, tobiko adds a burst of color and a slight crunch to the dish. It also brings a salty, briny flavor that contrasts beautifully with the creamy salmon mixture.
- Avocado: For a fresh, creamy addition, sliced avocado adds richness and complements the salmon’s natural flavor.
- Scallions: Chopped scallions (green onions) bring a sharp, fresh flavor that cuts through the richness of the salmon and mayo mixture. They also add a beautiful pop of green color.
- Sesame Seeds: Toasted sesame seeds bring a nutty crunch and an extra layer of flavor, giving your Salmon Sushi Bake an authentic sushi feel.
- Pickled Ginger: If you enjoy the zing of pickled ginger, you can serve it on the side as an optional garnish, or finely chop it and scatter a little on top for extra sharpness.
- Tip: Feel free to adjust these toppings based on your personal preferences or dietary needs. Some people may prefer a more minimalist approach, while others enjoy a more loaded version of the bake.
5. Final Layer: Nori Sheets
To complete your layers, you’ll need the nori sheets, which will serve as the finishing touch. After layering the rice, salmon mixture, and any toppings, nori sheets are placed on top before the bake. Nori is typically used as a wrapper in sushi, but in a sushi bake, it’s used to provide a crispy contrast to the warm, creamy layers beneath.
- How to layer:
Tear the nori sheets into smaller pieces or strips and scatter them across the top of your layered bake. The nori will crisp up during baking, adding a subtle crunch and a characteristic seaweed flavor that enhances the overall sushi experience. - Tip: If you prefer a softer texture, you can place the nori sheets underneath the salmon mixture instead of on top, allowing them to absorb some of the creaminess. However, placing the nori on top will create a crispy, flavorful contrast to the creamy salmon layer.
6. Ready for the Oven
Once all your layers are in place, your Salmon Sushi Bake is ready to be baked. Preheat your oven to 350°F (175°C) and bake for approximately 15-20 minutes, or until the top is golden and bubbly. The dish should have a slightly crispy top and edges, but the inside should remain soft and creamy.
- Tip: For an extra crispy top, you can place the dish under the broiler for the last 1-2 minutes of baking. Just be sure to watch it closely to prevent burning.
By carefully layering each component in this step, you’ll create a balanced, flavorful dish that showcases the rich salmon, creamy sauce, and satisfying crunch of nori. Each bite of the Salmon Sushi Bake will offer a harmonious blend of textures and flavors, making it a true comfort food masterpiece!
Step 4: Bake Until Golden and Bubbly, Then Serve with Nori Sheets
Now that you’ve carefully layered your sushi rice, salmon mixture, and toppings, it’s time to finish your Salmon Sushi Bake by baking it to perfection. This step is crucial to achieving that golden, bubbly, and slightly crispy top that makes this dish so irresistible. Here’s a detailed guide on how to bake your sushi bake until it reaches the ideal texture, and how to serve it with nori sheets for that authentic sushi experience.
1. Preheat the Oven
Before placing your assembled sushi bake in the oven, make sure to preheat your oven to 350°F (175°C). Preheating ensures that your bake cooks evenly and reaches the desired texture. It’s important not to skip this step, as placing the dish in a cold oven could result in uneven cooking and may affect the bake’s final texture.
- Tip: If you want the top of the bake to be extra crispy, you can adjust the temperature to 375°F (190°C), but watch it closely to avoid burning.
2. Baking Time
Once your oven is preheated, it’s time to bake your Salmon Sushi Bake. Place the dish on the middle rack of the oven and bake it for 15-20 minutes, or until the top is golden brown and bubbling. During this time, the salmon mixture will firm up slightly, while the creamy texture of the mayo and cream cheese will become even more indulgent.
- How to check:
Keep an eye on the bake as it cooks. The top should become lightly golden and slightly crisp at the edges, and the filling should bubble around the edges. This bubbling is a good indication that the dish is hot and ready to be served. - Tip: If you notice that the top isn’t browning as much as you’d like, you can switch the oven to broil for the last 1-2 minutes. This will give the top a golden, crispy finish, but be sure to watch it carefully, as broiling can cause it to burn quickly.
3. Adding the Nori Sheets
While the sushi bake is baking, it’s the perfect time to prepare your nori sheets for serving. Once the bake is out of the oven and bubbling hot, nori sheets can be added to the top for that authentic sushi flavor and texture.
- How to add nori sheets:
Tear or cut the nori sheets into strips or small squares, depending on how you want to serve them. Some prefer to top the bake with fresh nori, while others like to serve it on the side for people to add individually. The choice is yours! - Tip: If you want a bit of extra flavor, you can lightly toast the nori sheets in a dry pan for 30 seconds to a minute before serving. This will intensify the umami flavor and add a subtle smokiness that complements the richness of the baked salmon.
4. Let it Cool Slightly Before Serving
Once the Salmon Sushi Bake is golden and bubbly, it’s a good idea to let it sit for a few minutes before serving. This helps the layers settle and firm up slightly, making it easier to cut and serve. Allowing it to cool for about 5-10 minutes also helps preserve the integrity of the layers, ensuring that the rice and salmon mixture don’t slide off when you scoop it onto plates.
- Tip: While the bake is resting, you can prepare any additional toppings, such as sliced avocado, scallions, or a drizzle of sriracha sauce, to add just before serving. These toppings can enhance the flavor and add a fresh contrast to the warm, baked dish.
5. Serve and Enjoy
Once your Salmon Sushi Bake has cooled slightly and your nori sheets are added, it’s ready to be served. This dish is perfect for family-style dining, where everyone can scoop a generous portion onto their plates, adding pieces of nori and extra toppings as desired.
- How to serve:
For the full sushi experience, serve the bake with extra nori sheets on the side, so diners can take a piece and top their portions as they prefer. The crispy texture of the nori pairs beautifully with the creamy salmon bake, adding an authentic sushi flavor. Alternatively, you can serve individual portions with a sheet of nori wrapped around each bite. - Tip: For an even more authentic touch, serve the Salmon Sushi Bake with a side of pickled ginger and wasabi. These traditional sushi condiments add a refreshing kick that complements the richness of the bake.
6. Storing Leftovers
If you have any leftovers, they can be stored in an airtight container in the refrigerator for up to 2-3 days. The flavors will continue to meld, and the bake can be enjoyed cold or reheated. To reheat, simply place it in the oven at a low temperature (about 300°F or 150°C) for 10-15 minutes to warm it through without drying it out.
- Tip: If you want to enjoy the crispy top again, you can broil the leftovers for a couple of minutes to get that golden finish.
By baking your Salmon Sushi Bake until it’s golden and bubbly, you’re ensuring that the flavors come together beautifully, and the texture is perfectly balanced. Topped with crispy, flavorful nori sheets, this dish is the ideal comfort food that brings the taste of sushi into a hearty and satisfying bake. Enjo
Tips for the Best Salmon Sushi Bake
How to Achieve the Perfect Texture for Sushi Rice
The key to a successful Salmon Sushi Bake is not just the salmon and toppings but also the sushi rice. Properly cooked sushi rice provides the perfect base for the dish, offering a sticky, slightly tangy texture that holds all the flavors together. Achieving the perfect texture for sushi rice can make all the difference in elevating your dish. Here’s how to do it:
1. Choose the Right Rice
The first step in making sushi rice is selecting the right type of rice. Sushi rice is a short-grain Japanese rice that is sticky and slightly plump when cooked, making it perfect for holding together and creating the desired texture. Do not use long-grain rice or jasmine rice, as these varieties do not have the sticky qualities necessary for sushi rice.
- Tip: Look for sushi rice at an Asian grocery store or online. It will often be labeled as “Japanese short-grain rice” or “sushi rice.”
2. Rinse the Rice Thoroughly
Before cooking your sushi rice, it’s essential to rinse it thoroughly to remove excess starch. This helps the rice cook evenly and ensures that it doesn’t become too sticky or mushy. Place the rice in a fine-mesh sieve or bowl and rinse it under cold water, gently swirling it with your hand. Continue rinsing until the water runs clear.
- Tip: Be patient with this step! Rinsing the rice thoroughly is crucial to achieving the right texture. Skip this step, and your rice will turn out too sticky and gummy.
3. Soak the Rice
After rinsing, soak the rice for 20-30 minutes. Soaking allows the grains to absorb some water, leading to even cooking. This step is important for achieving tender rice that holds its shape without becoming overcooked.
- Tip: While soaking, avoid stirring the rice, as this can break the grains and result in a mushy texture.
4. Cook the Rice Properly
To cook sushi rice, use a rice cooker or stovetop method. If using a rice cooker, follow the manufacturer’s instructions. A general rule is to use a 1:1.1 or 1:1.2 ratio of rice to water, depending on your rice cooker model. For stovetop cooking, place the rice in a pot with water, bring it to a boil, then reduce the heat to low and cover it. Let the rice simmer for about 15-20 minutes, ensuring that all the water is absorbed.
- Tip: Do not lift the lid during cooking. This helps to retain the steam and cook the rice evenly.
5. Season the Rice with Vinegar Mixture
Once the rice is cooked, the key to perfect sushi rice is the seasoning. Sushi vinegar—a mix of rice vinegar, sugar, and a pinch of salt—adds the necessary tangy flavor and makes the rice sticky. To prepare, gently heat ½ cup rice vinegar, 2 tbsp sugar, and 1 tsp salt in a small saucepan until the sugar dissolves. Allow the mixture to cool slightly before stirring it into the hot rice. Use a wooden spatula or rice paddle to fold the vinegar mixture into the rice, being careful not to mash the grains.
- Tip: Use fan to help cool the rice down while mixing, which gives the rice a shiny, glossy appearance and helps it absorb the vinegar mixture evenly.
6. Let the Rice Rest
After mixing the vinegar into the rice, let it rest for about 10-15 minutes in a flat container (like a baking sheet or wide bowl). This resting period allows the flavors to set in and for any excess moisture to evaporate, resulting in perfect sushi rice that isn’t too wet or dry.
- Tip: While the rice is resting, cover it with a clean, damp kitchen towel to prevent it from drying out.
7. Test the Texture
The perfect sushi rice should be sticky enough to hold together but not so sticky that it becomes mushy. It should feel slightly firm to the bite but soft enough to melt in your mouth. When you press a small amount between your fingers, it should hold together but not be overly wet or clump together too much.
- Tip: If your rice is too wet, try draining it gently or cooking it a little longer to absorb more moisture. If it’s too dry, add a small amount of water and let it rest again.
8. Keep It Warm
Once the rice is prepared, it’s important to keep it warm until you’re ready to assemble your Salmon Sushi Bake. Sushi rice is best used slightly warm, as it retains its stickiness and texture better than when it’s cold. You can store it in a covered bowl or pot to maintain warmth.
- Tip: Never refrigerate sushi rice before using it. Cold rice will become hard and lose its sticky texture, which is crucial for a sushi bake.
9. Using Sushi Rice in the Bake
Now that you’ve achieved the perfect texture for your sushi rice, it’s time to layer it as the base of your Salmon Sushi Bake. Carefully press the rice into the baking dish, ensuring it’s evenly spread and compacted. This will create a sturdy base that will hold the salmon mixture and toppings as they bake.
By following these steps, you’ll ensure that your sushi rice provides the ideal texture and flavor to complement the rich, creamy salmon mixture in your bake. Perfectly cooked sushi rice is the foundation of your dish and brings it all together, offering that signature sushi texture that everyone loves.
Best Way to Season the Salmon for Maximum Flavor
When preparing a Salmon Sushi Bake, the seasoning of the salmon plays a pivotal role in bringing out its natural flavors while complementing the other ingredients in the dish. Properly seasoning the salmon ensures that every bite is full of richness, depth, and a delightful balance of flavors. Here’s how you can season the salmon for the best possible taste:
1. Start with Fresh, Quality Salmon
The foundation of a flavorful salmon dish begins with selecting high-quality, fresh salmon. Fresh, wild-caught salmon, or responsibly farmed salmon, is preferred for its superior taste and texture. The freshness of the fish will make the seasoning more effective, as it will absorb flavors better than fish that is not as fresh.
- Tip: Opt for sockeye or king salmon if available, as they have richer flavors and firmer textures, which work beautifully in a sushi bake.
2. Basic Seasoning: Salt and Pepper
While the salmon is already flavorful on its own, a simple seasoning of salt and black pepper is essential. Seasoning both sides of the fillet generously with salt and freshly ground black pepper enhances the fish’s natural taste and adds a savory element to balance the richness.
- Tip: Use kosher salt for a more even distribution of flavor, and freshly grind black pepper for a more robust flavor.
3. Incorporate Soy Sauce for Umami
One of the most common seasonings for salmon, especially in sushi recipes, is soy sauce. It adds a deep umami flavor that complements the natural sweetness of the fish. Light soy sauce is preferable for seasoning, as it enhances flavor without overpowering the delicate taste of the salmon. It also helps create a slightly caramelized crust when the salmon is cooked.
- Tip: Low-sodium soy sauce can be used if you want to control the salt content while still providing that savory depth.
4. Add a Touch of Rice Vinegar for Brightness
To balance the richness of the salmon and bring out its natural sweetness, rice vinegar is an excellent addition. Its mild tanginess helps elevate the overall flavor profile. You don’t need much—just a few teaspoons drizzled over the salmon before cooking will give it a refreshing lift.
- Tip: Use seasoned rice vinegar for an extra hint of sweetness, which pairs beautifully with the richness of the fish.
5. Incorporate Garlic and Ginger for Zest
For an extra layer of flavor, finely minced garlic and ginger are perfect additions to your salmon seasoning. Garlic offers a pungent, aromatic depth, while ginger provides a warm, slightly spicy note that cuts through the richness of the salmon. These ingredients also pair wonderfully with the creamy textures in the sushi bake.
- Tip: Use fresh ginger and garlic for the most intense flavor. Avoid pre-minced versions, as they often lose their vibrant freshness.
6. Sweet and Spicy with Sriracha and Honey
If you enjoy a slight kick of heat in your dishes, a touch of sriracha can be added to the seasoning mix. The spicy tang will contrast nicely with the sweetness of the salmon. For a more balanced, sweet-spicy flavor, combine a bit of honey or maple syrup with the sriracha. The sweetness helps to balance the heat, while also adding a subtle caramelization to the salmon when baked.
- Tip: For a more nuanced spice level, add sriracha to the mayonnaise mixture used for the bake. This allows the heat to blend with the creamy texture and become evenly distributed.
7. Sesame Oil for Nutty Flavor
A light drizzle of sesame oil can also add a nutty, slightly toasted flavor to the salmon. The oil not only enhances the flavor but also contributes a subtle richness that complements the texture of the salmon. A small amount goes a long way, so start with just a few drops to avoid overpowering the fish.
- Tip: Use toasted sesame oil for a stronger, nuttier flavor profile, or regular sesame oil for a milder taste.
8. Herbs and Spices: Cilantro, Chives, and Furikake
While the primary focus for seasoning the salmon is on savory and umami-rich elements, adding a sprinkle of herbs or spices can introduce a refreshing touch. Chopped cilantro or chives work well for a bright, herbaceous contrast. You can also incorporate a bit of furikake (a Japanese seasoning blend) over the salmon before baking. Furikake typically contains dried seaweed, sesame seeds, and other seasonings, which will add a burst of umami and crunch to the salmon.
- Tip: Furikake is optional but highly recommended if you want to bring in that authentic sushi flavor and texture.
9. Let the Salmon Marinate
For deeper flavor penetration, allow the salmon to marinate for at least 15-30 minutes after applying your seasonings. This gives the salmon time to absorb the soy sauce, ginger, garlic, and other ingredients, making it more flavorful when baked. However, don’t marinate for too long, as the acidity of the vinegar can start to break down the fish and alter its texture.
- Tip: If you’re short on time, even a 10-minute marinade will enhance the flavor. Just make sure to marinate in the fridge to avoid food safety issues.
10. Baking the Salmon for the Perfect Texture
After seasoning, the salmon can be cooked in various ways—grilled, pan-seared, or baked. For the Salmon Sushi Bake, the goal is to cook the salmon gently so it flakes beautifully while still keeping its moisture. Baking the salmon at a moderate temperature of 350°F (175°C) ensures it cooks evenly without drying out.
- Tip: When baking the salmon, you can place it skin-side down (if it has skin) to prevent it from drying out, ensuring a moist and tender texture when flaked.
By following these steps, you’ll be able to season your salmon in a way that maximizes its natural flavors while also blending seamlessly with the other ingredients in the Salmon Sushi Bake. Each seasoning complements the rich, tender fish, ensuring that every bite is full of savory, tangy, and slightly spicy goodness.
How to Store and Reheat Leftovers Without Drying Them Out
One of the best things about Salmon Sushi Bake is that it can be made in advance and stored for later enjoyment. However, because of its delicate texture and the ingredients involved, reheating leftovers can sometimes result in dryness or loss of flavor. With the right techniques, you can preserve the dish’s creamy, tender salmon and perfectly cooked sushi rice. Here’s how to store and reheat your Salmon Sushi Bake leftovers to maintain their deliciousness:
1. Storing Leftovers Properly
The first step to ensuring your leftovers stay fresh and flavorful is proper storage. The goal is to minimize exposure to air, which can cause the salmon to dry out.
- Cool Down the Dish First: Allow the Salmon Sushi Bake to cool down to room temperature before storing it. This will prevent condensation from building up inside the storage container, which could make the dish soggy.
- Use Airtight Containers: Store leftovers in airtight containers to keep out air and moisture. You can also wrap the dish tightly in plastic wrap or cover it with a plastic lid or foil if you’re storing it in a baking dish.
- Separate Components (Optional): If you have extra ingredients, like nori sheets or avocado, it’s best to store them separately. These components can become soggy or wilted when stored with the hot, creamy elements of the sushi bake. Keep them in small containers and add them back when reheating.
- Tip: Nori sheets should be stored in a dry, airtight container at room temperature. When reheating, it’s best to add them fresh to the dish to retain their crispiness.
2. How Long Can You Store It?
You can store your Salmon Sushi Bake leftovers in the refrigerator for up to 3 days. Make sure it is well-sealed to keep it fresh. If you want to extend its shelf life further, freezing is an option, though it may affect the texture slightly.
- Freezing Option: If you choose to freeze leftovers, place the sushi bake in a freezer-safe container or resealable freezer bag. Be sure to remove as much air as possible to prevent freezer burn. It can be stored in the freezer for up to 1-2 months. When ready to reheat, it’s best to thaw it overnight in the fridge for optimal texture.
3. Reheating Without Drying Out
Reheating Salmon Sushi Bake requires a delicate balance—too much heat can dry out the salmon, while too little may not heat the dish properly. Here are a few techniques for reheating your leftovers without losing moisture or flavor:
Oven Reheating Method
Using the oven is one of the best methods for reheating Salmon Sushi Bake, as it evenly heats the dish and helps retain moisture, keeping the salmon tender.
- Preheat the Oven: Set your oven to 350°F (175°C).
- Cover the Dish: Place your leftover Salmon Sushi Bake in an oven-safe dish and cover it loosely with foil. This will help trap moisture, ensuring that the dish heats up evenly without drying out.
- Reheat: Place the covered dish in the oven for about 15-20 minutes, or until it’s heated through. If you like the top to be a bit crispy, you can remove the foil for the last 5 minutes of reheating.
- Tip: If you’re reheating a large portion, check the internal temperature with a food thermometer. It should reach 165°F (74°C) to be fully heated and safe to eat.
Microwave Reheating Method
While the microwave is faster, it can sometimes cause the dish to dry out or heat unevenly. To avoid this, follow these steps:
- Use a Microwave-Safe Dish: Transfer the Salmon Sushi Bake to a microwave-safe container. If it’s stored in a large baking dish, you may want to break it into smaller portions for even reheating.
- Add Moisture: To prevent dryness, sprinkle a small amount of water or broth over the dish before microwaving. This will create steam and help retain moisture during reheating.
- Cover the Dish: Use a microwave-safe cover or a damp paper towel to cover the dish. This helps trap steam and keeps the salmon from drying out.
- Reheat in Intervals: Microwave the dish in 30-second intervals, stirring gently between each interval to ensure even heating. Depending on the size of the portion, it should take 2-3 minutes in total to reheat.
- Tip: For best results, avoid over-microwaving the dish, as it can cause the salmon to become tough. Heat just until it’s warm, not hot.
Stovetop Reheating Method
If you prefer not to use the microwave or oven, you can also reheat your Salmon Sushi Bake on the stovetop, though this method works best if you’re reheating a smaller portion.
- Use a Pan: Heat a non-stick skillet over medium-low heat.
- Add Moisture: Add a small amount of water or broth to the pan, then place the Salmon Sushi Bake in the pan. Cover the skillet with a lid to trap the steam and reheat the dish evenly.
- Heat Gently: Allow the dish to reheat for 5-10 minutes, stirring occasionally and checking for even heat distribution.
4. Avoid Reheating Multiple Times
Repeated reheating can affect both the texture and flavor of your Salmon Sushi Bake, especially when it comes to the creamy components like the Kewpie mayo and cream cheese. To ensure that each bite is as delicious as the first, try to only reheat what you plan to eat at that moment. If you have leftover portions, store them separately and reheat only the desired amount.
- Tip: Single servings are best when reheating to prevent multiple reheating cycles, which can degrade the texture and flavor of the dish.
5. Consider Freshening Up the Dish
If you’re reheating leftovers and want to add a bit of freshness, consider topping the reheated Salmon Sushi Bake with freshly chopped scallions, avocado, or a sprinkle of furikake before serving. This will enhance the dish with a touch of freshness and texture, making it feel almost like a new meal.
By following these tips, you can enjoy your Salmon Sushi Bake leftovers with minimal loss of texture and flavor. Whether you choose to reheat using the oven, microwave, or stovetop, you’ll be able to savor the creamy, savory goodness of your sushi bake without worrying about it drying out.
Serving Suggestions and Variations
Serve with Nori Sheets for Wrapping
One of the signature elements of Salmon Sushi Bake is the addition of nori sheets for wrapping and serving. Nori, a type of dried seaweed, adds a distinctive flavor and texture that perfectly complements the creamy, warm layers of sushi rice and salmon. By serving the Salmon Sushi Bake with nori sheets, you not only enhance the flavor profile but also introduce a traditional sushi element that elevates the entire dish.
Here’s why nori sheets are an essential part of the serving experience for Salmon Sushi Bake:
1. Adds a Crunchy Texture
Nori sheets offer a crispy and crunchy texture that contrasts beautifully with the soft and creamy layers of the Salmon Sushi Bake. The combination of the warm, moist casserole and the crisp, dried seaweed provides a satisfying bite and enhances the overall mouthfeel. The texture of nori also adds an element of fun to the dish, as you wrap individual portions, much like a sushi roll.
2. Complements the Flavor Profile
Nori has a distinctive umami flavor that enhances the savory richness of the salmon, the sushi rice, and the creamy elements like Kewpie mayo and cream cheese. This salty, oceanic taste pairs perfectly with the rich flavors of the baked salmon, balancing the dish and preventing it from feeling too heavy. The nori also complements the soy sauce and sriracha in the bake, adding a subtle oceanic flavor that echoes traditional sushi flavors.
- Tip: For an even bolder flavor, try lightly toasting the nori sheets before serving. This can bring out their natural aroma and add an extra layer of depth to the flavor profile.
3. Fun and Interactive Eating Experience
Serving Salmon Sushi Bake with nori sheets allows your guests to get involved in the meal, making the experience more interactive and fun. By using the nori as a wrapper, you can create individual portions that are easy to handle and eat. This is especially enjoyable for family-style meals or gatherings, where everyone can assemble their own sushi bake wraps.
- How to Serve: To serve, cut the nori sheets into smaller pieces, about the size of a traditional sushi roll. Place a spoonful of the warm Salmon Sushi Bake onto a piece of nori, then wrap it up or roll it, sushi-style. You can also fold the nori sheet into a pocket to hold the filling.
4. Adds Visual Appeal
In addition to the textural and flavor benefits, nori sheets also contribute to the visual appeal of the dish. The rich, green color of the nori adds contrast to the warm, golden-brown layers of the baked salmon, creating an inviting and vibrant presentation. The combination of the creamy salmon, the vibrant nori, and the colorful toppings like scallions, avocado, or tobiko makes for an eye-catching dish that is as beautiful as it is delicious.
- Tip: Arrange the nori sheets on the side or cut them into strips for guests to use as they assemble their wraps, giving your presentation a clean and elegant look.
5. Health Benefits of Nori
Nori sheets are not just a flavorful addition—they also provide several health benefits. Rich in vitamins, minerals, and antioxidants, nori is a great source of iodine, fiber, and protein, making it a nutritious complement to your Salmon Sushi Bake. Adding nori to the dish increases its nutritional value without overpowering the other flavors.
- Nutritional Perks: Nori is particularly rich in vitamin A, C, and B12, as well as omega-3 fatty acids. It’s a great choice for those seeking to boost the nutrient content of their meal in a simple and tasty way.
6. Variations of Nori for Different Flavors
While standard nori sheets work perfectly with Salmon Sushi Bake, you can also experiment with different varieties of nori to suit your taste preferences or make the dish more unique. There are various flavored nori sheets available, such as wasabi-flavored or sesame-coated nori, that can add an extra kick or a layer of complexity to your sushi bake.
- Tip: For a more gourmet twist, look for premium nori that has been toasted with additional seasonings, or use sweet nori varieties for a slight contrast in flavor. You can also use sushi rolls with already seasoned nori for even more flavor complexity.
7. Serving Suggestions
While nori sheets are typically used to wrap the salmon bake, they can also be served alongside as a garnish or topping. Crumble the nori into small pieces and sprinkle it over the top of the bake for an extra burst of flavor and color. This can elevate the presentation of the dish while incorporating nori’s savory flavor throughout each bite.
Nori sheets are more than just a vessel for holding the ingredients of Salmon Sushi Bake—they enhance the dish in multiple ways. From adding a crisp texture and umami flavor to providing an interactive and fun dining experience, nori elevates the overall meal, making it feel like a modern, yet traditional sushi experience. Whether you use the sheets for wrapping or as a garnish, the inclusion of nori is what truly brings this fusion dish to life.
Add a Spicy Drizzle with Extra Sriracha or Eel Sauce
To take your Salmon Sushi Bake to the next level, adding a spicy drizzle is an excellent way to enhance the flavor profile with a zesty kick. A drizzle of extra sriracha or eel sauce can make the dish even more dynamic, adding both heat and depth to the flavors. Here’s how you can incorporate this spicy drizzle into your Salmon Sushi Bake:
1. Sriracha Drizzle:
Sriracha is a popular chili sauce known for its bold heat and slightly sweet undertones. When added as a drizzle, it enhances the dish with a flavorful kick that pairs perfectly with the creamy richness of the salmon and the mild sweetness of the rice.
How to make the sriracha drizzle:
- Step 1: In a small bowl, mix sriracha with a little bit of mayonnaise or cream cheese to balance the heat and create a creamy consistency. You can adjust the amount of mayo or cream cheese to your preferred level of heat and creaminess.
- Step 2: Add a few drops of soy sauce to the mixture for an added umami flavor.
- Step 3: Drizzle the sriracha mixture over the top of the baked salmon before serving. This creates a visual pop with its bright red hue while delivering the spice in every bite.
Tip: For extra heat, you can add more sriracha or even sprinkle some red pepper flakes on top before baking or right after serving.
2. Eel Sauce Drizzle:
Eel sauce, also known as unagi sauce, is a thick, savory-sweet sauce made from soy sauce, sugar, and mirin. It is often used in sushi dishes, particularly for grilled eel, but its rich flavor makes it a great topping for any baked sushi creation.
How to make the eel sauce drizzle:
- Step 1: To make eel sauce at home, combine equal parts soy sauce, mirin, and sugar in a small saucepan. Bring the mixture to a simmer, stirring occasionally, until it thickens to a syrupy consistency.
- Step 2: Once the sauce is ready, allow it to cool slightly before drizzling it over the top of the baked Salmon Sushi Bake. The sweet, savory sauce will contrast nicely with the spicy sriracha drizzle, creating a well-balanced flavor profile.
- Step 3: Add a light drizzle of eel sauce just before serving to ensure it maintains its rich, glossy finish.
Tip: You can also use a pre-made eel sauce, which is often available at Asian markets or grocery stores. Just warm it up slightly before drizzling.
3. Combining Both Drizzles:
For those who love a balance of heat and sweetness, combining both sriracha and eel sauce can be a game-changer. The creamy, spicy sriracha paired with the sweet and savory eel sauce creates a layered, multidimensional flavor profile that’s irresistible.
How to combine the sauces:
- Step 1: Prepare both sriracha and eel sauce as described above.
- Step 2: Drizzle a generous amount of sriracha sauce over the baked Salmon Sushi Bake first.
- Step 3: Follow up with a drizzle of eel sauce, layering it over the top to create an enticing contrast of flavors and textures.
- Step 4: Optionally, garnish with a sprinkle of scallions or sesame seeds to add extra flavor and visual appeal.
Tip: You can drizzle the sauces just before serving or after baking to maintain their textures and flavors. If you prefer a milder heat, use less sriracha or mix it with a bit more mayonnaise to balance out the spiciness.
4. Extra Tips for Drizzling Perfection:
- Consistency is key: Make sure your drizzle is not too runny or too thick. If the sriracha or eel sauce is too thick, you can thin it out slightly with a small amount of water or soy sauce.
- Test and adjust: Always taste the sauces before drizzling over the bake. If you want more heat, add more sriracha; if you prefer more sweetness, add a little more eel sauce.
- Presentation matters: Drizzle the sauces in a zig-zag or swirl pattern to make the presentation more visually appealing. This helps distribute the sauce evenly across the dish.
Adding a spicy drizzle with extra sriracha or eel sauce takes your Salmon Sushi Bake to new heights by introducing bold flavors that complement the rich, creamy layers of salmon and sushi rice. Whether you choose to go with the heat of sriracha, the sweetness of eel sauce, or a combination of both, this drizzle brings an exciting flavor boost that everyone will love.
Make It Keto-Friendly by Replacing Rice with Cauliflower Rice
For those following a keto diet or anyone looking to reduce their carbohydrate intake, transforming your Salmon Sushi Bake into a keto-friendly meal is easier than you might think. The key modification is swapping out the traditional sushi rice for cauliflower rice, a popular low-carb alternative. Here’s how this simple substitution works and how it helps maintain the flavor and texture you love in the dish while making it keto-friendly.
1. Why Cauliflower Rice Works for Keto:
Cauliflower rice is made by finely chopping or grating cauliflower into small, rice-like pieces. It’s a great substitute for regular rice because it’s naturally low in carbohydrates, with only about 2 grams of net carbs per cup, compared to the 45 grams found in a cup of traditional sushi rice. This makes it an ideal base for keto meals, as it fits into the strict carb limitations of the diet while still providing a satisfying, textured component in dishes like Salmon Sushi Bake.
Benefits of cauliflower rice:
- Low in carbs: One of the main goals of a keto diet is to significantly limit carbohydrate intake, and cauliflower rice is a great way to do that.
- High in fiber: Cauliflower rice is rich in fiber, which helps support digestion and keeps you feeling fuller for longer.
- Packed with nutrients: Cauliflower is full of vitamins and minerals like Vitamin C, Vitamin K, folate, and potassium, making it a healthy addition to your meal.
2. How to Make Cauliflower Rice:
Making cauliflower rice is easy, and it can be done in several ways to achieve the desired texture.
Steps to make cauliflower rice:
- Step 1: Start by washing and drying a head of cauliflower. Cut off the stem and leaves, and chop the cauliflower into smaller florets.
- Step 2: Use a food processor to pulse the cauliflower florets until they break down into small, rice-sized pieces. If you don’t have a food processor, you can use a box grater to shred the cauliflower manually.
- Step 3: Once you have your cauliflower rice, it’s ready to be cooked. To cook it, you can sauté the rice in a pan with a bit of oil, or you can steam it in a microwave-safe bowl with a lid. Cooking it lightly helps retain the texture, and you can season it with a little salt, pepper, or sesame oil for extra flavor.
Tip: Be careful not to overcook the cauliflower rice, as it can turn mushy. You want it to have the same texture as regular rice, so aim for about 5–7 minutes of cooking time.
3. How Cauliflower Rice Compares to Regular Sushi Rice in Texture:
When replacing traditional sushi rice with cauliflower rice, it’s important to keep the texture in mind. Regular sushi rice is sticky and slightly chewy, a result of the starch content, which helps it bind together and hold its shape.
Cauliflower rice doesn’t have the same starchy properties, but with a few adjustments, it can still mimic the texture of rice in a baked dish. The key is to lightly cook the cauliflower rice so it retains a bit of bite, similar to al dente rice, and doesn’t become too soft or mushy. When layered with the rich, creamy salmon and other ingredients in the bake, the cauliflower rice provides the necessary structure without overpowering the dish.
Tip: To help cauliflower rice mimic the sticky texture of sushi rice, you can lightly mix in some almond flour or coconut flour with a bit of rice vinegar to add more texture and moisture.
4. The Flavor Impact of Cauliflower Rice in a Salmon Sushi Bake:
While cauliflower rice doesn’t have the same subtle sweetness or vinegary flavor as sushi rice, the seasonings and ingredients used in the Salmon Sushi Bake will help elevate its flavor. By adding rice vinegar (a key ingredient in sushi rice seasoning), you can make the cauliflower rice taste even closer to the traditional version, giving it a tangy undertone that complements the salmon, sriracha, and mayo in the bake.
For extra flavor, try seasoning the cauliflower rice with sesame oil, soy sauce, or rice vinegar while cooking, ensuring it blends seamlessly into the overall dish. This keeps the umami-rich flavors balanced and ensures that the cauliflower rice doesn’t feel out of place.
5. Additional Tips for a Perfect Keto Salmon Sushi Bake:
- Be mindful of liquid: Cauliflower rice tends to release more moisture than regular rice, so ensure that you drain any excess water after cooking. This will help prevent the bake from becoming too soggy.
- Use a good non-stick pan: If you’re sautéing the cauliflower rice, use a non-stick pan to avoid sticking and to ensure it cooks evenly.
- Layer with care: When layering the cauliflower rice, be sure to press it gently into the baking dish to help it hold its shape. While cauliflower rice doesn’t have the same binding properties as sushi rice, pressing it will help it maintain its texture as the dish bakes.
By swapping traditional sushi rice with cauliflower rice, you can create a delicious keto-friendly Salmon Sushi Bake that still captures all the flavor and texture of the original. This substitution doesn’t sacrifice the dish’s integrity but instead provides a healthier, lower-carb option for those following a keto diet or anyone looking to reduce carbs in their meal. With just a few simple adjustments, you can enjoy a guilt-free version of this flavorful, satisfying dish!
Conclusion:
When it comes to pairing salmon with rice, the possibilities are endless, offering a perfect balance of flavors and textures. From traditional options like sushi rice to creative twists like cauliflower rice for keto diets, there is a rice recipe that can complement any style of cooking and satisfy every palate. Whether you’re preparing a simple Salmon Sushi Bake, a flavorful salmon and rice bowl, or even a rich wild rice pilaf, the versatility of rice ensures that your salmon dishes will always stand out.
By using high-quality rice and incorporating vibrant flavors like soy sauce, sesame oil, and furikake, you can elevate your salmon recipes to new heights. Additionally, customizing your rice with ingredients like avocado, scallions, and pickled vegetables brings an extra layer of freshness and color to your plate, making each meal both delicious and visually appealing.
Remember, the best rice recipes for salmon are those that complement the fish’s natural richness while enhancing its flavor. Whether you’re looking for a comforting, classic dish or something a bit more adventurous, these rice recipes will ensure that your salmon meals are both satisfying and unforgettable.
So, don’t be afraid to experiment with different types of rice and seasonings, and soon you’ll discover your perfect combination that makes your salmon dishes truly shine!
Are you ready to try this recipe?
There are no reviews yet. Be the first one to write one.