
“The Ultimate Guide to Baking Split Chicken Breasts: Easy and Delicious” 2025
Table of Contents
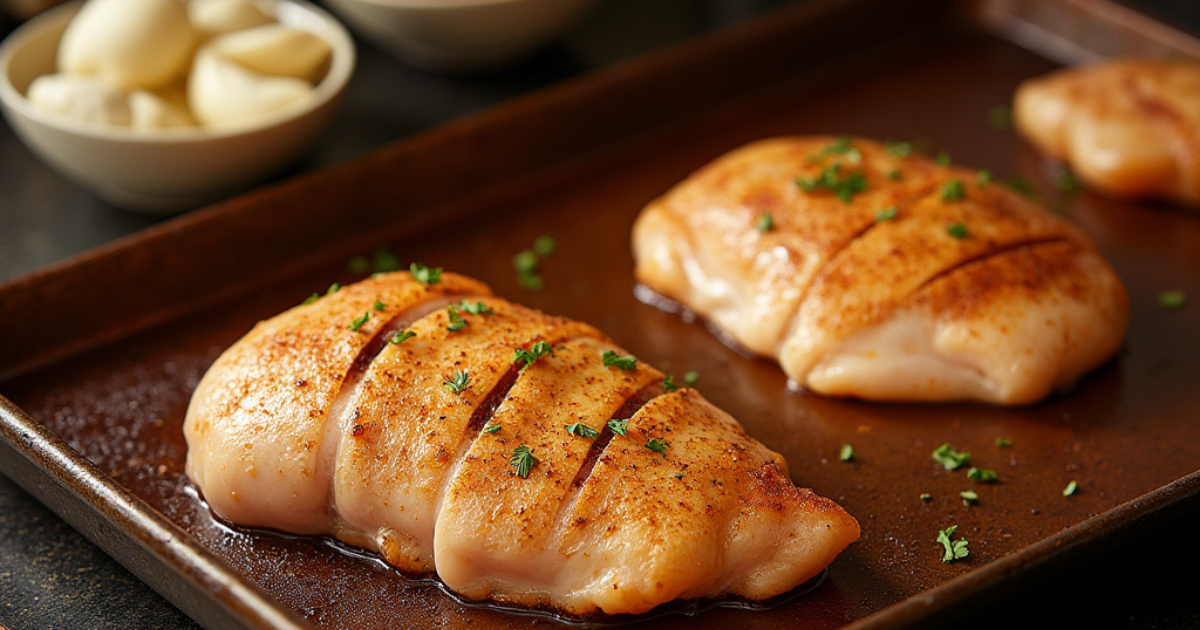
Baking split chicken breasts is one of the easiest and most rewarding ways to prepare this flavorful cut of meat. Whether you’re a busy home cook or looking for a simple yet delicious dinner idea, baked split chicken breasts deliver juicy, tender meat with crispy skin—perfect for any meal. The best part? It’s a fuss-free cooking method that requires minimal prep time while yielding maximum flavor.
In this post, we’ll explore how to bake split chicken breasts to perfection, ensuring you get that perfectly cooked, moist chicken every time. From selecting the right seasoning to setting the perfect baking temperature, you’ll discover how easy it is to elevate your chicken dishes with just a few simple steps. With the versatility of split chicken breasts, you’ll have endless meal options, from family dinners to meal prep for the week ahead.
Why Baking Split Chicken Breasts is the Best Method ?
Bone-in Chicken for Extra Flavor and Moisture
When it comes to baking chicken, bone-in cuts, like split chicken breasts, are often considered the best option for achieving superior flavor and moisture. The bone acts as a natural barrier that helps lock in the chicken’s juices, resulting in meat that is tender and flavorful.
1. Flavor Enhancement:
The bone contributes to a deeper, richer flavor in the chicken. As the chicken bakes, the fat and collagen from the bones slowly release into the meat, creating a more complex and savory taste that’s hard to achieve with boneless cuts. This means that even a simple seasoning blend can transform the chicken into something extraordinary. Whether you’re using classic herbs like rosemary and thyme or a zesty blend of garlic and paprika, the bone helps absorb these flavors, making each bite more satisfying.
2. Moisture Retention:
Baking chicken with the bone intact helps to preserve its moisture, preventing the meat from drying out. The bone acts as an insulator, slowing down the cooking process and ensuring the chicken stays juicy on the inside. This is particularly important for white meat, like chicken breasts, which can easily become dry when overcooked. The added moisture retention ensures that you get tender chicken with a succulent bite every time, without worrying about the meat turning tough or rubbery.
3. Texture Difference:
Another benefit of cooking bone-in chicken is the difference in texture. The skin of the split chicken breast crisps up nicely during baking, creating a delicious contrast between the crispy outer layer and the tender, juicy meat inside. The bones also give the chicken a slightly firmer texture, which some people prefer, as it provides a more substantial bite compared to boneless cuts.
Incorporating bone-in chicken into your cooking, especially when baking, not only enhances flavor but also makes the entire eating experience more enjoyable. It’s a small change that can yield big results, turning a simple dish into something truly special.
Baking as a Healthier and More Hands-Off Option Compared to Frying or Grilling
Baking is a popular cooking method that not only yields delicious results but also offers several health benefits, especially when compared to frying or grilling. It’s a simple, hands-off approach that allows you to cook your food with less effort and without compromising on flavor or nutrition. Here’s why baking is the healthier and more convenient option:
1. Lower Fat Content:
One of the biggest health benefits of baking is that it doesn’t require the addition of extra fats or oils like frying does. While frying submerges the chicken in oil, which can significantly increase its fat content, baking allows the chicken to cook in its own natural juices. This means that you can enjoy a leaner, lower-fat meal without sacrificing taste. If you do choose to add a small amount of olive oil or butter, it’s far less than the amount typically used in frying, helping to keep your dish light and healthy.
2. Less Risk of Overcooking or Charring:
When grilling or frying, it can be easy to overcook or burn the chicken, especially when trying to achieve that perfect crispy skin. This can result in the formation of harmful compounds, like acrylamide, which is produced when cooking at high temperatures for extended periods. With baking, the cooking process is more controlled, which means you can achieve a perfectly cooked chicken without the risk of overdoing it. This makes baking a safer method for both flavor and health, ensuring that your meal remains tender and free from harmful charred bits.
3. Retained Nutrients:
Baking is a gentler cooking method compared to grilling, which often exposes food to high direct heat. This can cause the loss of certain nutrients, particularly water-soluble vitamins like vitamin C and B vitamins. When baking, the chicken retains more of its natural nutrients, allowing you to enjoy a meal that’s not only delicious but also packed with vitamins and minerals. Additionally, since you’re not cooking the food in oil, more of the chicken’s natural goodness stays intact, preserving its nutritional value.
4. Convenience and Time-Saving:
Unlike grilling, which requires constant attention to ensure the chicken cooks evenly and doesn’t burn, or frying, which demands active monitoring and flipping, baking is a largely hands-off cooking method. Once your split chicken breasts are seasoned and placed in the oven, you can let them cook with minimal interference. This gives you more time to prepare side dishes, relax, or attend to other tasks without worrying about overcooking the chicken. Baking is especially ideal for busy weeknights or meal prepping, where convenience and time-efficiency are key.
5. Even Cooking and Juicy Results:
Baking in the oven ensures an even distribution of heat, which allows for consistent cooking and better moisture retention. Unlike grilling, where heat may be uneven or direct, resulting in dry patches or overcooked areas, baking cooks the chicken slowly and evenly, locking in all the juices. This method guarantees that your split chicken breasts will stay juicy and tender, without requiring constant flipping or adjusting.
In conclusion, baking split chicken breasts offers a healthier and more hands-off cooking experience compared to frying or grilling. It allows you to enjoy a meal that is lower in fat, retains more nutrients, and requires less effort while still delivering perfectly cooked, delicious chicken every time.
Perfect for Meal Prep and Various Recipes
Baked split chicken breasts are a versatile and practical option, making them ideal for meal prep and a wide range of recipes. Their simple preparation, combined with their ability to be used in different dishes, makes them a favorite for busy individuals and families looking to save time while eating healthily. Here’s why they’re perfect for meal prepping and a variety of recipes:
1. Meal Prep Friendly:
Baked split chicken breasts are one of the best proteins for meal prepping. Because they bake in a single batch, they can be made in large quantities at once, saving you time in the kitchen. Once cooked, they can be stored in the refrigerator for up to 4 days, ready to be added to your meals throughout the week. Whether you’re prepping lunches for work or dinner for the family, having baked chicken breasts on hand makes it easy to assemble quick and nutritious meals without cooking from scratch every day.
2. Easy to Portion:
After baking, the chicken breasts are easy to portion and divide for different meals. Each breast can be sliced, shredded, or cubed depending on the recipe you’re planning. This makes them perfect for assembling bowls, salads, sandwiches, or wraps. The chicken can also be used in casseroles or stir-fries, ensuring that every meal is balanced and protein-packed. With baked split chicken breasts, you can effortlessly manage portion control while ensuring you have enough for multiple meals.
3. Versatility in Recipes:
Baked chicken breasts can be incorporated into a wide variety of recipes, ranging from simple dishes to more elaborate meals. Here are a few examples:
- Salads: Slice or shred the chicken to top off a fresh salad with greens, vegetables, and your favorite dressing.
- Wraps and Sandwiches: Add the chicken to whole-grain wraps or sandwich bread along with some veggies, cheese, and sauce for a quick, satisfying meal.
- Chicken Bowls: Combine the chicken with grains like rice or quinoa, veggies, and a flavorful sauce like teriyaki or BBQ for a wholesome meal.
- Soups and Stews: Use the baked chicken as a base for chicken soups or stews, adding flavor and protein to your broth.
- Stir-fries and Casseroles: Dice or shred the chicken to incorporate into stir-fries, pasta dishes, or baked casseroles.
4. Customizable Flavors:
One of the key benefits of baked split chicken breasts is their ability to absorb a wide range of seasonings and marinades. This makes them a blank canvas for a variety of cuisines. You can create different flavor profiles based on the seasonings or marinades you choose. For instance, a garlic and rosemary seasoning will give the chicken an herbaceous, savory flavor perfect for Mediterranean dishes, while a smoky BBQ rub could be used to make a delicious pulled chicken for tacos or sandwiches. You can tailor the seasoning to suit whatever dish you’re preparing, from Asian-inspired bowls to classic American comfort food.
5. Long Shelf Life for Leftovers:
Not only are baked split chicken breasts easy to prepare and store, but they also have a long shelf life compared to other cooked meats. If you prepare a large batch at the start of the week, you can freeze the leftovers for later use. Simply shred or slice the chicken, place it in an airtight container or freezer bag, and store it in the freezer for up to 3 months. This makes baked chicken a great option for stocking up your freezer with convenient, ready-to-use protein that can be easily added to any meal when you’re short on time.
6. Ideal for Family-Friendly Meals:
Since baked split chicken breasts are simple to prepare and cook, they are an ideal choice for family-friendly meals. The chicken can be served as the main entrée with a side of vegetables or potatoes, or used in recipes that the whole family will enjoy, like tacos, chicken pot pie, or chicken and rice casserole. Its mild flavor also means that even picky eaters will appreciate it, making it a reliable and flexible option for feeding a crowd.
In summary, baked split chicken breasts are not only a convenient and healthy option for meal prepping, but their versatility makes them perfect for a wide range of recipes. From salads and wraps to casseroles and stir-fries, this easy-to-make protein can be transformed into a variety of delicious meals that suit any taste. With the ability to store leftovers and use them in different dishes throughout the week, baked split chicken breasts are the ultimate meal prep solution.
Key Ingredients and Tools for Perfectly Baked Chicken
Ingredients: Split Chicken Breasts, Olive Oil, Garlic Powder, Paprika, Salt, Pepper, and Optional Herbs
The key to making perfectly baked split chicken breasts is choosing the right combination of ingredients that enhance the natural flavors of the chicken while ensuring moisture and tenderness. Let’s break down each ingredient in this simple yet effective seasoning blend, which will elevate your dish and ensure delicious, juicy results every time.
1. Split Chicken Breasts:
The star ingredient in this recipe is, of course, the split chicken breast. This cut includes both the breast meat and the bone, which helps retain moisture and adds a rich flavor as it cooks. It’s perfect for baking, as the bone helps prevent the chicken from drying out, keeping the meat tender and juicy. You can purchase split chicken breasts with or without skin, depending on your preference for a crispy exterior or a lower-fat option. The skin crisps beautifully during baking, creating a delightful contrast to the moist meat inside.
2. Olive Oil:
Olive oil is a key ingredient in this recipe for two main reasons: flavor and moisture. Olive oil adds a mild, slightly fruity flavor that complements the chicken, while also helping to keep the meat moist as it cooks. It also ensures that the seasoning sticks to the chicken evenly, creating a nice coating of herbs and spices. If you prefer a slightly different flavor, you could substitute olive oil with avocado oil or coconut oil, both of which have a high smoke point and can also contribute to a moist result.
3. Garlic Powder:
Garlic powder is a must-have in this seasoning blend for its rich, savory flavor. It adds a deep, aromatic taste to the chicken without being overpowering. Unlike fresh garlic, garlic powder infuses the chicken evenly as it bakes, enhancing the flavor profile without the risk of burning or becoming too sharp. You can also substitute garlic powder with garlic granules for a slightly more textured result, but either option will deliver that essential garlic flavor.
4. Paprika:
Paprika brings a beautiful depth of flavor and color to the dish. It has a mild, smoky taste that enhances the natural flavors of the chicken without being too spicy. Paprika also adds a lovely red hue to the skin as it bakes, giving the chicken an appetizing, golden-brown appearance. If you prefer a little heat, you could opt for smoked paprika or a spicier variety like hot paprika, depending on your taste preferences. For a milder version, sweet paprika is the perfect choice.
5. Salt:
Salt is a crucial ingredient in any seasoning blend, as it brings out the natural flavors of the chicken. A pinch of salt helps balance the other ingredients and enhances the overall taste of the baked chicken. It’s important to use the right amount of salt to avoid overpowering the dish, so a light sprinkle before baking should suffice. You can adjust the salt based on your dietary needs or preferences, using alternatives like sea salt, kosher salt, or Himalayan pink salt.
6. Pepper:
Freshly ground black pepper adds a subtle heat and a touch of earthiness to the seasoning. Pepper complements the garlic and paprika, adding depth to the flavor without overwhelming the chicken. Pepper also provides a mild spice that contrasts well with the richness of the olive oil and the smokiness of the paprika. For a more complex flavor, consider using white pepper, which has a slightly different taste, or even a blend of black and cracked pepper for added texture and heat.
7. Optional Herbs:
While the core seasoning blend includes garlic powder, paprika, salt, and pepper, you can easily customize the recipe with a variety of herbs to suit your taste. Herbs like rosemary, thyme, and oregano add aromatic qualities that pair wonderfully with chicken. For a more Mediterranean flavor, try adding fresh or dried basil, parsley, or sage. You can sprinkle the herbs directly on the chicken or mix them with the olive oil for a more evenly distributed flavor. Fresh herbs, added towards the end of cooking, will provide a bright, fresh contrast to the savory seasoning.
Why These Ingredients Work Together:
Together, these ingredients create a harmonious flavor profile that enhances the natural taste of the chicken. The olive oil acts as a carrier for the spices, ensuring that the seasonings coat the chicken evenly and adhere during baking. Garlic powder and paprika provide depth and warmth, while salt and pepper balance the overall flavor. Optional herbs add additional aromatic elements, making each bite more complex and satisfying.
This seasoning blend is not only simple but highly customizable. If you want to experiment, you can add a dash of lemon zest, a sprinkle of cayenne for heat, or even a drizzle of honey for a touch of sweetness. These ingredients work beautifully together to create a juicy, flavorful chicken that’s perfect for a wide range of meals.
Tools: Baking Sheet, Parchment Paper, Meat Thermometer, and Roasting Rack
The right tools can make a huge difference when baking split chicken breasts, ensuring that the chicken is cooked evenly, remains juicy, and achieves the perfect texture. Each of the tools listed here plays a specific role in helping you achieve consistent and professional results every time. Let’s break down the importance of each tool and how it contributes to the cooking process:
1. Baking Sheet:
A baking sheet is the foundation of any baked chicken dish. This flat, rectangular metal tray is essential for providing an even cooking surface, allowing the heat to circulate around the chicken as it bakes. It’s important to choose a sturdy, heavy-duty baking sheet, as thinner sheets may warp or cook unevenly under high heat. Using a large baking sheet also ensures that the chicken pieces have enough space between them, which allows for better airflow and helps the chicken cook evenly on all sides. A baking sheet with a raised edge helps prevent juices from spilling over and keeps your oven clean during cooking.
Why it’s important: A baking sheet ensures even heat distribution and creates a stable cooking surface, preventing the chicken from being overcrowded, which can result in uneven cooking.
2. Parchment Paper:
Parchment paper is a must-have for baking because it acts as a non-stick surface, preventing the chicken from sticking to the baking sheet. This makes cleanup much easier and ensures that the skin of the chicken doesn’t stick or tear off when you remove it from the pan. In addition to its non-stick properties, parchment paper can also help to retain moisture, allowing the chicken to cook in its own juices while keeping the skin crispy. If you’re baking chicken with skin, parchment paper helps to prevent it from getting stuck to the sheet, ensuring that you can lift the chicken off easily without any skin sticking.
Why it’s important: Parchment paper makes cleanup easier, prevents sticking, and allows for a crispier skin on the chicken by keeping it from sitting in its own juices.
3. Meat Thermometer:
A meat thermometer is one of the most important tools when it comes to baking chicken breasts, especially bone-in cuts like split chicken breasts. It takes the guesswork out of cooking and ensures that the chicken reaches a safe internal temperature of 165°F (74°C), which is the minimum required for poultry. By inserting the thermometer into the thickest part of the chicken breast (avoiding the bone), you can accurately monitor the cooking process and prevent overcooking or undercooking. Using a meat thermometer helps to retain the chicken’s juiciness, as it ensures the chicken is cooked just right without becoming dry or overdone.
Why it’s important: A meat thermometer guarantees the chicken is cooked to perfection every time, ensuring safe internal temperatures and preventing overcooking or undercooking.
4. Roasting Rack:
A roasting rack is an optional but highly beneficial tool when baking split chicken breasts. This raised metal rack holds the chicken above the baking sheet, allowing air to circulate around the chicken on all sides as it bakes. This helps to achieve an evenly cooked chicken with a perfectly crispy skin. The rack also allows any excess fat or juices to drip away, ensuring that the chicken doesn’t sit in its own rendered fat, which could lead to soggy skin. If you want your chicken to have an extra crispy exterior, using a roasting rack is a great way to elevate the dish.
Why it’s important: A roasting rack promotes even heat distribution and helps the chicken cook more uniformly, while also allowing excess fat to drain away, leading to crispier skin and juicier meat.
Why These Tools Work Together: Using these tools in combination creates an ideal environment for baking split chicken breasts. The baking sheet provides the stable surface, while parchment paper ensures easy removal and cleanup. The meat thermometer takes the guesswork out of cooking and guarantees perfectly cooked chicken, and the roasting rack enhances heat circulation, promoting crispiness and even cooking. Together, they ensure that your chicken turns out juicy, flavorful, and visually appealing every time you bake.
Importance of Preheating the Oven and Choosing the Right Temperature
Preheating the oven and selecting the correct temperature are fundamental steps in ensuring that your baked split chicken breasts turn out perfectly every time. While they may seem like small details, they have a significant impact on the cooking process, helping to lock in moisture, achieve even cooking, and create a deliciously crispy skin. Let’s break down why both preheating and temperature are so crucial when baking chicken breasts.
1. Preheating the Oven:
Why Preheating Matters:
Preheating the oven is an essential step that ensures the oven reaches the desired cooking temperature before you place the chicken inside. Without preheating, the chicken would begin cooking in a gradually warming oven, leading to uneven cooking. This means that the chicken could take longer to cook, may not cook through properly, or could result in dry, overcooked parts. Preheating guarantees that the chicken is exposed to a consistent, evenly distributed heat from the moment it enters the oven, helping to lock in moisture and ensure even cooking throughout.
How Preheating Affects Texture and Moisture:
By preheating the oven to the correct temperature, you’re immediately creating an environment where the chicken can start cooking right away. This helps retain moisture in the meat, especially with bone-in cuts like split chicken breasts, which benefit from immediate heat to seal in their natural juices. The result is a moist, tender interior and a crisp exterior. Preheating also allows the skin of the chicken to crisp up quickly, which is especially important for getting that golden, crispy finish that everyone loves.
Time Efficiency:
Preheating helps optimize cooking time. Without it, your chicken may take longer to bake, which could lead to overcooking or drying out the chicken. Since the oven is already at the correct temperature when you place the chicken in, you can follow your recipe’s suggested baking time with more confidence and less guesswork.
2. Choosing the Right Temperature:
Why the Right Temperature is Crucial:
The temperature you set your oven to directly affects how the chicken cooks, influencing both texture and flavor. For split chicken breasts, the ideal temperature is generally between 375°F and 425°F (190°C to 220°C). This range allows the chicken to cook thoroughly while also promoting the Maillard reaction—a chemical reaction that occurs when proteins and sugars are exposed to heat, creating a golden-brown, flavorful crust on the chicken’s surface. Cooking at too low a temperature may cause the chicken to cook too slowly, potentially leading to dry meat. On the other hand, cooking at too high a temperature can cause the skin to burn or become overly crispy before the inside is fully cooked.
Bone-In Chicken Needs Lower Temperature:
When baking bone-in split chicken breasts, it’s important to choose a temperature that allows the meat to cook thoroughly without overcooking the exterior. Higher temperatures, such as 425°F, are great for skin-on chicken because they allow the skin to crisp up quickly. However, a slightly lower temperature, such as 375°F, is ideal for ensuring the inside cooks through while still allowing the skin to get crispy without burning. Cooking the chicken at the right temperature ensures that both the interior and the exterior cook at the optimal rate, resulting in a juicy, flavorful dish.
Cooking Time Considerations:
At the correct temperature, split chicken breasts typically bake in 35 to 45 minutes, depending on the size of the breasts and whether they are bone-in or boneless. The key is to follow the recipe’s recommended temperature to prevent undercooking or overcooking. Remember, the meat should reach an internal temperature of 165°F (74°C) when checked with a meat thermometer.
3. Impact on Skin Crispiness:
Creating Crispy Skin:
The temperature at which you bake the chicken also plays a crucial role in achieving a crispy, golden skin. A higher temperature, like 400°F to 425°F, allows the skin to become crisp and crackly while locking in moisture. The skin should be exposed to high heat for the first 20-25 minutes, then the temperature can be reduced to allow the meat to cook through without over-browning the skin. This balance between heat levels is key to achieving the perfect texture—crispy skin on the outside and juicy meat on the inside.
Even Cooking:
Selecting the right oven temperature ensures even cooking across all parts of the chicken. With bone-in chicken, the meat near the bone can take longer to cook than the outer portions. By preheating the oven and maintaining a consistent, moderate-to-high temperature, you allow the heat to penetrate the chicken uniformly, resulting in an evenly cooked dish. This also ensures that the chicken remains tender and moist without any undercooked or overcooked sections.
4. Avoiding Common Pitfalls:
Preheating Prevents Cold Spots:
If you place chicken in a non-preheated oven, the heat will gradually increase as the oven warms up, creating cold spots on the chicken. These cold spots can result in uneven cooking, which may lead to some parts being undercooked while others are overcooked. Preheating ensures that all areas of the chicken cook at the same rate, making it easier to achieve consistent, delicious results.
The Risk of Overcooking or Drying Out:
Baking chicken at the wrong temperature can easily lead to overcooking, especially with split chicken breasts. If the temperature is too high, the chicken will cook too quickly on the outside, while the inside remains raw. Alternatively, if the temperature is too low, the chicken will take longer to cook, causing it to dry out. Choosing the right temperature and ensuring the oven is preheated prevents these issues, allowing for perfectly cooked chicken every time.
In summary, preheating the oven and selecting the appropriate baking temperature are essential steps in ensuring that your split chicken breasts turn out juicy, flavorful, and perfectly cooked. Preheating guarantees even cooking and moisture retention, while the right temperature helps achieve a crispy exterior without compromising the juiciness of the meat. By following these guidelines, you’ll be able to bake split chicken breasts with confidence and enjoy a delicious meal each time.
Step-by-Step Guide to Baking Split Chicken Breasts
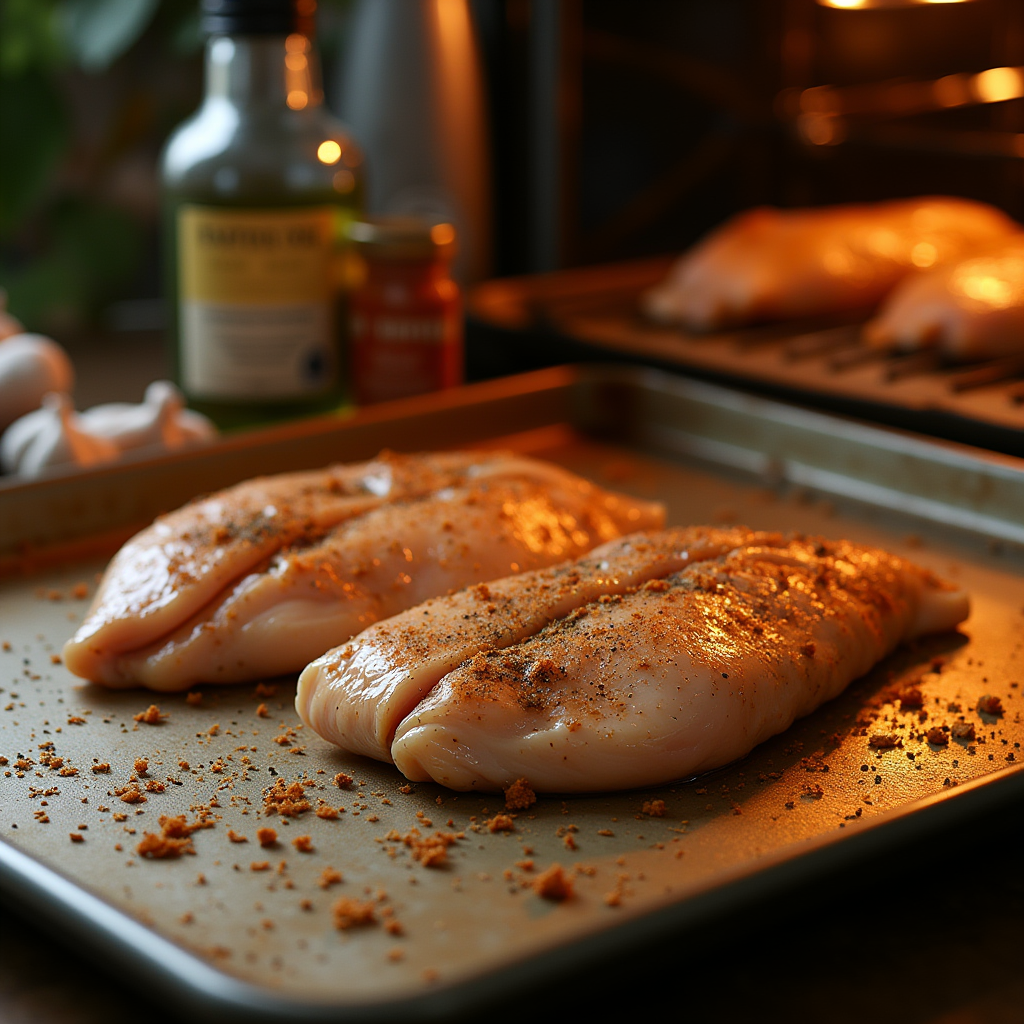
Preparing the Chicken: Cleaning, Patting Dry, and Seasoning
Properly preparing split chicken breasts before baking is essential to achieving a perfectly cooked, flavorful dish. By taking the time to clean, pat dry, and season the chicken correctly, you ensure that the meat stays juicy, the skin becomes crispy, and the flavors are balanced and well-distributed. Each of these steps plays a key role in the final result, and understanding why they’re necessary will help you execute the recipe flawlessly. Here’s a closer look at each of these critical preparation steps:
1. Cleaning the Chicken:
Why Cleaning is Important:
When preparing chicken, particularly if it’s purchased from a butcher or a supermarket, it’s important to clean the chicken to remove any residual feathers, skin, or bone fragments. While most chicken breasts are cleaned before packaging, a quick rinse can help ensure that all excess debris is removed. However, it’s essential to note that washing chicken with water is not necessary (and can actually spread bacteria in the kitchen). Instead, simply inspect the chicken for any feathers or leftover pieces of skin, and trim them away if needed.
How to Clean:
Using a sharp kitchen knife, carefully remove any excess fat, skin, or feathers from the chicken. Be mindful of any bones that might be sticking out, especially if you’re using bone-in chicken breasts. Once the chicken is free of these unwanted bits, you’re ready to move on to the next step. Cleaning the chicken helps to ensure that it cooks evenly and is free of any unwanted textures or flavors.
2. Patting the Chicken Dry:
Why Drying the Chicken is Essential:
Patting the chicken dry with paper towels is one of the most important steps for achieving crispy, golden skin. Moisture on the surface of the chicken can prevent the skin from becoming crisp during baking. If the chicken is too wet, it will steam in the oven rather than bake, leading to soggy skin and a less appealing texture. Additionally, moisture can dilute the seasoning, preventing it from adhering properly to the meat.
How to Pat the Chicken Dry:
After cleaning, use a few paper towels to gently pat the chicken dry on all sides. Don’t press too hard, but make sure to absorb as much moisture as possible from the surface of the meat and skin. You can also use a clean kitchen towel, but paper towels are usually more hygienic. Patting the chicken dry also helps the seasoning to stick better, allowing the spices and herbs to form a flavorful crust on the surface during baking.
Extra Tip:
For even crispier skin, you can let the chicken sit uncovered in the refrigerator for 30 minutes to an hour before baking. This allows any remaining moisture on the surface to evaporate, which enhances the skin’s ability to crisp up in the oven.
3. Seasoning the Chicken:
Why Proper Seasoning is Crucial:
Seasoning is where the magic happens! The right combination of spices and herbs will infuse the chicken with rich, savory flavors that elevate the dish. Whether you’re keeping it simple with salt, pepper, and garlic powder or experimenting with a more complex blend of herbs and spices, seasoning is key to enhancing the chicken’s natural flavors. Properly seasoning the chicken also helps create a flavorful outer layer that locks in moisture as the chicken bakes, giving you that perfect, juicy bite.
How to Season the Chicken:
Once your chicken is dry, it’s time to season. Start by rubbing a thin layer of olive oil or melted butter all over the chicken. This helps the seasonings to adhere to the skin while also providing moisture to the meat. Then, generously sprinkle your chosen seasonings over the chicken. Common seasonings for split chicken breasts include:
- Salt & Pepper: These basic staples enhance the chicken’s natural flavors.
- Garlic Powder: Adds a savory depth to the chicken.
- Paprika: Brings mild heat and a beautiful color to the skin.
- Herbs (Optional): Rosemary, thyme, or oregano add earthy, aromatic notes to the chicken.
For bone-in chicken, you may want to season the cavity where the bone is exposed as well as the skin. Make sure the seasoning is evenly spread on all sides of the chicken for consistent flavor.
How Much Seasoning to Use:
Don’t be shy with your seasonings! A generous coating of salt, pepper, and your chosen herbs will result in the most flavorful chicken. You can always adjust the amount depending on your preferences or dietary restrictions. The goal is to have an even distribution of flavors on every inch of the chicken.
Optional Marinades or Brining:
For even more flavor, you can marinate the chicken for an hour or up to overnight in the refrigerator. A simple marinade might include olive oil, lemon juice, garlic, and herbs. Brining is another option, especially for bone-in chicken. A saltwater brine helps the chicken retain moisture during cooking, keeping the meat juicy and tender. If you’re brining, be sure to rinse the chicken after soaking to prevent overly salty meat.
4. Optional: Letting the Chicken Rest for a Few Minutes Before Baking:
Why Resting is Helpful:
After seasoning, allowing the chicken to rest for 10-15 minutes before placing it in the oven is an optional but useful step. Resting allows the seasoning to penetrate the chicken more deeply, enhancing the flavor. Additionally, resting the chicken at room temperature ensures it cooks more evenly in the oven. Cold chicken placed directly into a hot oven can cook unevenly, especially with bone-in cuts, so letting the meat sit briefly helps prevent this.
How to Rest the Chicken:
Simply cover the chicken loosely with plastic wrap or foil and leave it at room temperature for 10-15 minutes while the oven preheats. If you’re preparing multiple pieces, you can rest them all together on the baking sheet or a separate platter. Once the chicken has rested, it’s ready to go into the oven for baking.
Summary of Preparation Steps:
- Cleaning the Chicken – Trim away any excess fat, skin, or feathers, ensuring the chicken is free of unwanted pieces.
- Patting Dry – Remove any excess moisture from the chicken’s surface to ensure crisp skin and better seasoning adherence.
- Seasoning – Generously season the chicken with olive oil, salt, pepper, garlic powder, and optional herbs for a flavorful and aromatic dish.
- Optional Resting – Let the chicken rest at room temperature to ensure even cooking and better flavor penetration.
By following these simple steps, you’re setting yourself up for success in achieving juicy, flavorful split chicken breasts with crispy skin. Proper preparation is the foundation of a great dish, and these techniques will help you make the most of your ingredients and cooking process.
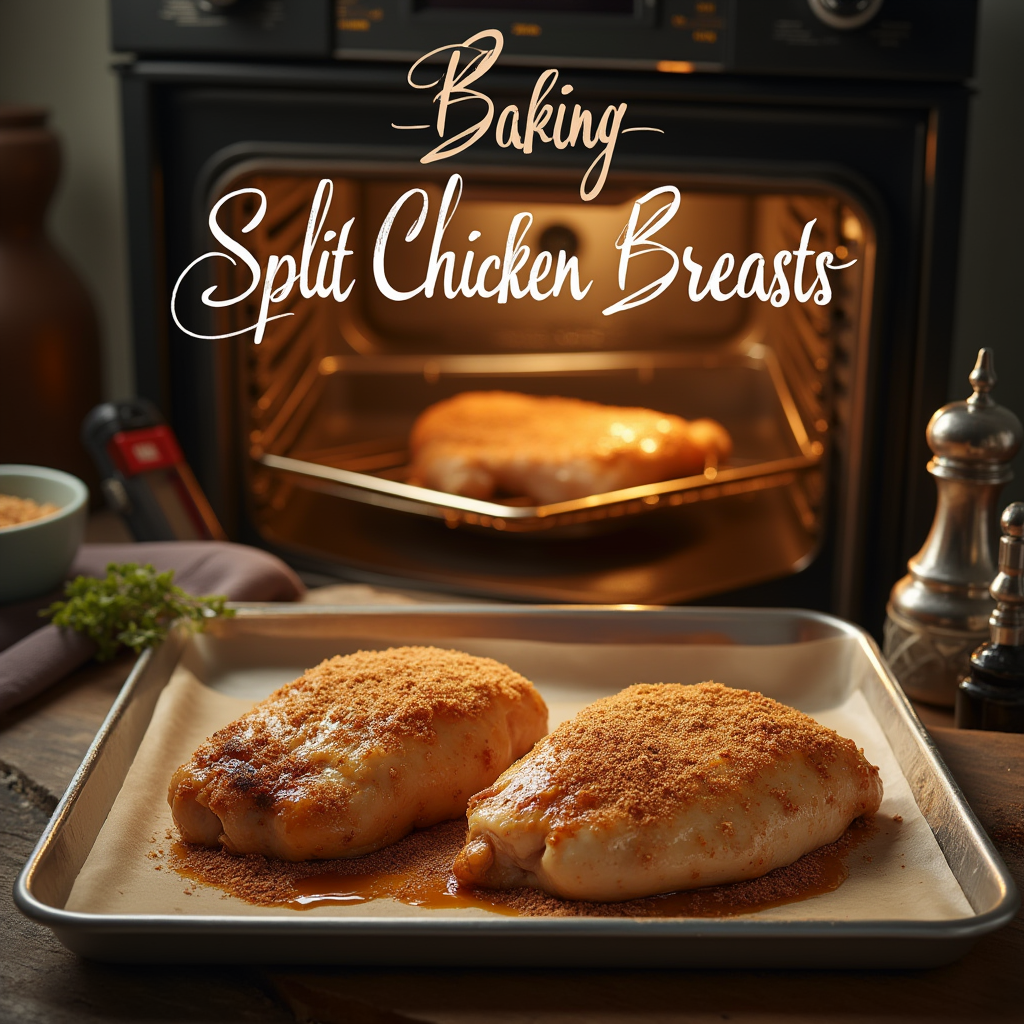
Baking Process: Setting the Right Temperature and Cooking Time
The baking process is one of the most crucial stages when it comes to achieving perfectly cooked split chicken breasts. By setting the right temperature and cooking time, you ensure that the chicken cooks evenly, stays juicy, and achieves that desirable golden-brown skin. These elements are essential for creating a meal that’s both flavorful and tender. Let’s break down why the right temperature and cooking time matter and how to use them effectively.
1. Importance of the Right Temperature:
Why Temperature Matters: The temperature at which you bake split chicken breasts has a significant impact on the texture, moisture retention, and flavor of the chicken. Cooking the chicken at too low of a temperature can result in undercooked meat, while too high of a temperature can lead to dry, overcooked chicken. The goal is to strike a balance where the chicken cooks thoroughly but remains tender and moist on the inside while developing a crispy, golden skin on the outside.
Ideal Temperature Range: For split chicken breasts, the optimal baking temperature is typically between 375°F (190°C) and 425°F (220°C). This temperature range is ideal for ensuring that both the skin and meat cook evenly. Here’s a breakdown of how different temperatures affect the cooking process:
- 375°F (190°C): This is a moderate baking temperature, perfect for bone-in chicken breasts. It allows the chicken to cook slowly enough to retain moisture while ensuring the skin becomes crispy and golden. This temperature also allows the heat to penetrate the bone, which is important when baking bone-in chicken.
- 400°F (200°C) to 425°F (220°C): These higher temperatures are excellent for achieving a crispy, golden-brown exterior while sealing in juices. These temperatures work best for skin-on chicken breasts, where you want the skin to get crispy and delicious without drying out the meat inside. However, be mindful to check the chicken’s internal temperature with a thermometer to avoid overcooking.
Oven Calibration: It’s also important to note that ovens can vary slightly in temperature, so it’s a good idea to use an oven thermometer to verify the temperature inside your oven, ensuring accuracy in your cooking process. Even a slight difference can impact the final result.
2. The Role of Cooking Time:
How Cooking Time Affects Results: The cooking time for split chicken breasts is closely tied to both the oven temperature and the size of the chicken breasts. Cooking the chicken for the right amount of time allows it to cook thoroughly, ensuring that it reaches the proper internal temperature without drying out. The cooking time varies based on the oven temperature, the thickness of the chicken breasts, and whether the chicken is bone-in or boneless.
General Cooking Time Guidelines: At 375°F (190°C), bone-in split chicken breasts typically take around 35 to 45 minutes to bake fully. The chicken will cook more slowly at this temperature, allowing the bone to cook the meat from the inside while preserving its moisture.
At 400°F (200°C), the chicken will bake more quickly, typically in 30 to 40 minutes, depending on the size. This slightly higher temperature promotes quicker skin crisping and a nice sear on the outside while allowing the inside to stay juicy.
At 425°F (220°C), you may only need about 25 to 35 minutes to achieve a golden-brown, crispy exterior with a perfectly cooked interior. This higher heat works best for skin-on chicken breasts, helping the skin get crispy without overcooking the meat.
Checking for Doneness: Regardless of the temperature and cooking time, the most reliable way to ensure the chicken is cooked through is to check its internal temperature with a meat thermometer. Insert the thermometer into the thickest part of the chicken, avoiding the bone. The internal temperature should reach 165°F (74°C) to be considered safe for consumption. If the chicken hasn’t reached this temperature, it needs additional time in the oven.
3. Managing Even Cooking:
How to Ensure Even Cooking: Even cooking is crucial for ensuring that your split chicken breasts turn out moist and evenly browned. Here are some tips for promoting even cooking:
- Even Placement on the Baking Sheet: Arrange the chicken breasts on a baking sheet in a single layer, ensuring they aren’t overcrowded. Overcrowding can trap moisture and prevent the skin from crisping. If needed, bake in batches.
- Roasting Rack: For even airflow around the chicken, consider using a roasting rack placed on top of the baking sheet. This helps the hot air circulate evenly around the chicken, promoting more uniform cooking and crispier skin.
- Turning the Chicken: If you want extra crispiness, you can flip the chicken halfway through the cooking time. This helps both sides of the chicken get crispy, although it’s not strictly necessary if you’re using a high temperature that crisps the skin quickly.
- Resting After Baking: After removing the chicken from the oven, allow it to rest for 5 to 10 minutes before serving. This step lets the juices redistribute throughout the meat, resulting in a more moist and flavorful chicken.
4. High-Heat Crisping Techniques:
Maximizing Crispy Skin: If your main goal is to get that perfect, crispy skin, consider a few high-heat tricks:
- Start at a Higher Temperature: Begin baking the chicken at 425°F (220°C) for the first 15-20 minutes. This will allow the skin to become golden and crisp. Then, reduce the temperature to 375°F (190°C) to allow the meat to cook through without over-browning the skin.
- Broil at the End: If you want an extra crispy finish, you can turn on the broiler for the last few minutes of cooking. Watch the chicken closely to avoid burning, but broiling helps the skin get even crispier.
5. Resting Time:
Why Resting is Important: Once the chicken reaches the desired internal temperature, remove it from the oven and allow it to rest for about 5 to 10 minutes. Resting is key to allowing the juices to redistribute throughout the meat. If you cut into the chicken immediately, the juices will spill out, leaving the meat drier. Resting helps to lock in the moisture, ensuring that every bite is as juicy and flavorful as possible.
Summary of the Baking Process:
- Preheat the oven to the right temperature (375°F to 425°F) for optimal cooking.
- Bake for the recommended time (35-45 minutes for bone-in breasts, 30-40 minutes for higher temperatures or boneless).
- Check internal temperature to ensure chicken reaches 165°F (74°C) for safety.
- Rest after baking to allow juices to redistribute for a juicy, flavorful result.
By understanding and applying the right baking temperature and time, you’re setting yourself up for a perfectly cooked split chicken breast that’s juicy on the inside, crispy on the outside, and packed with flavor.
How to Check for Doneness Using a Meat Thermometer
Using a meat thermometer is one of the most reliable ways to ensure your split chicken breasts are perfectly cooked, juicy, and safe to eat. This method takes the guesswork out of cooking and helps you avoid undercooking or overcooking your chicken. Here’s why checking for doneness with a meat thermometer is essential, and how to do it correctly.
1. Why a Meat Thermometer is Crucial:
Ensuring Food Safety: Chicken needs to be cooked to a minimum internal temperature of 165°F (74°C) to be safe for consumption. This temperature is critical for killing any harmful bacteria, such as Salmonella, that may be present in raw chicken. Without a thermometer, it can be difficult to accurately assess whether the chicken has reached this safe temperature, especially if the chicken breasts are large or thick.
Avoiding Overcooking: While the internal temperature ensures food safety, it also prevents overcooking. Chicken that’s overcooked can become dry, tough, and unpleasant to eat. The meat thermometer allows you to remove the chicken from the oven at just the right moment, when it’s fully cooked but still moist and tender.
2. The Correct Way to Use a Meat Thermometer:
Choosing the Right Thermometer: There are several types of meat thermometers, but the most common for home cooking are:
- Instant-Read Thermometer: This type provides a quick temperature reading when you insert it into the chicken. It’s ideal for checking doneness during or after cooking. However, it doesn’t remain in the chicken while it cooks.
- Leave-In Thermometer: This thermometer can be left in the chicken while it’s baking, continuously monitoring the internal temperature without the need to open the oven. It’s particularly useful if you’re cooking larger pieces of chicken or want to monitor temperature without interrupting the cooking process.
Inserting the Thermometer Correctly: For accurate results, it’s important to insert the meat thermometer into the thickest part of the chicken breast. If you’re using bone-in chicken breasts, make sure to avoid the bone when inserting the thermometer, as this can give you a false reading. The bone conducts heat differently than the meat, leading to an inaccurate temperature.
- Insert the thermometer at a slight angle into the thickest part of the breast, making sure it’s deep enough to reach the center of the meat.
- For split chicken breasts, the thickest part is usually towards the center of the breast. Make sure to insert the thermometer horizontally (from the side) to get the most accurate reading.
Avoiding Contact with the Bone: If you’re cooking bone-in chicken, be careful not to let the thermometer touch the bone. The bone will heat up more quickly than the meat, which can result in a higher reading than the actual internal temperature of the chicken breast. This can lead to overcooking. Always insert the thermometer into the meat, not near the bone.
3. What Temperature Should the Chicken Be?
The chicken is fully cooked when the internal temperature reaches 165°F (74°C), according to food safety guidelines. At this temperature:
- The chicken will be safe to eat, as harmful bacteria will be killed.
- The meat will remain juicy and tender, as it hasn’t been cooked to the point of drying out.
If you’re cooking bone-in chicken breasts, the temperature can vary slightly at different parts of the chicken. The thickest part of the meat should reach 165°F (74°C), while the area near the bone might be a bit cooler.
4. Checking Multiple Pieces:
If you’re baking more than one split chicken breast or cooking a batch of chicken, it’s important to check the internal temperature of each piece. Not all pieces of chicken cook at the same rate, especially if they vary in size. The smaller pieces may cook faster than the larger ones, so always check each one individually.
How to Check Multiple Pieces: Insert the thermometer into the thickest part of each chicken breast to check if all pieces have reached the safe temperature of 165°F (74°C). If you’re baking chicken on a roasting rack, the pieces at the bottom may cook slightly faster, so be mindful when checking the temperature.
5. What to Do if the Chicken Isn’t Fully Cooked:
If your thermometer reads below 165°F (74°C), your chicken needs more time to cook. Here’s what to do:
- Return the Chicken to the Oven: If you’re using a leave-in thermometer, simply place the chicken back in the oven and continue cooking, checking the temperature every 5-10 minutes. If you’re using an instant-read thermometer, insert the thermometer again after 5-10 minutes of additional cooking time to ensure it has reached the correct temperature.
- Cover the Chicken: If the skin is already brown but the internal temperature is still too low, consider covering the chicken loosely with foil to prevent it from overbrowning while it continues to cook.
- Monitor the Temperature Closely: Once your chicken reaches 165°F (74°C), remove it from the oven immediately to avoid overcooking.
6. What If the Chicken is Overcooked?
While checking for doneness with a thermometer helps you avoid undercooking, it’s also useful for preventing overcooking. Overcooked chicken becomes dry and tough, which can lead to an unpleasant eating experience. If your thermometer shows a temperature higher than 165°F (74°C) and the chicken is noticeably dry or tough, this means the chicken was likely in the oven for too long.
For next time, make sure to pull the chicken out of the oven as soon as it hits the target temperature of 165°F (74°C). Resting the chicken for 5-10 minutes will allow the juices to redistribute throughout the meat, making it more tender and juicy.
Summary of How to Check for Doneness:
- Insert the Meat Thermometer into the thickest part of the chicken breast, avoiding the bone.
- Look for 165°F (74°C) on the thermometer to ensure the chicken is safe and properly cooked.
- Check multiple pieces if cooking more than one chicken breast to ensure uniform doneness.
- Let the Chicken Rest after reaching the correct temperature to allow juices to redistribute and maintain moisture.
By using a meat thermometer, you can be confident that your split chicken breasts are cooked to perfection—juicy, flavorful, and safe to eat. This simple step ensures you achieve a delicious, tender result every time.
Letting the Chicken Rest for Juicier Results
Allowing your baked split chicken breasts to rest after they come out of the oven may seem like an optional step, but it plays a crucial role in ensuring that your chicken remains juicy, tender, and flavorful. Resting the chicken allows the juices to redistribute throughout the meat, leading to a more succulent and enjoyable eating experience. Here’s why resting is so important and how to do it correctly.
1. Why Resting Makes a Difference:
When chicken (or any meat) cooks, the heat causes the muscle fibers to contract and squeeze out moisture. As the chicken cooks, the juices move toward the center of the meat. If you cut into the chicken immediately after removing it from the oven, the juices will spill out, resulting in dry, less flavorful meat.
By letting the chicken rest, the muscle fibers have time to relax and reabsorb the juices. This process helps the chicken retain its moisture, making each bite juicy and tender. Resting also improves the overall texture of the meat, allowing the fibers to set into place, which helps maintain a perfect, pleasant consistency.
2. How Long Should You Let Chicken Rest?
The amount of time you should let the chicken rest depends on the size and thickness of the chicken breasts. For split chicken breasts, a 5 to 10-minute rest period is ideal. This time allows the juices to redistribute evenly throughout the meat, resulting in more flavorful and moist chicken.
- Smaller breasts or thin cuts may only need about 5 minutes to rest.
- Larger or bone-in breasts should rest for closer to 10 minutes.
During this rest period, the chicken will continue to hold its heat, which means the juices will not only redistribute, but the residual heat will help complete the cooking process, ensuring it stays moist.
3. How to Rest the Chicken Properly:
To rest your chicken correctly and prevent it from cooling down too much, follow these steps:
- Remove the chicken from the oven as soon as it reaches the safe internal temperature of 165°F (74°C).
- Place the chicken on a cutting board or plate, ensuring it is not overcrowded. This prevents the chicken from steaming in its own juices, which can affect the texture.
- Cover the chicken loosely with foil to keep the heat in and maintain its temperature. Avoid covering it too tightly, as this can trap steam and make the skin soggy.
- Let the chicken rest for 5 to 10 minutes, depending on the size and thickness of the chicken breasts.
4. The Benefits of Resting the Chicken:
Juicier Meat: Resting the chicken allows the muscle fibers to relax and the juices to be reabsorbed, which results in juicier and more flavorful meat. The difference in texture is especially noticeable in larger or thicker pieces of chicken, where the juices can more easily escape if not given time to redistribute.
Better Flavor: When juices are trapped inside the meat, they help to carry and amplify the flavors. By letting the chicken rest, the seasoning and natural flavors of the meat have more time to settle, making each bite more flavorful and satisfying.
Improved Texture: The process of resting gives the chicken a chance to firm up slightly and reach its final texture. Cutting into the chicken too soon can cause it to be rubbery or overly fibrous, whereas resting allows the meat to “set” and results in a much more tender bite.
Prevents Dryness: If you skip the resting period and cut into the chicken right away, you may notice that the meat is dry and stringy. Resting helps prevent this by allowing the internal moisture to redistribute, which prevents the chicken from becoming dry as you cut it.
5. What Happens if You Skip the Resting Step?
If you don’t allow the chicken to rest, you may experience the following:
- Dry Meat: The moisture will escape as soon as you slice into the chicken, making the meat dry and less enjoyable.
- Tough Texture: Without resting, the muscle fibers will remain contracted, which can result in tough, chewy meat.
- Less Flavorful: The juices, which carry the natural flavors of the chicken and seasoning, will be lost if you cut into it too soon, leading to a less flavorful experience.
While it may be tempting to dig into your perfectly baked split chicken breasts right away, skipping the resting step often leads to a disappointing result.
6. Resting and Meal Preparation:
If you’re using baked split chicken breasts for meal prep or a recipe that involves slicing the chicken (like salads, wraps, or bowls), it’s even more important to rest the chicken first. Resting ensures that when you cut the chicken, you’ll retain the moisture needed for a flavorful and juicy meal, whether it’s eaten right away or stored for later.
Summary of Resting Your Chicken:
- Let the chicken rest for 5-10 minutes after baking to allow the juices to redistribute.
- Cover loosely with foil to retain heat without trapping steam.
- Don’t skip the resting period—it’s essential for a juicy, flavorful result.
- Resting also improves the texture of the chicken, making it more tender and enjoyable.
Resting your chicken after baking may seem like a small step, but it has a significant impact on the quality of the final dish. Whether you’re serving it immediately or storing it for later, resting ensures that your chicken stays moist, tender, and packed with flavor.
Common Mistakes to Avoid for Perfectly Baked Split Chicken Breasts
Overbaking: How It Affects Texture and Flavor
Overbaking is one of the most common mistakes when cooking split chicken breasts, and it can significantly impact both the texture and flavor of your dish. While it might seem harmless to leave your chicken in the oven for a few extra minutes, overbaking leads to dry, tough meat, and a loss of flavor, making your perfectly seasoned chicken much less enjoyable. Here’s how overbaking affects your chicken and how to avoid it.
1. Dry Texture:
One of the most noticeable effects of overbaking split chicken breasts is the loss of moisture. Chicken breasts, especially when bone-in, are lean cuts of meat with a low fat content. If they are left in the oven too long, they can dry out as the natural juices escape. This results in a dry and tough texture that makes the chicken less tender and harder to chew.
When you bake chicken for too long, the muscle fibers tighten up, causing the meat to become rubbery and stringy. Instead of being juicy and succulent, overbaked chicken will feel dry and unpleasant in your mouth. Overbaking also causes the chicken skin (if left on) to become too crispy or even burnt, adding an unwanted bitterness to the dish.
How to Avoid It:
- Use a meat thermometer to check the internal temperature. Once the chicken reaches 165°F (74°C), remove it from the oven immediately.
- Monitor cooking times based on the size and thickness of the chicken breasts. Larger or thicker breasts will take longer to cook, but make sure you don’t exceed the optimal baking time.
2. Loss of Juiciness and Flavor:
The natural juices in chicken contain much of its flavor. When overbaked, these juices are forced out of the meat, leaving it bland and dry. This means that your chicken will lose its flavor, and no amount of seasoning or marinade can make up for the loss of moisture and richness.
When baked correctly, the chicken absorbs and retains its own juices, making every bite flavorful. However, when overcooked, the chicken becomes incapable of holding onto the moisture, leading to a less satisfying eating experience. Additionally, the overbaked meat will have a less vibrant, cooked-taste flavor compared to a perfectly baked chicken breast, which retains its more subtle, fresh flavor.
How to Avoid It:
- Rest your chicken after baking to allow the juices to redistribute throughout the meat.
- Consider using a marinade or brine before baking. This can help add moisture and flavor, though it cannot fully compensate for overbaking.
3. Tough, Chewy Meat:
When you overbake chicken breasts, they become tough and chewy. This happens because the protein fibers in the meat tighten up, making it more difficult to break down when chewing. The meat doesn’t have the same tenderness you expect from well-cooked chicken, and each bite feels more like chewing through rubber than enjoying a juicy, succulent piece of meat.
This toughness is especially noticeable in split chicken breasts, as the bones in the meat can cause uneven cooking. The outer layers may become overdone while waiting for the thickest part of the meat to reach the proper temperature. As a result, the outer layers dry out and become tough.
How to Avoid It:
- Bake at a consistent temperature and avoid raising the heat too much to speed up the process.
- Use a roasting rack to promote even heat distribution, ensuring the chicken cooks uniformly without overbaking the outer layers.
4. Overcooked Skin:
If you’re baking split chicken breasts with the skin on, overbaking can cause the skin to become overcooked and unpleasantly crispy or burnt. While a crisp skin can be desirable, overbaking causes the skin to turn overly dark and bitter, which detracts from the overall flavor. In some cases, overcooked skin can become almost inedible, ruining the enjoyment of the meal.
How to Avoid It:
- Monitor the cooking process closely and avoid leaving the chicken in the oven after it reaches the correct internal temperature.
- Cover the chicken loosely with foil during baking if you’re worried about the skin becoming too dark, especially if you’re using high heat. This can protect the skin from becoming overly crisp while still ensuring the chicken is cooked properly.
5. How Overbaking Affects Meal Prep and Leftovers:
Overbaking not only ruins the texture and flavor of your freshly baked chicken breasts but also impacts the quality of any leftovers. When you reheat overbaked chicken, the meat becomes even drier and tougher. The loss of moisture from overbaking means that there’s not enough moisture left for reheating, leading to an even worse eating experience when you try to enjoy the leftovers.
How to Avoid It:
- Store leftovers in an airtight container and reheat them gently with a bit of moisture, such as broth or water, to help restore some juiciness.
- If you plan to meal prep, aim to bake the chicken to just the right temperature so that it remains juicy even after refrigeration or freezing.
Summary: How Overbaking Affects Your Chicken:
- Dry Texture: Overbaking squeezes out natural juices, leaving the chicken dry and tough.
- Loss of Flavor: The juices, which contain flavor, are lost, leaving the chicken bland.
- Tough, Chewy Meat: Overbaked chicken becomes rubbery and difficult to chew.
- Overcooked Skin: Skin can become too crispy or burnt, leading to a bitter taste.
- Meal Prep Problems: Overbaked chicken leads to dry, tough leftovers that are hard to reheat.
To achieve perfectly baked split chicken breasts, it’s crucial to avoid overbaking. Using a meat thermometer, monitoring cooking times, and resting the chicken after baking are all essential steps in ensuring that your chicken remains juicy, flavorful, and tender.
Using the Wrong Seasoning or Not Seasoning Enough
Seasoning is a crucial element in bringing out the natural flavors of split chicken breasts. When done right, seasoning enhances the taste, tenderizes the meat, and creates a balanced flavor profile. However, using the wrong seasonings or not seasoning enough can result in bland, unappetizing chicken. Here’s a closer look at how improper seasoning affects your baked split chicken breasts and how to avoid this mistake for perfectly flavorful results.
1. The Importance of Seasoning for Flavor
Split chicken breasts have a mild flavor, which makes them an excellent canvas for a variety of seasonings. However, if the chicken is not seasoned properly or lacks enough seasoning, the meat will taste flat and one-dimensional. Inadequate seasoning may fail to penetrate the chicken, leaving the surface bland while the inside remains tasteless.
Without seasoning, the natural flavor of the chicken is not fully expressed, and the overall taste of the dish will be dull. Whether you’re using simple salt and pepper or a more complex mix of spices, the seasoning plays a vital role in elevating the dish and making it more enjoyable.
How to Avoid It:
- Season generously with salt, pepper, and other spices of your choice. Ensure that both the skin and meat are well-seasoned. For bone-in chicken breasts, be sure to season under the skin as well for better flavor penetration.
- Use a balanced combination of seasonings, such as garlic powder, onion powder, paprika, thyme, or rosemary. Don’t be afraid to experiment with herbs and spices to find the right balance for your tastes.
2. Using the Wrong Seasoning Blend
Another common mistake is using the wrong seasoning blend for the dish you’re preparing. For example, using a spice mix intended for grilling might not work well when baking, as it could burn at higher oven temperatures or overwhelm the delicate flavor of the chicken. Similarly, overly salty seasoning can make the chicken taste too salty, while bland seasonings might fail to provide the flavor you’re looking for.
When it comes to baking split chicken breasts, it’s essential to choose a seasoning that complements the baking process and enhances the natural flavor of the meat. Additionally, overly sweet or spicy seasonings may not balance the richness of the chicken properly, leading to an imbalanced or unappealing flavor.
How to Avoid It:
- Choose seasonings that suit baking, such as garlic powder, onion powder, smoked paprika, or dried herbs. These blends work well in the oven and enhance the flavors of the chicken without overpowering them.
- Experiment with fresh and dried herbs like rosemary, thyme, or sage. Fresh herbs can be tucked under the skin, while dried herbs can be rubbed directly onto the meat for even flavor distribution.
3. Seasoning Too Early or Too Late
When seasoning chicken, timing is just as important as the amount of seasoning used. If you season the chicken too early, especially if you use salt, the seasoning may draw moisture out of the chicken, making it dry and preventing it from absorbing the flavors. On the other hand, if you season the chicken too late, the seasoning may not adhere well, resulting in uneven flavor distribution.
How to Avoid It:
- Season the chicken just before baking to allow the seasonings to adhere properly and penetrate the meat. If using salt, you can season 15 to 30 minutes before baking to allow it to absorb without drawing out excess moisture.
- Use a dry rub or seasoning mix that contains salt, but be cautious with the amount. Too much salt can make the chicken taste overly salty, while not enough can leave it bland.
4. Over or Underseasoning the Chicken
Overseasoning can be just as damaging as underseasoning. Too much salt or spice can overwhelm the natural flavor of the chicken, leaving it too salty, spicy, or bitter. On the other hand, underseasoning can leave the chicken tasting flat and unremarkable. Finding the right balance is key to ensuring your chicken is flavorful but not overpowering.
How to Avoid It:
- Taste your seasoning blend before applying it to the chicken. If using a pre-made seasoning or spice blend, check for salt content and adjust accordingly.
- Start with a moderate amount of seasoning and adjust as needed. It’s always easier to add more seasoning than to take it away once applied.
5. Not Seasoning Both Sides of the Chicken
A common mistake when seasoning split chicken breasts is only seasoning the skin or one side of the meat. The seasoning should be applied evenly to all parts of the chicken, including both sides of the meat and under the skin (if using bone-in breasts with skin). Failing to do this can result in uneven flavor, with some parts of the chicken being well-seasoned and others remaining bland.
How to Avoid It:
- Make sure to season both sides of the chicken, even under the skin if possible. For skinless breasts, apply the seasoning directly to the meat on both sides.
- Gently lift the skin on bone-in chicken and rub the seasoning directly onto the meat. This allows for maximum flavor penetration and ensures that every bite is flavorful.
6. Overlooking Marinating or Brining for Extra Flavor
While seasoning is essential, marinating or brining the chicken can take the flavor to the next level. Brining helps the chicken retain moisture during baking, while marinating infuses the meat with additional flavor. Failing to marinate or brine, especially for lean cuts like chicken breasts, can result in dry, less flavorful meat.
How to Avoid It:
- Consider marinating the chicken for a few hours or overnight to enhance its flavor. A marinade with acid (such as lemon juice or vinegar) and fat (such as olive oil) will add flavor and moisture.
- Brine the chicken for 30 minutes to an hour in a simple saltwater solution to help the meat stay juicy during baking.
Summary: The Key to Perfectly Seasoned Chicken:
- Season generously with a combination of salt, pepper, garlic powder, and herbs to bring out the natural flavor.
- Use the right seasoning blend for baking—avoid overly sweet or grilling-specific blends that may not work well in the oven.
- Season the chicken just before baking to avoid drawing out moisture and to ensure the flavors stick.
- Find the right balance between too much and too little seasoning to avoid overpowering or bland chicken.
- Season both sides of the chicken, including under the skin if applicable, for even flavor distribution.
- Consider marinating or brining to add moisture and flavor, especially for lean cuts like chicken breasts.
By avoiding these common seasoning mistakes, you’ll ensure your baked split chicken breasts are flavorful, moist, and delicious every time!
Not Checking the Internal Temperature for Doneness
One of the most critical steps in ensuring perfectly cooked split chicken breasts is checking the internal temperature. Skipping this simple step can result in undercooked or overcooked chicken, both of which can ruin your meal. Here’s why monitoring the internal temperature is so important and how it impacts the quality of your baked split chicken breasts.
1. Risk of Undercooking
Undercooking chicken is a significant safety concern. When chicken is not cooked to the correct internal temperature, harmful bacteria like Salmonella and Campylobacter may still be present, which can cause foodborne illness. Undercooked chicken will be pink in the center, and the juices may be cloudy rather than clear.
Even if the chicken appears cooked on the outside, the inside may still be raw. This can result in an unpleasant texture and a potentially unsafe meal. For split chicken breasts, this is especially true for the thicker parts near the bone, which often take longer to cook.
How to Avoid It:
- Use a meat thermometer to ensure the chicken reaches an internal temperature of 165°F (74°C) at its thickest point. A thermometer will give you an accurate reading, so you don’t have to guess.
- Insert the thermometer into the thickest part of the chicken, avoiding the bone, as it can give an inaccurate reading.
2. Overcooking and Dryness
While undercooking is a concern, overcooking is equally problematic. If chicken is cooked beyond the recommended temperature, it can become dry, tough, and less flavorful. Overcooking causes the proteins in the chicken to tighten and squeeze out moisture, resulting in a dry texture that no amount of seasoning or sauce can fix.
When split chicken breasts are overcooked, they lose their juiciness, and the skin (if left on) can become too crispy or even burnt. Overbaked chicken also loses the natural flavor, and the meat becomes chewy instead of tender and succulent.
How to Avoid It:
- Set a timer and monitor the temperature closely. Start checking the internal temperature about 5-10 minutes before the expected finish time.
- Remove the chicken from the oven immediately when it reaches 165°F (74°C) to prevent it from continuing to cook with residual heat.
3. Inconsistent Cooking Without Checking Temperature
Not checking the internal temperature can lead to uneven cooking, especially when baking bone-in chicken breasts. Since the bone conducts heat differently than the surrounding meat, the chicken may be overcooked in some areas while still undercooked in others. This can result in a dish that’s uneven in texture and doneness, with some pieces dry and others raw.
Using a meat thermometer ensures that all parts of the chicken are cooked to perfection, giving you consistent results every time.
How to Avoid It:
- Check multiple areas of the chicken, especially near the bone, as this is where the meat can be the thickest and take the longest to cook.
- Rotate the chicken during baking to ensure even heat distribution, but always check the temperature at the end to confirm that all parts are properly cooked.
4. Meat Thermometers Are Essential Tools
Investing in a reliable meat thermometer is one of the simplest and most effective ways to ensure that your split chicken breasts are cooked perfectly. There are several types of thermometers available, including instant-read and probe thermometers. Both are easy to use and can be a lifesaver when cooking chicken to the right doneness.
How to Avoid It:
- Choose a quality meat thermometer that provides quick, accurate readings. Instant-read thermometers are ideal for quick checks and are affordable for home cooks.
- Digital thermometers are often more accurate and easy to read than dial thermometers, which can be harder to interpret.
5. Preventing Overcooked Chicken:
If you rely solely on time or visual cues (such as the color of the meat or juices) to determine if your chicken is done, you risk overcooking it. While timing can give you a general idea, the size and thickness of the chicken breasts can vary, which means cooking times may not always be consistent.
By using a meat thermometer, you can avoid the guesswork, ensuring that the chicken is removed from the oven at the perfect moment for maximum juiciness and tenderness.
How to Avoid It:
- Remove the chicken a few minutes before the ideal temperature to account for carryover cooking (the process in which the chicken continues to cook as it rests).
- Rest the chicken for 5-10 minutes after removing it from the oven. This allows the juices to redistribute throughout the meat, ensuring that the chicken stays juicy.
Summary: Why Checking the Internal Temperature Is Crucial:
- Undercooking Risks: Undercooked chicken can lead to foodborne illnesses and a raw, unappetizing texture.
- Overcooking Consequences: Overcooked chicken becomes dry, tough, and less flavorful.
- Inconsistent Cooking: Without checking the temperature, different parts of the chicken may cook unevenly.
- Meat Thermometers Are Essential: Using a meat thermometer ensures accurate cooking, whether you’re baking, grilling, or roasting.
- Prevent Overcooking: Checking the internal temperature at the right time ensures the chicken is perfectly cooked without drying out.
By checking the internal temperature of your split chicken breasts, you’ll ensure a perfectly cooked, juicy, and flavorful meal every time. A meat thermometer is your best friend when it comes to achieving consistent, safe, and delicious results.
Delicious Serving Ideas for Baked Split Chicken Breasts
Pairing with Roasted Vegetables, Mashed Potatoes, or Rice
One of the best ways to create a well-rounded and satisfying meal with your baked split chicken breasts is by pairing them with delicious sides like roasted vegetables, mashed potatoes, or rice. These classic sides not only complement the flavor of the chicken but also enhance the overall dining experience by adding variety in texture, taste, and color. Let’s explore why these sides are perfect companions for baked chicken and how to pair them for maximum enjoyment.
1. Roasted Vegetables: A Flavorful and Healthy Option
Roasted vegetables are a wonderful side dish to pair with baked split chicken breasts. The roasting process enhances the natural sweetness and richness of the vegetables, giving them a slightly caramelized exterior while keeping them tender and flavorful inside. Vegetables like carrots, bell peppers, Brussels sprouts, zucchini, and sweet potatoes add vibrant color to the plate, creating a visually appealing dish that’s also packed with nutrients.
The earthy flavors of roasted vegetables provide a great contrast to the mild flavor of chicken, and the slight char that roasting imparts brings out a deeper, smoky taste that pairs perfectly with the juicy, tender chicken.
How to Pair:
- Season the roasted vegetables with olive oil, garlic, salt, pepper, and your favorite herbs like rosemary, thyme, or oregano to complement the chicken’s seasoning. The subtle smokiness from the roasting process works harmoniously with the richness of the chicken.
- Try a variety of vegetables: Roasted Brussels sprouts, carrots, parsnips, and butternut squash are all great choices. These hearty vegetables balance out the richness of the chicken while adding a variety of textures to the plate.
- Serve alongside the chicken or place the vegetables on the same roasting pan for a one-pan meal. This method allows the vegetables to absorb some of the chicken’s flavor, making the pairing even more delicious.
2. Mashed Potatoes: Creamy Comfort for a Hearty Meal
Mashed potatoes are a classic and comforting side dish that pairs beautifully with baked split chicken breasts. The creamy, buttery texture of mashed potatoes adds a rich contrast to the lean, juicy chicken, creating a satisfying and indulgent meal. The smooth consistency of mashed potatoes allows them to soak up any chicken drippings or sauce, making every bite flavorful and comforting.
Whether you prefer traditional mashed potatoes with butter and cream or a healthier version made with olive oil and garlic, mashed potatoes offer versatility and a comforting touch to your meal.
How to Pair:
- Add garlic, chives, or sour cream to mashed potatoes for added flavor. These ingredients can give the mashed potatoes a richer taste that complements the baked chicken perfectly.
- Serve with a side of gravy or chicken sauce for extra moisture and flavor. The creamy texture of mashed potatoes soaks up the sauce beautifully, adding depth to the overall dish.
- Choose the right seasoning for the potatoes. Simple seasoning with salt, pepper, and butter works well, but you can also infuse extra flavor by adding roasted garlic or fresh herbs like parsley or thyme.
3. Rice: Light and Versatile Side Dish
Rice is a versatile side dish that can be customized to match the flavors of your baked split chicken breasts. Whether you opt for plain white rice, flavorful brown rice, or a fragrant wild rice blend, rice provides a neutral base that complements the savory chicken while adding some lightness to the meal. Rice also offers a great vehicle for soaking up sauces or chicken drippings, which adds flavor and moisture to every bite.
Rice pairs especially well with baked chicken when you incorporate complementary seasonings like garlic, onion, or even lemon zest. For added texture, you can mix in ingredients like sautéed mushrooms, peas, or nuts.
How to Pair:
- Add fresh herbs: A sprinkle of fresh parsley, cilantro, or basil can elevate your rice and add a refreshing contrast to the rich flavor of the chicken.
- Flavor the rice: Cook your rice in chicken broth or with spices like turmeric or cumin to infuse it with flavor. This adds an extra layer of taste and makes it more exciting to pair with your chicken.
- Serve with a drizzle of sauce: If you’ve prepared a sauce for your chicken (such as a creamy garlic sauce or pan gravy), pour a little over the rice to enhance both the chicken and the rice with delicious, cohesive flavors.
4. How These Pairings Create a Balanced Meal
When paired with roasted vegetables, mashed potatoes, or rice, your baked split chicken breasts create a well-balanced, satisfying meal that covers all the major food groups. The chicken provides lean protein, the vegetables offer fiber and essential vitamins, and the mashed potatoes or rice contribute carbohydrates for energy.
These sides not only complement the flavor and texture of the chicken but also help to round out the meal in terms of nutrition, making it both delicious and wholesome. The versatility of these sides means you can tailor them to suit your family’s preferences or the occasion. Whether you’re preparing a quick weeknight dinner or a more elaborate meal for guests, these sides elevate the dish and make it more memorable.
5. Experiment with Different Combinations
The beauty of pairing baked split chicken breasts with roasted vegetables, mashed potatoes, or rice is the opportunity for endless combinations. You can experiment with different vegetable blends, rice varieties, or potato preparations to suit your mood or the season. For example:
- Spring or summer: Pair chicken with roasted asparagus and mashed cauliflower for a lighter meal.
- Fall or winter: Opt for heartier mashed potatoes and roasted root vegetables like sweet potatoes or parsnips.
- Asian-inspired meal: Pair baked chicken with jasmine rice and sautéed bok choy or broccoli, with a drizzle of soy sauce or teriyaki glaze.
Summary: How to Pair Baked Split Chicken Breasts for the Perfect Meal
- Roasted vegetables add flavor, nutrition, and color, while the caramelized edges enhance the richness of the chicken.
- Mashed potatoes provide a creamy, comforting texture that complements the savory, juicy chicken.
- Rice offers a light, versatile side that soaks up sauces and enhances the flavors of the chicken.
- Balanced meal: These sides together create a complete meal that is both nutritious and satisfying.
- Endless combinations: Experiment with different vegetables, potatoes, and rice varieties to create the perfect side dish for your baked chicken breasts.
By pairing your baked split chicken breasts with roasted vegetables, mashed potatoes, or rice, you’ll create a delicious, well-rounded meal that’s perfect for any occasion. Whether you’re feeding your family on a weeknight or hosting guests, these classic sides make the meal complete!
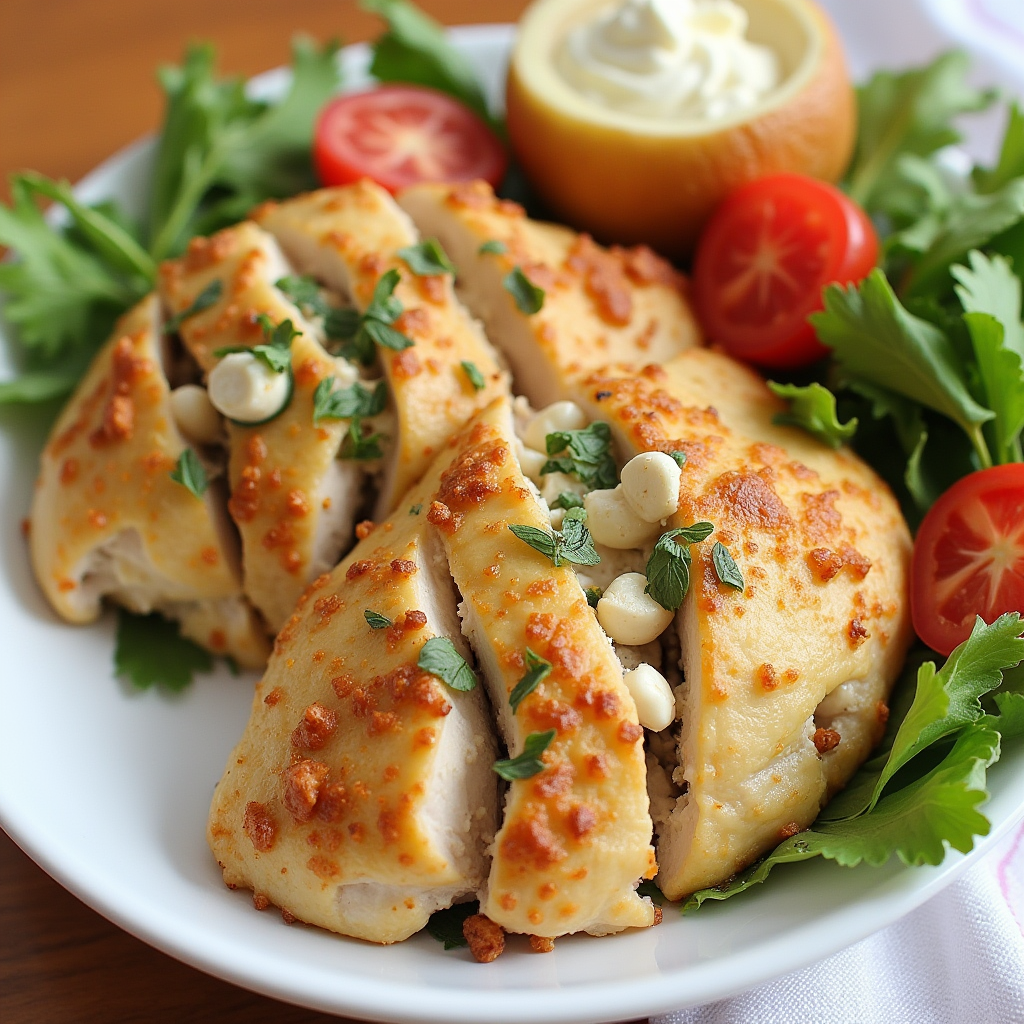
Using the Chicken in Salads, Wraps, or Sandwiches

Baked split chicken breasts are incredibly versatile, making them an excellent ingredient for transforming simple meals like salads, wraps, or sandwiches into satisfying and flavorful dishes. Whether you’re looking to create a light, healthy lunch or a more filling dinner, the tender, juicy chicken can be easily incorporated into various dishes, adding protein, flavor, and texture. Here’s how you can use your baked split chicken breasts in these three popular meals:
1. Chicken Salads: Light, Fresh, and Protein-Packed
Salads are an ideal way to use baked split chicken breasts, offering a light yet filling meal that’s perfect for lunch or a side dish. The chicken adds a hearty element to salads, giving you the necessary protein to keep you satisfied throughout the day. You can serve the chicken either warm or cold, making it versatile for any time of year. Whether you prefer a classic chicken Caesar salad or a more creative blend of greens, baked chicken brings the perfect balance of tenderness and flavor.
How to Pair:
- Shredded Chicken Salad: Once your chicken has cooled, shred it with a fork for a more casual, easy-to-eat texture. Combine it with leafy greens like romaine, spinach, or arugula, and add your favorite veggies such as cherry tomatoes, cucumbers, and red onions. Dress with a tangy vinaigrette or a creamy dressing like ranch or blue cheese.
- Grilled Chicken Salad: If you prefer a more grilled taste but want to keep things light, you can add grilled veggies like zucchini, peppers, or corn to the salad. Topping the chicken with a drizzle of balsamic glaze or a squeeze of lemon juice can bring out extra freshness.
- Mediterranean Chicken Salad: For a Mediterranean-inspired dish, add Kalamata olives, feta cheese, cucumber, and roasted red peppers to the salad. A Greek vinaigrette would be a great choice to tie all the ingredients together.
2. Chicken Wraps: Convenient and Flavorful
Wraps are another great way to use baked split chicken breasts. They offer a convenient, portable meal that’s ideal for busy lunches or a quick dinner. By using a soft tortilla, pita, or lettuce leaves, you can create a satisfying wrap that holds the juicy chicken, fresh veggies, and a variety of sauces. Wraps are highly customizable, so you can add different ingredients depending on your taste preferences or dietary needs.
How to Pair:
- Classic Chicken Wrap: Start with a soft flour tortilla and layer on sliced or shredded baked chicken, lettuce, tomatoes, and avocado. Add a dollop of mayonnaise, ranch dressing, or honey mustard for extra flavor.
- Asian-Inspired Chicken Wrap: Use a whole wheat wrap or rice paper for an Asian twist. Combine baked chicken with shredded cabbage, carrots, cucumbers, and cilantro, and drizzle with hoisin sauce, soy sauce, or peanut dressing.
- Southwestern Chicken Wrap: For a more hearty wrap, pair baked chicken with black beans, corn, sliced jalapeños, and cheese. Add some salsa, guacamole, or sour cream for extra flavor, and wrap it up tightly for a portable meal.
3. Chicken Sandwiches: Comforting and Delicious
Chicken sandwiches are a comfort food classic, and baked split chicken breasts make a fantastic filling for any sandwich. Whether you’re making a quick meal at home or serving up something special for a gathering, the moist, flavorful chicken is the perfect protein option for sandwiches. You can create anything from a simple sandwich to a more decadent version with toppings like cheese, pickles, or coleslaw.
How to Pair:
- Classic Chicken Sandwich: For a basic sandwich, take a toasted bun and layer on a generous portion of sliced baked chicken. Add fresh lettuce, tomatoes, and a slice of cheddar or Swiss cheese. A spread of mayo, mustard, or a tangy barbecue sauce would be the perfect finishing touch.
- Crispy Chicken Sandwich: If you’re in the mood for a crispy chicken sandwich, slice your baked chicken and pan-fry it for a golden, crispy crust. This adds a satisfying crunch to your sandwich, making it feel indulgent.
- BBQ Chicken Sandwich: Combine shredded baked chicken with your favorite BBQ sauce and pile it high on a soft bun. Top it with coleslaw and pickles for extra texture and flavor. The sweetness of the BBQ sauce paired with the tanginess of the slaw is a perfect combination.
- Chicken Club Sandwich: Elevate your chicken sandwich by adding crispy bacon, a slice of avocado, and a couple of slices of tomato. The combination of the smoky bacon, creamy avocado, and tender chicken is sure to be a crowd-pleaser.
4. How These Dishes Create Versatile, Easy Meals
Using baked split chicken breasts in salads, wraps, or sandwiches makes meal preparation not only easier but also more versatile. Since baked chicken is naturally juicy and tender, it can be adapted to any meal type—whether you’re craving something light and fresh like a salad or a hearty, filling sandwich. These meals can be tailored to any dietary preference and are perfect for lunch, dinner, or even meal prep for the week.
Benefits of Using Baked Chicken in These Dishes:
- Meal Prep-Friendly: Baked chicken can be made in large batches and used throughout the week for different meals. Once cooked, it stores well in the refrigerator for up to 4 days, making it an excellent option for quick meals.
- Customizable: The possibilities are endless when it comes to what you can pair with your chicken. From fresh greens to spicy sauces, you can tailor your wraps and sandwiches to your exact tastes.
- Healthy and Filling: These dishes provide a balanced combination of protein, fiber, and vegetables, making them not only tasty but also nutritious. You can control the ingredients to suit any dietary needs, whether you’re looking for low-carb, gluten-free, or vegetarian options.
5. Easy and Quick to Prepare
All three of these meal ideas—salads, wraps, and sandwiches—are quick to prepare, making them great for busy days. With the chicken already baked and ready to go, you can assemble your meal in just minutes. Whether you’re throwing together a quick lunch or packing a sandwich for work, these recipes help you make the most out of your baked split chicken breasts with minimal effort.
Summary: Using Baked Split Chicken Breasts in Salads, Wraps, or Sandwiches
- Salads: Add juicy baked chicken to fresh greens, veggies, and dressing for a satisfying, protein-packed meal.
- Wraps: Combine baked chicken with veggies, sauces, and wraps for a portable, easy-to-eat meal that can be customized.
- Sandwiches: Layer baked chicken with toppings like cheese, avocado, or BBQ sauce for a comforting, delicious sandwich.
- Versatile Meals: These dishes offer endless variety, allowing you to create meals that suit your tastes, dietary needs, and available ingredients.
- Quick and Easy: These meals are fast to prepare and perfect for meal prepping, making them convenient for busy lifestyles.
By incorporating your baked split chicken breasts into salads, wraps, or sandwiches, you can create a wide range of satisfying, flavorful meals that are perfect for any occasion. Whether you need a quick lunch or a hearty dinner, these ideas provide you with plenty of options to enjoy your chicken in new and exciting ways.
Adding Sauces Like Garlic Butter, BBQ, or Lemon Herb for Extra Flavor
Sauces are an excellent way to elevate the flavor of baked thin-cut chicken breasts. By adding the right sauce, you can enhance the natural taste of the chicken while introducing bold and complementary flavors. Here are some popular options:
- Garlic Butter: A rich and savory choice, garlic butter adds a luxurious, smooth finish to your chicken. The aromatic combination of garlic and butter coats the chicken in a velvety glaze that’s both indulgent and satisfying. This sauce is perfect for those who enjoy a more savory, umami-rich flavor profile. For extra depth, you can add a sprinkle of fresh parsley or Parmesan cheese.
- BBQ Sauce: If you’re craving a tangy, sweet, and smoky flavor, BBQ sauce is a great choice. Whether you prefer a classic tomato-based sauce or a tangier vinegar-based one, BBQ sauce pairs perfectly with chicken. It caramelizes slightly during baking, adding a deliciously sticky layer of flavor that is both savory and sweet. A drizzle of BBQ sauce can also bring a nice contrast to the mild taste of chicken breasts, making it a family favorite.
- Lemon Herb: For a lighter, refreshing option, a lemon herb sauce is a fantastic choice. The acidity from the lemon balances the richness of the chicken, while fresh herbs like thyme, rosemary, and basil add aromatic flavors. This sauce works well for those who want a more subtle, zesty flavor without overwhelming the natural taste of the chicken. It’s ideal for a lighter, healthier meal that still feels satisfying and flavorful.
By experimenting with these sauces, you can customize your baked chicken breasts to suit different tastes and preferences, turning a simple dish into a restaurant-quality meal.
Conclusion
Baking split chicken breasts is a simple yet highly effective method for achieving juicy, flavorful results every time. By following the key steps—preheating the oven, properly seasoning the chicken, and monitoring the cooking time and temperature—you ensure the perfect balance of tenderness and flavor in each bite. This method not only guarantees a mouthwatering meal but also offers versatility for different recipes, making it an ideal choice for busy weeknights or meal prep.
We encourage you to try this easy and delicious recipe for baked split chicken breasts and experience the difference for yourself. Don’t forget to share your results and any personal twists you’ve added to the recipe in the comments below—we’d love to hear from you!
Call-to-action: If you enjoyed this recipe and want more delicious chicken ideas, explore our other chicken recipes or sign up for our newsletter for weekly updates, cooking tips, and exclusive content delivered straight to your inbox.